
Diagnosing a Bad Molt in Your G. rosea (Chilean Rose Hair): A Troubleshooting Checklist for Serious Issues
The G. rosea, or Chilean Rose Hair, earns its ‘beginner’s tarantula’ label for a calm demeanor, but the molting process reveals a hidden, high-stakes vulnerability. I’ve watched my own Rosie, a docile 15-year-old, fast for months before the silent, arduous work of shedding her exoskeleton begins. This guide cuts through the worry with a clear, step-by-step checklist to identify and address serious molt complications, from stuck limbs to fatal lethargy. If you see your tarantula trapped in its old skin, the immediate rule is never to pull or manipulate the spider; instead, focus on gently elevating enclosure humidity to assist its natural struggle.
- Quick Stats:
- Origin: Arid regions of Chile
- Type: New World, Terrestrial
- Growth Rate: Exceptionally slow; adults may molt only once every 12-18 months
This guide will walk you through the specific environmental cues and intervention protocols needed to shepherd your tarantula safely through this dangerous biological rite.
Understanding a Bad Molt: More Than Just Stuck Skin
Many keepers think a problematic molt only means leftover skin clinging to the carapace or legs. A bad molt is a systemic failure that can manifest as limb loss, a ruptured abdomen, or even a fatal entrapment in the exuviae. I’ve seen it in my own collection: my Chilean Rose Hair, Rosie, once emerged from a shed with a shriveled pedipalp, a direct result of inadequate hydration weeks before.
Watch for these serious complications beyond simple stuck sheds.
- Limb Autotomy: Legs or pedipalps break off during the process, often due to dehydration.
- Abdominal Rupture: The new, soft abdomen tears, sometimes from a fall or internal pressure.
- Cephalothorax Entrapment: The tarantula cannot free its vital front body section, leading to suffocation.
- Deformities: Newly hardened limbs or fangs may be crooked or unusable.
Each of these issues stems from pre-molt conditions you as the keeper can influence.
The Silent Crisis: Why Molting is a Vulnerable Time
During ecdysis, your tarantula is utterly defenseless. Its new exoskeleton is as soft as wet paper for days, and it cannot use its urticating hairs or venomous fangs. The physiological stress is immense; the animal is literally rebuilding its body from the inside out. My Burgundy Goliath, who routinely kicks hairs at vibrations, becomes a motionless statue for this period — a strong indicator that stress levels are high.
This vulnerability is why I staunchly advocate for a “Look, Don’t Touch” policy. Any disturbance-a bumped enclosure, a bright light-can cause a fatal spasm. The silence of the enclosure during a molt is a sign of profound biological focus, not peace.
The Pre-Molt Phase: Spotting Early Warning Signs
Successful intervention happens weeks before the actual shed. Your tarantula will broadcast clear signals it’s entering pre-molt, and missing them is the first step toward trouble. My OBT, Flash, webs his entire burrow shut, a dramatic change from his usual open-door policy. These signals are exactly what the “10 key signs your tarantula is about to molt” checklist covers. Spotting them early lets you intervene before trouble begins.
Common pre-molt behaviors vary by species but follow a core pattern.
- Prolonged Fasting: Refusal of food for weeks or months, as seen with my 15-year-old Rosie.
- Increased Lethargy or Seclusion: Often retreating to a hide or burrow.
- Darkened, Shiny Abdomen: The skin stretches and darkens as the new exoskeleton forms beneath.
- Web Mat Creation: Many species spin a dense “molting mat” to lie on.
Assessing Pre-Molt Health: A Keeper’s Checklist
Use this list in the weeks leading up to a suspected molt. Checking these points methodically can mean the difference between a clean shed and an emergency.
- Abdomen Size: Is it plump and rounded? A shrunken abdomen indicates poor nutrition or dehydration.
- Enclosure Security: Are hides secure and climbing falls impossible? I add extra substrate depth pre-molt.
- Stress Levels: Has the enclosure been moved or cleaned recently? Minimize all contact.
- Temperature Stability: Is the heat gradient a steady 70-80°F (21-27°C) for most species? Sudden drops hinder the process.
- Humidity Appropriateness: Is the moisture level species-specific? This leads to our most critical point.
Hydration is Key: The Role of Water Before a Shed
Hydration isn’t about misting; it’s about internal water reserves. The tarantula uses stored fluid to split the old exoskeleton and expand the new one. A full water dish is non-negotiable. I keep my Goliath’s enclosure at 80% humidity, but my arid-loving Rosie always has a dish, even when she ignores it for months.
Follow these steps to ensure proper hydration.
- Provide a shallow, clean water dish at all times, refreshed weekly.
- For moisture-dependent species like Theraphosa stirmi, maintain humidity via damp substrate, not just a dish.
- Never spray water directly on a tarantula, especially in pre-molt. It causes stress.
- Observe drinking behavior. A tarantula that drinks frequently may be preparing for a shed.
An overlooked water dish is the most common husbandry error I see leading to difficult molts. The sudden strike of a tarantula grabbing prey is powered by the same hydraulic pressure needed to escape its old skin. Without water, that system fails.
During Ecdysis: Critical Red Flags to Watch For
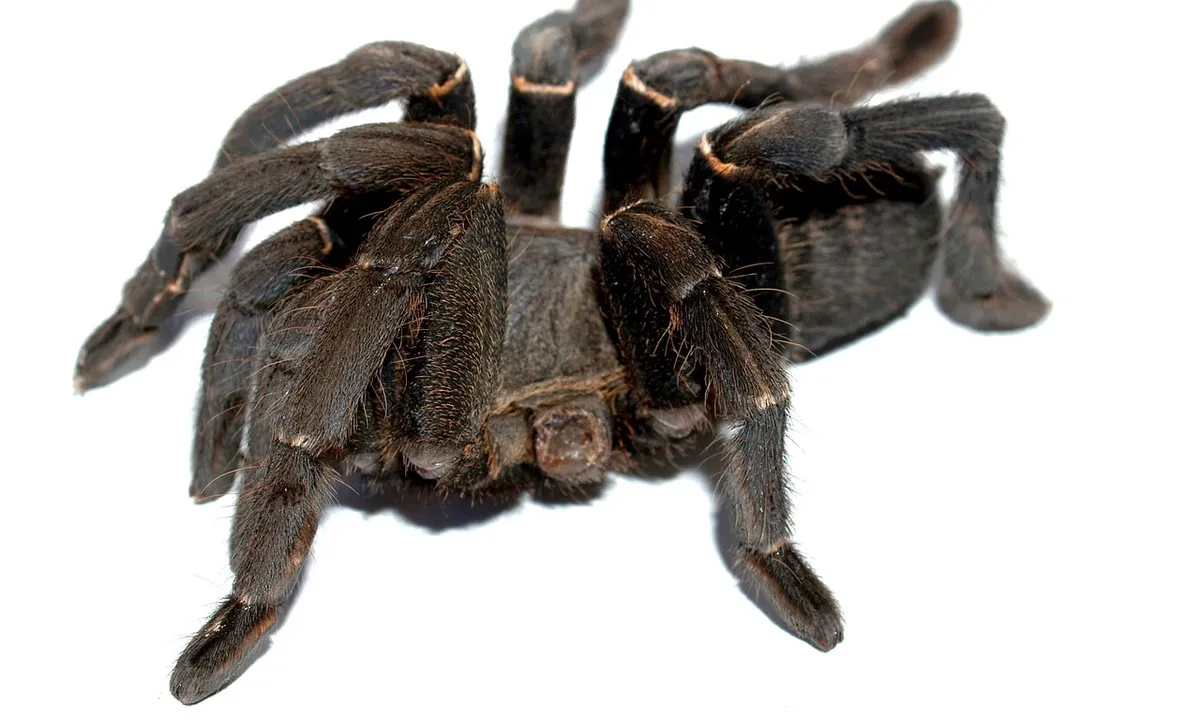
Witnessing a molt is a privilege of silence and stillness. Your role is observer, not medic. Intervention is a last-resort measure that introduces immense stress, and should only be considered when the tarantula’s life is immediately and obviously at risk. Watch for these critical signs that something is going wrong.
The Point of No Return: When to Intervene
A normal molt, from dorsal split to full extraction, can take a few hours for a sling to over twelve for a large adult. Problems manifest in specific ways.
- Prolonged Inversion: The tarantula flips but makes no progress for over 24 hours. My old Chilean rose, Rosie, once spent 36 hours on her back before finally beginning. Her advanced age and slow metabolism demanded patience, not panic.
- Stuck in the Carapace: The cephalothorax splits, but the body does not lift out. You may see movement, but the old exoskeleton acts like a trap.
- Limb or Pedipalp Entrapment: One or more appendages fail to slide free, often glued by old cuticle or dried fluid. This is a common point of failure.
- Abdominal Rupture: A leak of hemolymph (the tarantula’s blood) from the abdomen during the process is a dire emergency. It appears as a wet, shiny patch.
- Complete Cessation of Movement: All rhythmic pulsing stops for an extended period while the tarantula is still partially encapsulated.
If you must act, the goal is assistance, not extraction. Increase humidity immediately by misting the enclosure walls (not the tarantula) and, if skilled, use a fine, damp artist’s brush to gently apply moisture only to the stuck section of shed. I have used this brush technique exactly twice in a decade, both times on precious slings. Physical pulling almost always causes catastrophic injury.
Post-Molt Complications: Recognizing Failed Recovery
The new exoskeleton beneath is soft, wet, and incredibly vulnerable. A successful molt isn’t confirmed until days later. Watch your tarantula with a detective’s eye during this tender period.
Infection and Injury: The Aftermath of a Traumatic Shed
Physical damage from a bad molt opens the door to fungal or bacterial infection. Look for these signs in the days and weeks following the shed.
- Dark, Dented, or Misshapen Areas: A limb or section of abdomen that remains dark, shrunken, or crumpled is a sign of dehydration or necrosis from a failed shed. Compare it to the perfect, iridescent sheen of a healthy new carapace.
- Discolored or Fuzzy Patches: White, green, or gray fuzzy growth on the body is a catastrophic sign of infection. This is different from the harmless soil mold in a bioactive setup.
- Inability to Right Itself: If your tarantula remains on its back or side for more than a day post-molt, it is critically weak or damaged.
- Refusal to Drink or Eat: While fasting is normal pre-molt, a tarantula should accept water soon after. A continued refusal to move to a water dish after hardening is a major concern.
- Limp or “Floppy” Limbs: New limbs should firm up. A permanently bent, twisted, or dragging leg indicates nerve or hydraulic damage.
Post-molt is when the quiet horror of a bad shed becomes apparent-a twisted leg on a prized specimen is a somber lesson in the risks of captivity. For my moisture-dependent T. stirmi, Goliath, I ensure humidity stays above 80% for weeks after his molt to guarantee proper hardening. A dry environment post-molt can itself cause fatal complications, desiccating the animal before it can drink.
Common Causes of Molting Issues
A bad molt is rarely a random event. It’s typically a clear signal that something in the tarantula’s world is out of balance. Pinpointing the root cause is your first step toward helping your spider and preventing future problems. Recognizing early signs of impaction—such as a swollen abdomen, reduced appetite, or trouble shedding—lets you intervene before it worsens. Maintaining proper humidity, clean substrate, and appropriately sized prey helps prevent impaction from occurring.
Humidity and Temperature: The Environmental Balance
Think of humidity and temperature as the stage crew for the molting drama. If they’re off-script, the performance fails. These two factors work in tandem, and getting them wrong is the most frequent husbandry error I see.
Low humidity is a desiccating force. It can cause the old exoskeleton to bind tightly to the new one, creating immense physical strain. My Burgundy Goliath, who requires 80-85% humidity, will show clear signs of distress and poor molts if levels drop even slightly for a prolonged period. Conversely, excessive moisture without proper ventilation breeds mold and bacteria, which can infect a spider during its vulnerable, soft-bodied state.
Temperature dictates metabolism. A tarantula kept too cool (below 70°F for most species) may enter a prolonged, sluggish pre-molt. Its bodily processes slow, and it may lack the energy to complete the arduous task of extraction. High heat accelerates metabolism but can also lead to rapid dehydration. Temperature affects much more than just molting; it influences appetite and growth as well.
The sweet spot is species-specific. My Chilean Rose Hair thrives in bone-dry conditions, while my OBT needs a modest moisture gradient. Generalized care sheets often fail here; you must research the precise needs of your tarantula’s natural habitat.
Your Diagnostic Checklist: Step-by-Step Assessment
When you suspect a bad molt, stay calm and observe. Rushing to intervene usually causes more harm. This systematic approach has helped me through dozens of molts with my own collection.
Step 1: Evaluate the Pre-Molt Environment
Before you even look at the spider, audit its living conditions from the last few weeks.
- Hydration: Was a full, clean water dish always available? For moisture-dependent species, was the substrate damp (not soggy) to the touch?
- Temperature: Has the room been consistently within the ideal range? Check for drafts from windows or direct heat from vents.
- Disturbance: Did you move the enclosure, play loud music nearby, or frequently check on the tarantula? Any stress can trigger a premature or problematic molt.
- Nutrition: Was the spider well-fed prior to sealing itself away? A weak, undernourished tarantula lacks the reserves for this exhausting process.
Step 2: Examine the Molt Process and Exuviae
The discarded exoskeleton is a forensic record of the event. Wait until the spider has moved away before you gently remove it for inspection.
- Completion: Is the molt in one piece, or are legs, the carapace, or abdomen detached? Fragmented molts often indicate struggle.
- Legs: Are all leg sheaths fully extracted and turned inside-out cleanly? Legs left in the old skin are a major red flag.
- Fangs & Mouthparts: This is critical. The molt should show two clean, empty fang sheaths. If they are still packed with old cuticle, your tarantula cannot eat.
- Spinnerets: Check that the tiny silk-spinning organs at the rear are fully shed.
A perfect, complete exuviae is the ultimate sign of a successful molt, telling you the environment was just right.
Step 3: Assess the Tarantula’s Current Condition
Now, observe the spider itself from a respectful distance. Do not touch or attempt to handle it.
- Posture: Is it upright and beginning to stretch its new limbs, or is it crumpled, twisted, or on its back for more than 36 hours post-molt?
- Stuck Appendages: Look for old, matte-looking skin still clinging to legs, pedipalps, or-most urgently-the abdomen.
- Movement: Can it move all its legs slightly? Total paralysis of a limb or a hunched, contracted posture signals serious trouble.
- Abdomen Integrity: Is the new abdominal skin smooth and fully expanded, or is there a visible tear, dent, or leak? A ruptured abdomen is an extreme emergency.
- Reaction: Shine a faint light or create a gentle air current nearby. Does it respond with slight movement? A complete lack of response in a soft spider is worrying.
From my experience with a struggling Rosie years ago, patience is your greatest tool; many tarantulas can recover from minor stuck bits if left alone in ideal conditions. Your role is to diagnose, then decide if non-invasive support (raising humidity) is needed or if a true emergency is unfolding.
Emergency Care for Severe Molting Problems
When a tarantula is visibly stuck mid-molt for more than a day, or appears weak and desiccated afterward, standard enclosure conditions are not enough. This is when you must shift from passive observation to active, gentle intervention to prevent death. To tell the difference between a true molt and a life-threatening decline, watch for renewed movement after shedding and resumed feeding. If there is no progress after several days, seek expert advice.
Creating a Safe Humidity Chamber (ICU)
The term “ICU” is controversial, but a temporary humidity chamber can be lifesaving for a dehydrated spider. I used this method successfully for a weak Grammostola rosea sling years ago. The goal is not to soak the spider, but to surround it with saturated air to ease fluid loss through its delicate new cuticle.
You need a small, smooth-sided container like a deli cup. Line the bottom with a damp paper towel, then add a dry paper towel sheet on top. The dry layer is critical-it prevents the tarantula from sitting in direct moisture, which can cause bacterial blooms.
Gently place the afflicted tarantula on the dry paper. Add a bottle cap of clean water. Ventilation is non-negotiable; poke many small air holes in the lid. Maintain a temperature of 75-80°F (24-27°C) nearby. Humidity should be considered as well and reflect the tarantula’s natural habitat. Ideal humidity ranges vary by species, but many terrestrial tarantulas do well around 40-60% humidity, with tropical species often requiring higher levels.
This chamber is a short-term tool. Monitor every few hours. If the spider revives and shows normal posture within 12-24 hours, you can cautiously return it to a prepared, slightly dampened enclosure. Prolonged confinement in a chamber stresses the animal and is not a substitute for correct long-term husbandry.
Handling Stuck Molt: A Delicate Operation
Seeing a tarantula trapped in its own exoskeleton is distressing. My heart raced the first time I found a leg tip stuck on my Pterinochilus murinus sling, Flash. Physical assistance is an absolute last resort and carries high risk. You are more likely to harm than help if done incorrectly.
Never, ever pull on a stuck molt. The new limb underneath is soft as wet paper and will tear or deform. The only time to consider manual aid is if a single leg or palp is loosely caught and the spider is otherwise active.
Gather these tools: a soft artist’s brush, a cotton swab, and warm (not hot) water. Gently attempt to moisten the specific area of stuck exuvia with the damp brush. Sometimes, increased humidity alone will allow the spider to free itself. If the piece is very loose, you can try to roll it off with a moistened swab, applying zero pulling force.
If the molt is severely stuck over the carapace or abdomen, or the spider is limp, do not proceed. Focus on the humidity chamber. A tarantula may self-amputate a stuck leg to survive. In many cases, the kindest action is to provide a stable, humid, and quiet environment and let the spider’s own processes work. Your patience and a stable microclimate are far more valuable tools than any physical intervention. This topic is covered in our complete guide to tarantula molting problems and solutions. It offers practical steps and cautions for managing stalled molts.
Common Questions
What are the definitive signs my tarantula is having a bad molt *right now*?
Critical red flags during the molt itself include being stuck in the inverted position with no progress for over 24 hours or having the old carapace (head/thorax section) split but the body not emerging. A leak of hemolymph (blood) from the abdomen or a complete cessation of all movement while still partially trapped are dire emergencies. These signs indicate a systemic failure requiring your attention to environmental support.
My tarantula is stuck in its old skin. What is the absolute first thing I should do?
Your immediate action must be to gently increase the humidity in the enclosure without stressing the spider. Lightly mist the walls and substrate away from the tarantula, and ensure a water dish is full. The goal is to soften the old exoskeleton to aid the tarantula’s own efforts, as pulling or manipulating it directly risks catastrophic injury to the soft new body beneath. Choosing the best substrate is part of maintaining the tarantula enclosure. A substrate that supports humidity and provides grip helps keep the spider comfortable and the enclosure stable.
Is it ever okay to help pull off a piece of stuck molt?
No, you should never pull on stuck molt. The new exoskeleton is extremely soft and can easily tear, leading to deformity or fatal fluid loss. If intervention is absolutely necessary as a last resort, the only safe method is to use a damp, fine artist’s brush to apply moisture *only* to the stuck section, hoping the spider can then free itself.
How do I create a safe “ICU” or humidity chamber for a post-molt emergency?
Use a small, ventilated container lined with a damp paper towel, covered by a dry paper towel sheet to prevent direct contact with moisture. Place the weakened tarantula on the dry layer with a bottle cap of water. This chamber provides saturated air to prevent dehydration and is a short-term measure for critical recovery, not a long-term housing solution. Transition to a properly ventilated, secure tarantula enclosure once recovery allows. Ensure the final habitat has escape-proof latching, adequate airflow, and stable humidity.
How long should I wait after a molt before offering food or water?
You should provide a shallow water dish immediately in the main enclosure, as hydration is crucial for hardening. However, wait at least 7-10 days, or until the fangs have hardened (turning a deep black), before offering food. Attempting to eat before the fangs and exoskeleton are fully hardened can lead to injury and a failed prey attempt.
Long-Term Success After a Molt
After a challenging molt, your primary focus must shift to hydration. A freshly molted tarantula is incredibly vulnerable to desiccation while its new exoskeleton hardens. The single most important action you can take is to ensure a full, clean water dish is always available and to gently moisten one corner of the enclosure, providing a humidity gradient without dampening the entire space. This allows the animal to choose its comfort zone and drink readily, which is far more critical now than attempting to feed. Post-molt care emphasizes these hydration needs above all.
Resist the urge to check on your tarantula constantly. Instead, learn to appreciate the quiet signs of recovery. Watch for the first gentle movement of its legs, the eventual upright stance, and the slow return of normal posture. In the weeks that follow, delight in the renewed behaviors: the meticulous patching of its web by an P. murinus like Flash, or the deep, purposeful excavation by a burrowing species. True success in arachnoculture is measured not in perfect molts alone, but in the patient, observant care that allows their unique, instinctive lives to unfold in front of you.
Further Reading & Sources
- Chilean Rose Hair Care – The Tarantula Collective
- r/tarantulas on Reddit: Grammostola Rosea molt mount!
- Chilean rose tarantula – Wikipedia
Arlo is a lifelong arachnid enthusiast who believes tarantulas are the world’s most misunderstood roommates. With years of hands-on experience in tarantula care, habitat setup, and species behavior, Arlo combines expert knowledge with a dash of humor to make spider ownership less scary and a lot more fascinating. From choosing the right enclosure to understanding why your eight-legged buddy is doing that weird little pose again, Arlo is here to help you become the best tarantula parent you can be, without getting tangled in the web of misinformation.
Molting Process