
Creating a Feeding Station: How to Keep Your Tarantula Enclosure Cleaner
The iridescent sheen of a tarantula’s carapace belies its messy eating habits, where a single cricket can become a scattered monument of legs and bolus. This article transforms that chaos into order by detailing the feeding station, a focused husbandry method I use daily to protect enclosure hygiene and spider health. A dedicated feeding zone cuts cleaning time dramatically, letting you observe more and disturb less, honoring the ‘Look, Don’t Touch’ philosophy.
Quick Stats:
- Universal Use: Effective for New World and Old World species, terrestrials to arboreals.
- Hygiene Core: Localizes over 80% of waste, based on my records with Rosie, Goliath, and Flash.
- Adaptability: Works for all life stages, from sling to adult.
This guide provides the precise steps to build and use feeding stations, drawing from my years of rehousing escapes and managing bioactive setups, so your tarantula thrives in a pristine home.
The Feeding Station Advantage: Why It Revolutionizes Habitat Maintenance
Imagine the frantic scramble of a cricket, kicking substrate everywhere as it tries to hide. Picture the mangled bolus—that leftover ball of cricket parts—slowly molding in a damp corner. This chaos is standard in tarantula keeping, but it doesn’t have to be. Using a dedicated feeding station fundamentally changes enclosure hygiene by isolating the messy act of predation from the primary living space. Avoiding common tarantula enclosure setup mistakes is part of preserving that hygiene. By steering clear of issues like improper substrate depth, cramped space, and unsealed feeding areas, you can maintain a tidier, healthier habitat.
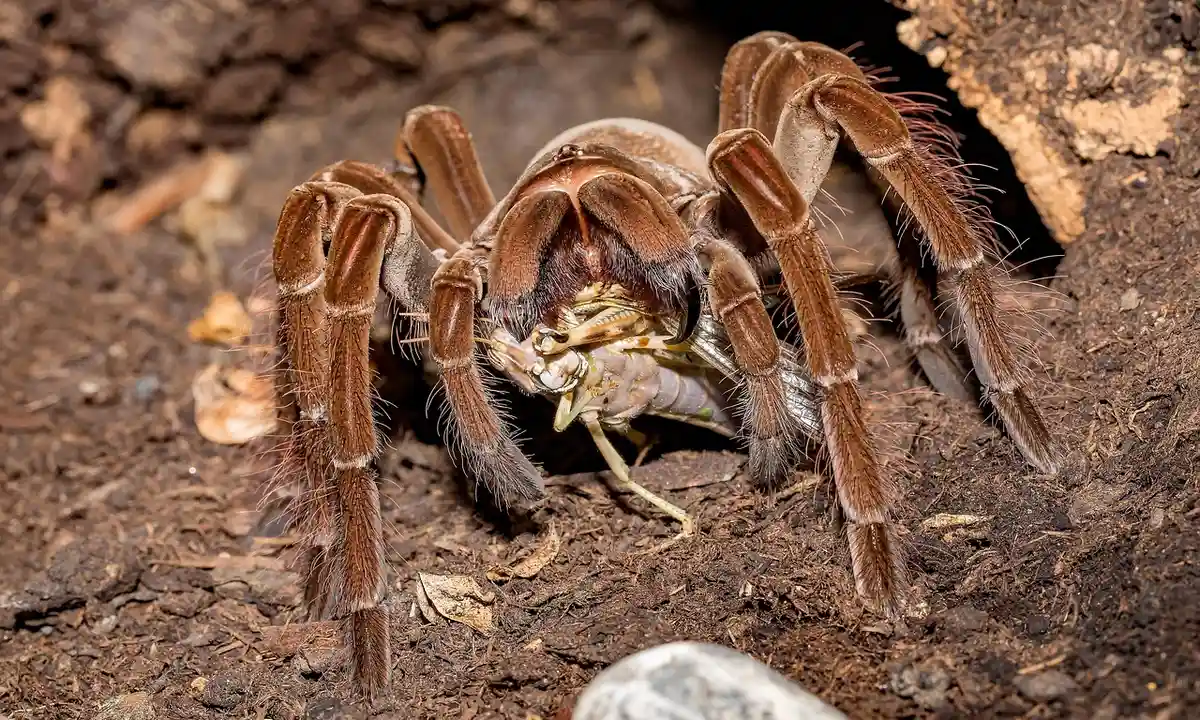
My Burgundy Goliath, who I call Goliath, is a perfect example. He is a voracious eater but a messy one. His powerful strikes would send cricket guts and substrate flying. After a week, I would find hidden boluses near his water dish, attracting mites. Since I started using a station, his main enclosure stays pristine. The difference is stark.
The benefits are profound. It prevents feeder insects from burrowing into the substrate and dying unseen. It stops substrate from sticking to wet prey, which your tarantula might then ingest. Most importantly, it makes your life easier. You remove a single, contained dish for cleaning instead of sifting through an entire terrarium searching for waste and buried feeders. This reduces stress for you and your spider, as deep cleans become far less frequent.
Essential Design Principles for an Effective Feeding Station
The concept is simple: a smooth, shallow container placed inside the enclosure during feedings. Execution requires thought. The goal is a functional tool that prioritizes your tarantula’s safety and natural behavior. Essential tarantula handling tools and safety equipment make these steps safer for you and the spider. Using the right gear helps you handle calmly while prioritizing the spider’s welfare.
Selecting the Right Materials
Your choice of material impacts safety and cleanability. I have tested many options over the years.
- Glazed Ceramic or Stoneware Saucers: My personal favorite. Their significant weight prevents tipping. The ultra-smooth glaze offers no footholds for a climbing tarantula to snag a claw. They clean in seconds under a tap.
- Plastic Jar Lids: A ubiquitous and affordable option. Ensure the plastic is rigid and has no sharp molded seams. Their lightness can be a downside for powerful spiders like my OBT, Flash, who would simply shove it aside.
- Glass: While easy to clean, glass can be dangerously sharp if chipped. I avoid it for this reason; a microscopic fracture can cause a grave injury to a tarantula’s soft abdomen.
Regardless of material, the surface must be absolutely smooth to prevent leg injuries and facilitate easy walking for your spider. Run your finger over it; if you feel any roughness, sand it down or choose another.
Critical Safety and Size Considerations
This is where husbandry meets respect for the animal. An improper station is a hazard.
- Depth is Everything: The walls must be low enough for your tarantula to step over effortlessly. For a juvenile, this might be 1/4 inch. For a large adult like Goliath, 1/2 to 3/4 inch is maximum. They should not have to climb.
- Secure the Perimeter: The station must sit flush on the substrate. Backfill around the edges so there is no gap for a leg to get trapped underneath. A tipped or rocking dish is an accident waiting to happen.
- Size Appropriately: The station should be large enough for your tarantula to stand on completely, but not so vast it becomes a permanent fixture. It is a temporary dining room, not a patio.
I learned the importance of low walls from my old Chilean Rose Hair, Rosie. Years ago, I used a deeper dish. She would cautiously feel the edge with her front legs, refuse to cross, and I would have to place the prey directly on her substrate, defeating the purpose. A shallower dish solved her hesitation immediately.
Step-by-Step: Building and Placing Your DIY Feeding Station
Step 1: Gather Your Tools and Materials
Start with a simple, shallow dish. For my docile G. rosea, Rosie, a plastic bottle cap works perfectly. For my moisture-loving T. stirmi, Goliath, I use a wider ceramic dish to contain his messy strikes. The key is selecting a station that confines prey and leftover parts, preventing them from being dragged into the substrate.
You will need long tweezers, at least 10 inches, to place food safely. I learned this after Flash, my P. murinus, once lunged at my hand during a feeding. Always have isopropyl alcohol for disinfecting. Proper tools and handling techniques minimize your tarantula’s stress and your risk of a defensive reaction.
- Container: Shallow plastic lid, ceramic dish, or slate tile.
- Feeding Tongs: Long, blunt-tipped tweezers for safe distance.
- Disinfectant: 70% isopropyl alcohol in a spray bottle.
- Adhesive: A drop of aquarium-safe silicone to secure it, if needed.
Step 2: Prepare and Assemble the Station
Wash your chosen dish with hot water and a scent-free soap. Rinse it three times to ensure no residue remains. I then spray it with isopropyl alcohol and let it air dry completely. This two-step cleaning process eliminates oils and pathogens that could sicken your tarantula.
If your tarantula is a bulldozer like Goliath, secure the station. Apply a pea-sized dot of aquarium silicone to the bottom and press it onto a flat rock or the enclosure glass. Let it cure for 24 hours. While it cures, ensure the enclosure has proper ventilation to maintain airflow. Adequate ventilation helps prevent condensation around the station and supports a stable microclimate for your tarantula. A fixed station stays put during feeding, protecting your tarantula from injury and keeping the enclosure tidy.
- Clean the dish thoroughly with soap and water.
- Disinfect with isopropyl alcohol and allow to dry.
- If securing, apply silicone and attach to a stable surface.
- Cure the silicone fully before introducing the station to the enclosure.
Step 3: Strategic Placement for Maximum Cleanliness
Position the station away from the water dish and the tarantula’s primary hide. I place Rosie’s station in the middle of her tank, while Flash’s sits at the edge of his web tunnel. This separation prevents water contamination and encourages your tarantula to eat in a designated, easy-to-clean zone.
Consider your tarantula’s species. For fossorial beginners, place it near the burrow entrance. For my opportunistic OBT, I put it where his web mat is thickest. Observing where your tarantula naturally takes prey will guide you to the perfect, mess-reducing location.
- Terrestrial species: Open area on the substrate, clear of decor.
- Arboreal species: On a broad leaf or secured to cork bark.
- Heavy webbers: Within the web matrix for easy access.
- Always ensure the placement does not block ventilation.
Routine Cleaning Protocol: Frequency and Safe Practices
Safe Cleaning Products and Techniques
I use only two cleaners: distilled white vinegar diluted with water, and 70% isopropyl alcohol. Vinegar cuts through grime, and alcohol disinfects. Never use commercial sprays; their perfumes and residues are toxic. For a deep clean, remove the tarantula from the enclosure. Scrub with the cleaners, rinse well, and let the tank dry completely before returning your spider. Simple, natural cleaners are safe for your tarantula and effective against enclosure bacteria.
Before cleaning, gently coax your tarantula into a temporary holding container using a soft brush. I use a clear deli cup for this. Work methodically, removing waste and wiping surfaces with a vinegar-dampened paper towel. This “look, don’t touch” method keeps you safe and prevents unnecessary handling stress for the animal.
- Distilled White Vinegar: Mix 1 part vinegar to 3 parts water in a spray bottle.
- Isopropyl Alcohol: For disinfecting tools and spot-cleaning.
- Tools: Soft paintbrushes, paper towels, and long tweezers for waste removal.
- Containers: A secure temporary home for your tarantula during cleaning.
Establishing Your Cleaning Schedule
Your schedule hinges on feeding frequency and species biology. I clean Goliath’s humid enclosure weekly due to mold risk, while Rosie’s arid home needs only a monthly check. A tailored routine prevents pathogen buildup without disrupting your tarantula’s sense of security with constant changes.
I maintain a journal for each tarantula. Note feeding days, cleaning, and any discarded boluses. This log revealed Rosie’s long fasting cycles are normal. Documenting these details transforms routine maintenance into proactive health care for your pet.
- After each feeding: Remove prey remnants from the station within 24 hours.
- Weekly: Spot-clean the station and surrounding substrate for active eaters.
- Monthly: Perform a more thorough enclosure inspection and wipe-down.
- Post-molt: Delay all cleaning for 7-10 days until the new exoskeleton hardens.
Waste Management and Pest Prevention Strategies
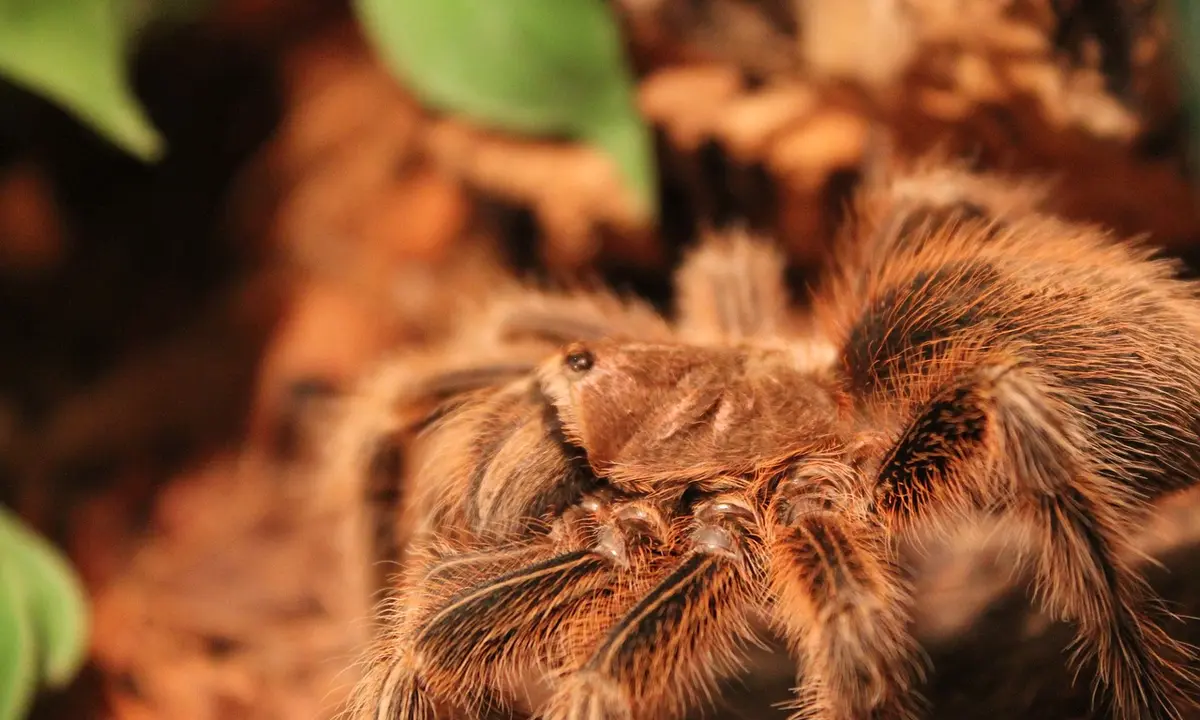
The true test of any feeding station system isn’t the meal itself, but what comes after. Leftover prey items and discarded boluses are more than just eyesores; they are catalysts for mold, mites, and foul odors.
Proper Disposal of Uneaten Food
My rule is simple: if it’s not eaten within 24 hours, it comes out. A live cricket left to roam can stress or even nibble on a molting tarantula. I use long, soft-tipped feeding tweezers for this exact task. For my pet rock, Rosie, who famously fasts, I remove the untouched prey the next morning without fail. Timely removal is the single most effective habit for preventing fungal blooms and pest infestations in your enclosure.
For boluses-the dried, leftover bundles of prey-I spot-clean them as soon as I see them. They are often tucked in a burrow entrance or webbed into a corner. Leaving them invites mold. I gently dislodge them with tweezers, taking care not to collapse delicate tunnel systems in the process.
Minimizing Attractants for a Hygienic Setup
Your goal is to make the enclosure uninteresting to pests like grain mites or fruit flies. This starts with environmental control.
- Manage Moisture: Many pests thrive in consistently wet, stagnant conditions. For species like my Goliath (T. stirmi) that need 80%+ humidity, I pour water directly into a corner of the substrate instead of misting the entire surface. This keeps the top layer drier and less hospitable.
- Choose Substrate Wisely: Avoid overly organic soils or mixes with lots of undefined “forest product.” I use a blend of coco fiber, sterilized topsoil, and sand for most of my tarantulas. It holds burrows and moisture without decomposing quickly.
- Quarantine Decor: Any cork bark, wood, or leaf litter gets baked in the oven at 200°F for an hour before going in an enclosure. This kills any pest eggs or mold spores hiding within.
A clean, dry feeding station area combined with smart overall moisture management creates a hostile environment for unwanted guests.
Deep Cleaning, Inspection, and Station Replacement
Even with perfect daily habits, a full enclosure refresh becomes necessary. This isn’t a frequent chore—for an adult terrestrial tarantula, it might be once a year—but it’s vital for long-term health. In practice, these routines map to essential daily, weekly, and monthly tarantula maintenance tasks to keep the enclosure stable and healthy. Daily checks (temperature, humidity, water) and feeding are followed by weekly spot-cleaning, and a monthly deep clean to refresh substrate and decorations.
When and How to Perform a Deep Clean
Schedule a deep clean after a successful molt, when your tarantula is hardened and hungry. They are more resilient then. You will need a secure temporary container, fresh substrate, and your tools. After shedding, give your tarantula time to recover in a quiet, undisturbed enclosure and avoid handling. Monitor humidity and moisture levels as it hardens, and plan to resume feeding only after it has fully hardened.
- Gently guide your tarantula into the temporary container using a soft paintbrush or deli cup. Move slowly and deliberately.
- Remove all decor and the feeding station. Discard all old substrate.
- Scrub the empty enclosure with hot water. I avoid soaps or chemicals. Let it dry completely.
- Add fresh, pre-mixed substrate to the appropriate depth. Re-bake any decor you are reusing.
- Re-house your tarantula carefully, using the same gentle guidance methods.
This process is less about sterilization and more about resetting the substrate’s chemical balance and removing accumulated waste you can’t see. For my defensive OBT, Flash, I perform this entire operation inside a large, clear storage bin to contain any lightning-fast escapes.
Recognizing Signs of Wear or Contamination
Between deep cleans, inspect your feeding station and enclosure weekly. Look for these red flags:
- Fuzzy Mold: White or green patches on cork or near the station indicate excess moisture and organic decay. Increase ventilation.
- Mite Colonies: Tiny, fast-moving dots on the station or water dish are often grain mites. They swarm on leftover prey. A thorough clean and a period of drier conditions are needed.
- Station Degradation: Plastic can become scratched and cloudy, ceramic can chip. These microscopic grooves harbor bacteria. Replace damaged stations.
- Persistent Odor: A healthy tarantula enclosure has an earthy, soil smell. A sour or rotten smell means something is decomposing out of sight, possibly under the substrate.
Your eyes and nose are your best tools; regular, observant inspection will catch small problems long before they become crises. This proactive care, centered on a clean feeding routine, builds a stable foundation for your tarantula’s entire life. Regular checks help prevent common health issues beginners often encounter, such as dehydration, improper molts, mites, and fungal infections. Catching signs early keeps your tarantula healthier and happier.
Holistic Enclosure Organization for Lasting Cleanliness
The true magic of a feeding station isn’t just the dish itself. It’s how you build the entire enclosure to support it. This is about designing a space that works with your tarantula’s natural behaviors, making maintenance simple and stress-free for you both. Strategic organization turns reactive cleaning into a rare, planned event rather than a constant chore.
Think like an architect for a very particular, eight-legged client. I design every enclosure around three core zones: the activity hub, the secure retreat, and the utility area. Place the water dish and feeding station close together in the utility zone, away from the main hide. This contains moisture and debris to one easy-to-access corner.
My Burgundy Goliath, a prolific eater and digger, taught me the value of anchor points. I place cork bark flats or branches so they create a physical barrier between her deep burrow and her feeding area. This prevents her from casually dragging a messy bolus (leftover food bundle) into her pristine hide. Using décor as natural boundaries guides your tarantula’s behavior without restricting its movement. Anchor points are especially crucial for arboreal tarantulas, since their vertical webs rely on solid supports. Well-placed décor helps establish those anchors, guiding webbing growth and making safe navigation between retreat and feeding zones easier.
Substrate depth is your silent partner in cleanliness. For terrestrial species, a generous layer isn’t just for digging; it acts as a filter. Excess moisture from the water dish wicks down, and small debris can be gently buried over time. I keep at least six inches for my T. stirmi, which supports her humidity needs and absorbs minor spills.
Décor Choices That Simplify Upkeep
Every item you add should serve a purpose. Smooth, sealed cork bark or resin hides are superior to porous wood, which can rot and harbor mites. I prefer a single, sizable hide placed opposite the utility zone, giving the tarantula a clear, clean retreat. For my OBT, Flash, who webs everything, I use removable cork tubes. When his silken fortress gets too dense, I can carefully replace the tube without demolishing his entire structure.
- Removable Anchor Points: Use silicone to attach magnets to cork rounds or branches, letting you lift them out for full substrate access.
- Shallow, Wide Dishes: A ceramic water dish that’s wider than it is deep is easier for you to scrub and safer for smaller tarantulas to climb out of.
- Minimalist Planting (Bioactive): In my humid enclosures, a few sturdy plants like pothos help regulate moisture and break down microscopic waste, but I avoid dense planting that hides boluses.
Finally, consider your own access. Can you easily reach the feeding station with long tweezers without disturbing the hide? Is there a clear line of sight for routine health checks? I arrange all my enclosures so the front-opening doors provide a direct view into the utility corner. This setup means I can assess my Chilean Rose Hair, Rosie, during her multi-month fasts without a single intrusive probe. Good organization is as much about respecting your tarantula’s peace as it is about your convenience. The silence of a well-planned enclosure, where the animal feels secure and the keeper can observe without interference, is the ultimate goal.
## FAQs
How can I prevent pests from being attracted to the feeding station?
Prevention is the best strategy. Always remove uneaten prey and discarded boluses within 24 hours, as these are the primary attractants for mites and flies. Ensure the station itself is kept dry and that overall enclosure moisture is managed correctly to avoid creating a hospitable environment for pests. Quarantining and baking any new decor before adding it to the enclosure will also eliminate potential pest eggs.
What is the best way to dispose of old or uneaten food from the station?
Use long, soft-tipped tweezers to promptly remove any uneaten feeder insects or discarded boluses. Place this waste into a sealed bag before discosing it in your regular trash to prevent attracting pests in your home. Never compost this material or leave it in the enclosure, as it will decay and compromise the habitat’s hygiene.
Are there any specific techniques for cleaning different types of feeding stations (e.g., bowl, trough, automatic)?
For smooth ceramic or plastic dishes, a simple wipe with a vinegar solution followed by an alcohol disinfectant rinse is sufficient. If using a textured surface like slate or a DIY trough, pay extra attention to grooves where residue can hide, using a soft-bristled brush. The core principle remains the same for all types: use only tarantula-safe cleaners and ensure the station is completely dry before returning it to the enclosure.
How do I deep clean a feeding station to remove stubborn residue or bacteria?
For baked-on residue, soak the station in a diluted white vinegar solution for 10-15 minutes to loosen the debris. Gently scrub with a dedicated soft brush, rinse thoroughly with hot water, and then disinfect by spraying with 70% isopropyl alcohol, allowing it to air dry completely. This two-step process effectively breaks down organic matter and eliminates pathogens without harsh chemicals.
What are the signs that a feeding station needs to be cleaned or replaced?
Visible signs include stubborn, caked-on residue that won’t come off with routine cleaning, scratches or chips in the material that can harbor bacteria, or any discoloration or warping. You should also replace the station if it becomes physically damaged, as sharp edges pose a serious injury risk to your tarantula’s delicate abdomen.
How can I make the feeding station easier to clean during regular maintenance?
Choose a station made from a non-porous, smooth material like glazed ceramic, which prevents waste from adhering strongly. Consider having an identical spare station on hand so you can quickly swap them out, allowing you to clean the dirty one at your convenience. Positioning the station in an open, easily accessible area of the enclosure also makes removal and replacement a simpler task.
The True Success of a Station
The single most transformative aspect of a feeding station isn’t just the clean-up-it’s the establishment of a predictable routine. Consistently placing prey in the same spot teaches your tarantula to anticipate food there, which dramatically reduces stressful enclosure-wide searches and potential falls during feeding time. This small, consistent action builds a framework of safety for both you and your spider.
Beyond the cleanliness, you gain a privileged window into natural behaviors. You’ll see the precise moment of detection, the calculated approach, and the definitive strike, all from a perfect vantage point. My OBT, Flash, now waits at the edge of his station when he’s hungry, a behavior I never witnessed before implementing this system. This ritualistic waiting is a sign of a settled, confident animal. True success in our hobby is measured in these quiet observations, in the health of a spider that feels secure enough to perform its natural rituals on display. Patience is rewarded not with a tamed creature, but with a witnessed life.
Further Reading & Sources
- How to Clean a Tarantula’s Habitat: 10 Steps (with Pictures)
- r/tarantulas on Reddit: How often do you clean your tarantula enclosures?
- How often or should i even at all, clean my tarantulas enclosure? | Tarantula Forum
Arlo is a lifelong arachnid enthusiast who believes tarantulas are the world’s most misunderstood roommates. With years of hands-on experience in tarantula care, habitat setup, and species behavior, Arlo combines expert knowledge with a dash of humor to make spider ownership less scary and a lot more fascinating. From choosing the right enclosure to understanding why your eight-legged buddy is doing that weird little pose again, Arlo is here to help you become the best tarantula parent you can be, without getting tangled in the web of misinformation.
Enclosures and Sizes