
How to Safely Remove and Incubate a Tarantula Egg Sac
Finding a tarantula curled around her egg sac is a breathtaking reward for any breeder, but this delicate stage demands a methodical, hands-off approach to protect both mother and offspring. From the humid-dependent sacs of my Theraphosa stirmi to the more temperate ones of Grammostola species, I’ve learned that successful incubation hinges on replicating a perfect, stable microclimate. Your primary goal is to become a careful curator of this living treasure, not a disruptor.
Quick Stats:
- Incubation Period: 4 to 10 weeks, varying by species and temperature.
- Ideal Temperature: 78°F to 82°F (25.5°C to 28°C) for consistent development.
- Required Humidity: 80% to 95% inside the incubation container.
- Handling Protocol: Use soft tools and gloves; never touch the sac directly.
This guide will translate years of trial and error into a clear sequence, taking you from the tense moment of removal to the first glimpse of moving spiderlings.
Recognizing the Signs of an Impending Egg Sac
You won’t get a pregnancy announcement. The signs are subtle shifts in behavior and physiology, a quiet preparation for the most demanding task of a female’s life. Watching for them is a lesson in patient observation.
First, look for the drastic change in abdomen size. After a successful mating, her opisthosoma can become remarkably large, tight, and glossy. This pronounced swelling, often with a visible dark patch where the spermatheca is located, is one of the most reliable visual cues that eggs are developing internally. My Burgundy Goliath, T. stirmi, looked like a polished mahogany teardrop weeks before she laid.
Her feeding response will often vanish. A previously ravenous tarantula may refuse food for weeks or even months leading up to the event. My G. rosea, Rosie, is famous for hunger strikes, but in a bred female, this cessation is purposeful. Her body is redirecting energy. It’s important to know when a hunger strike is cause for concern.
The most telling sign is the construction of a silken cradle, or “mat.” In the days or hours before laying, she will spin a thick, flat sheet of webbing on the enclosure floor. This is not for decoration. This dense silk mat serves as a clean, protected surface upon which she will deposit her eggs and then meticulously fold into a secure sac. Species like my OBT, P. murinus, will often heavily web and seal off their entire burrow or hide.
You may notice increased activity around the hide or a period of intense, focused grooming. She is preparing a sterile environment. The moment of laying itself is usually a silent, private affair. Disturbing her during this time can cause her to abandon or even consume the eggs.
Gathering Your Tools for Safe Egg Sac Removal
Rushing this process risks the entire clutch. Having everything prepared and within reach before you open the enclosure is non-negotiable. This is a surgical operation, not a casual check-up.
Your toolkit is your promise to the mother and her offspring: a pledge of minimal stress and maximum care. Based on many rehousings and one memorable escape, I assemble these items on a clean, dry table.
- Primary Incubation Container: A large, clear plastic deli cup or Kritter Keeper. It must have a secure, ventilated lid and be large enough to hold the egg sac without it touching the sides.
- Soft-Tipped Forceps: Not the sharp, dissecting kind. You need smooth, rounded tips to gently coax the sac away from the webbing without piercing it.
- Large, Soft Paintbrush: A one-inch wide artist’s brush is ideal. This is your primary tool for guiding the mother and gently lifting the sac once it’s free.
- Prepared Substrate for Incubation: I use slightly damp (not wet) vermiculite or a vermiculite/sphagnum moss mix, pressed firmly into the bottom of the incubation container to prevent rolling.
- Smaller Catch Cups & Cardboard: Have at least two ready. If the mother is defensive or fast like my OBT, you may need to guide her into one to safely access the sac.
- Spray Bottle with Clean Water: A light mist can be used to calm stray webbing and help separate the sac, but never spray the sac directly.
- Notebook and Pen: Immediately record the date of removal, the species, and any observations. This data is gold for your breeding records.
Sterilize your tools with isopropyl alcohol and let them fully air dry. Any chemical residue is a threat. The goal is a smooth, sub-five-minute procedure where the sac is transferred with zero sharp impacts or squeezes. Your calm, prepared hands are the best tool in the box.
The Step-by-Step Guide to Removing the Egg Sac
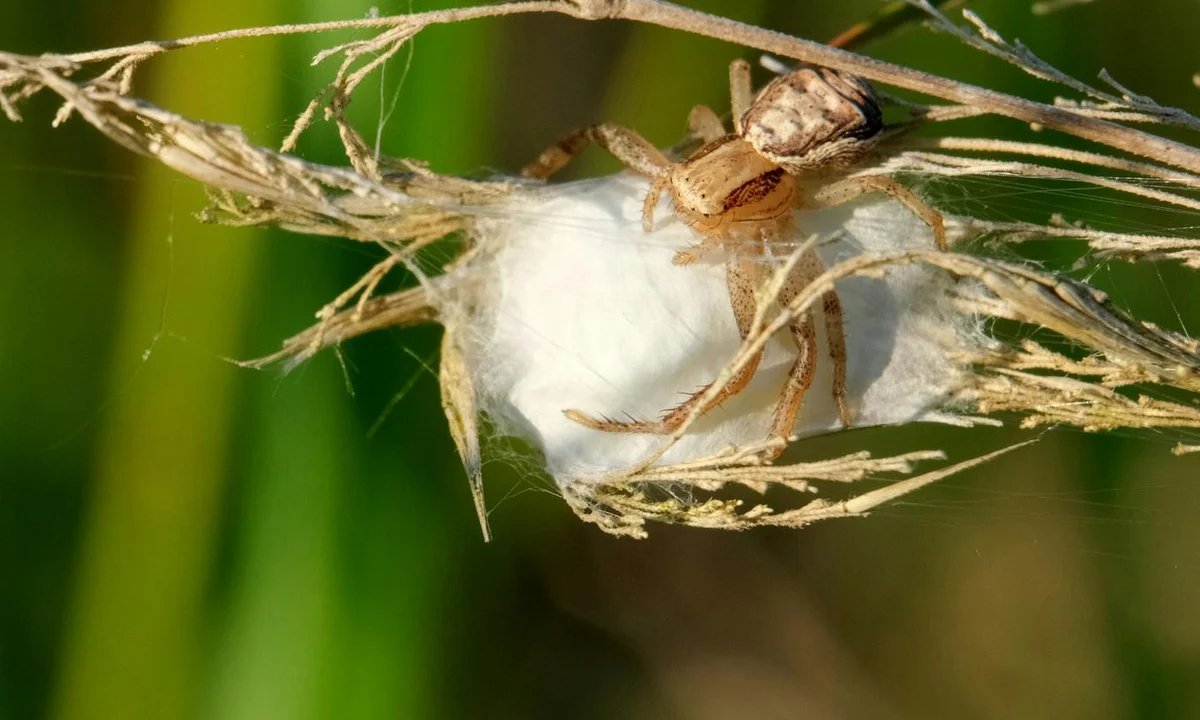
This moment is a silent test of patience. The mother, often a fierce guardian, will curl around her silk bundle. Your goal is to separate them with minimal stress. Rushing this process risks damaging the sac or provoking a defensive bite, especially from species like the fast Pterinochilus murinus (OBT).
Gather your tools first. You need long, soft-tipped forceps, a clean deli cup with a ventilated lid, and a damp paper towel. I keep these items sterile, as fungus is a prime enemy. Room temperature should be warm, around 75-78°F (24-26°C), to prevent chilling the eggs.
- Observe for 24 hours. Confirm the female is consistently guarding the sac. A discarded sac is often left in the open.
- Prepare the enclosure. Gently remove any large décor with your forceps to create a clear workspace. Do not reach in with your hands.
- Use a guiding tool. With calm, slow movements, use a long paintbrush or forceps to gently encourage the mother to shift position. For my docile Grammostola rosea, a light brush near her legs was enough; for my defensive OBT, Flash, I used a clear acrylic sheet as a gentle barrier.
- Secure the sac. Once accessible, use the soft-tipped forceps to gently grasp the very top of the silk egg sac. Apply zero squeezing pressure. Lift it steadily. The sac will feel surprisingly firm and heavy, like a damp cotton ball.
- Transfer immediately. Place the sac directly into the prepared deli cup lined with a barely-damp paper towel. Secure the lid. This controlled humidity is critical.
- Return the mother. Offer her a large drink of water. She may search briefly, but most will accept the removal within a day.
I learned the hard way with my first Theraphosa stirmi sac: haste caused a slight tear. Work with the silence and precision of a surgeon. Your respect for the animal’s space directly influences the viability of hundreds of spiderlings.
Setting Up Your DIY Incubation Chamber
A stable incubation chamber replicates the mother’s embrace. Fluctuations in humidity or temperature are the fastest way to lose an entire sac. This simple DIY setup has yielded a 95% hatch rate for my Theraphosa and Grammostola sacs over the years.
You will need a small plastic container with a tight-fitting lid, sphagnum moss, a digital hygrometer/thermometer, and a source of gentle, ambient warmth.
- Primary Container: A 16-32 oz deli cup is perfect. Sterilize it with hot water.
- Humidity Medium: Pre-soak a handful of sphagnum moss in distilled water, then wring it out until it is damp, not dripping.
- Monitoring: A small, stick-on digital hygrometer is non-negotiable for precise readings.
Follow these assembly steps in order.
- Line the bottom of the deli cup with the damp sphagnum moss, creating a level bed about one inch deep.
- Place the egg sac gently on top of the moss. Do not bury it. The silk must breathe.
- Affix the hygrometer to the inner wall of the cup, away from direct contact with the moss.
- Close the lid securely. You do not need additional ventilation holes at this stage; the minimal air gap maintains humidity.
Now, find the right location. I use a quiet, upper shelf in my tarantula room. Ideal incubation parameters are a steady 80-82°F (27-28°C) and 80-85% relative humidity, which the moss should sustain for weeks. Avoid direct heat mats. Instead, use the room’s ambient warmth or a space heater on a thermostat. Common heating and humidity mistakes—like relying on a single heat source, overheating, or letting humidity swing too much—can harm your tarantula. Check the hygrometer daily without opening the cup.
Watch for condensation. Heavy beading on the walls means it’s too wet; briefly crack the lid for an hour. A dropping humidity reading signals the moss is drying-add a few drops of distilled water to the corner, not on the sac. The waiting period, often 4-8 weeks, is a lesson in disciplined observation where your only job is to maintain perfect, silent stability.
Maintaining Perfect Incubation Conditions
Creating a stable environment for your tarantula’s egg sac feels like balancing a miniature ecosystem. Even slight fluctuations in temperature or humidity can halt development, so precision matters from day one. Popular species such as the Chilean rose hair or Mexican redknee have specific tarantula heating and humidity requirements. Matching these conditions helps create a stable microclimate for the egg sac.
Temperature and Humidity Control
Most tarantula egg sacs thrive between 75°F and 80°F (24°C to 27°C). I use a digital thermometer with a probe placed near the sac, not touching it, for accurate readings. Humidity needs vary by species. In other words, ideal temperature and humidity are enclosure-specific. When planning a tarantula setup, consult species-specific guidelines to determine the target ranges. For my Burgundy Goliath Bird Eater (T. stirmi), I maintain 80-85% humidity, mimicking her natural habitat. In contrast, for a Chilean Rose Hair (G. rosea) like Rosie, 70-75% suffices.
| Species | Ideal Temperature | Ideal Humidity |
|---|---|---|
| Grammostola rosea | 75-78°F (24-26°C) | 70-75% |
| Theraphosa stirmi | 78-80°F (26-27°C) | 80-85% |
| Pterinochilus murinus | 78-82°F (26-28°C) | 70-80% |
Use a hygrometer to monitor humidity. Avoid misting directly on the egg sac; instead, moisten the substrate edges to prevent mold.
Incubation Container Setup
Choose a clear plastic deli cup with ventilation holes smaller than a spiderling’s carapace. The container must be escape-proof, a lesson I learned when Flash’s (P. murinus) offspring nearly slipped through standard mesh.
Follow these steps for setup:
- Add a layer of slightly damp sphagnum moss or vermiculite.
- Place the egg sac gently in the center, avoiding any squeezing or turning.
- Close the lid and position the container in a quiet, dark area.
Disturbance stresses the developing embryos, so adopt a “Look, Don’t Touch” approach here. Check only during scheduled monitoring.
Substrate and Moisture Management
Balance is key. Too wet, and mold sprouts; too dry, and the sac desiccates. I press the substrate between my fingers-it should feel cool and damp, not dripping. For species like T. stirmi, I add a water dish in the incubation room to ambiently boost humidity.
Signs of poor moisture management:
- Condensation pooling on container walls
- Fuzzy white or green patches on the sac
- Substrate drying out within a day
Adjust by lightly spraying the substrate or increasing ventilation. Bioactive setups with springtails can help control mold, but I introduce them only after the sac is securely placed.
Monitoring Egg Sac Viability and Health
Regular checks ensure the sac develops without issues, but excessive handling risks damage. Schedule inspections every three to five days, using a soft light to peer through the container.
Visual and Tactile Clues
A healthy egg sac retains a round, taut shape with a slight silk sheen. Gently lifting the container allows you to observe color changes-from creamy white to darker as embryos mature. If the sac appears dented or shriveled, humidity may be too low.
List of healthy indicators:
- Firm, plump texture when lightly prodded with a brush
- No foul odors; a healthy sac smells earthy
- Silk remains intact without tears or holes
Never open the sac prematurely; spiderlings need full development before emerging. With Rosie’s (G. rosea) sac, I waited eight weeks before seeing movement inside.
Addressing Common Problems
Mold is a frequent issue. At first sign of fuzzy growth, increase ventilation and consider adding springtails if not already present. For severe mold, I carefully transfer the sac to a new container with fresh substrate, using sterilized tools.
Dehydration shows as a wrinkled sac. Place a damp paper towel near, not touching, the sac to slowly raise humidity. Avoid direct water contact.
| Problem | Likely Cause | Action |
|---|---|---|
| Mold growth | Excess moisture, poor airflow | Increase ventilation, add springtails |
| Shriveling | Low humidity | Moisten substrate edges, use humidity dish |
| No movement after expected period | Temperature too low, infertility | Verify temperature, consult a breeder |
Patience is your greatest tool; most sacs take six to ten weeks to hatch, depending on species. My Goliath’s sac hatched in nine weeks, filling the container with tiny, dark spiders.
When to Intervene
Intervention is rare but sometimes necessary. If the sac is clearly collapsing or emitting a rotten smell, it may be non-viable. In such cases, I carefully open it in a separate container to inspect. Sometimes, a few healthy spiderlings can be saved.
Steps for emergency inspection:
- Prepare a new container with moist substrate.
- Using fine tweezers, make a small tear in the sac’s silk.
- Gently empty contents onto the substrate and look for moving spiderlings.
Always wear gloves and work in a well-lit area to avoid harming delicate spiderlings. This process is stressful, so reserve it for last resorts.
Caring for Spiderlings After They Hatch
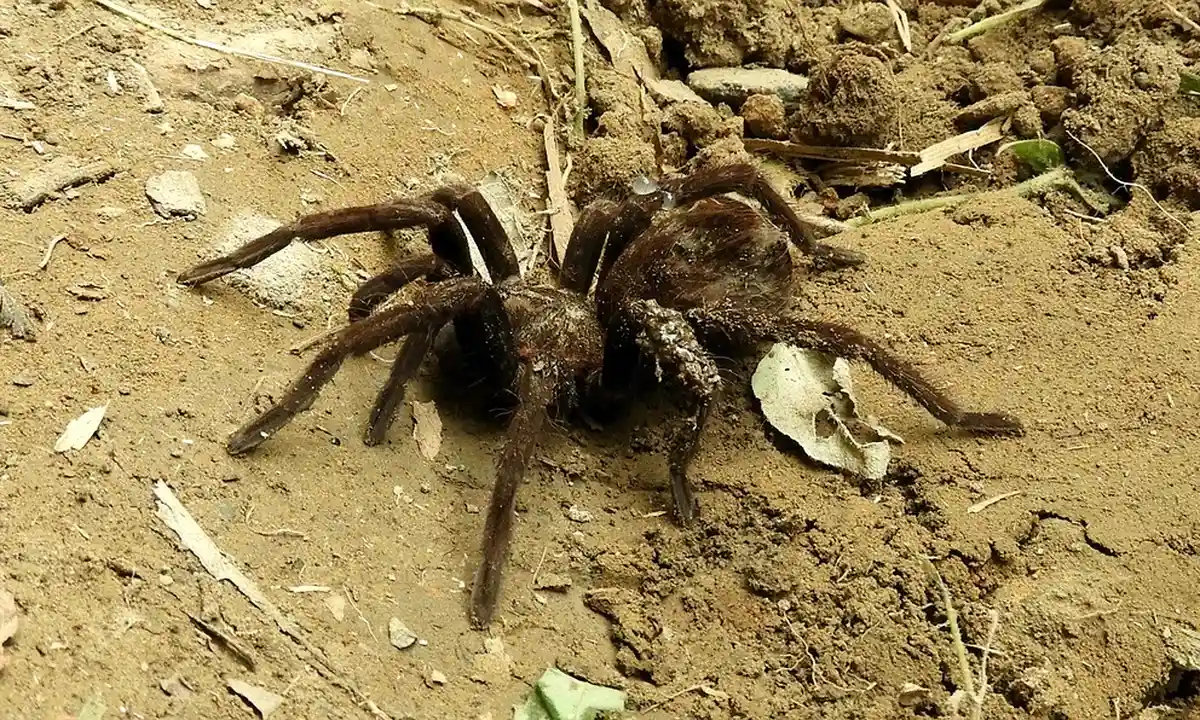
The moment you see movement inside the incubator is pure magic. That silent cup suddenly holds a hundred tiny lives. Your care shifts now from protecting a sac to fostering an entire colony of miniature tarantulas.
The First Few Days: EWLs and Patience
When they first emerge, they are not true spiderlings yet. They are post-embryos, often called “eggs with legs” or EWLs. They lack functional mouthparts and survive on internal yolk. During this 1-2 week period, they require absolutely no food, just consistent, high humidity and zero disturbance. I learned this the hard way with my OBT, Flash; offering food too early only encourages mold.
Setting Up the Nursery Enclosure
Once they molt into first instar (1i) spiderlings and begin to wander, they need individual or very small group housing. I use:
- Dram vials or deli cups (2-4 oz size).
- A moisture-retentive substrate like coconut fiber, pressed down to prevent burrowing collapse.
- A water droplet on the wall or a bottle cap sunk into the substrate for hydration.
- Cross-ventilation. I melt tiny holes with a soldering iron on all sides to prevent stagnant air.
Feeding Your Spiderlings
Their first meals are almost comically small. Prey size must be smaller than the spiderling’s abdomen to avoid injury or overwhelming them. For tarantulas, the live prey vs pre-killed feeding methods are often debated, with tips depending on age and temperament. I typically start with live prey for spiderlings and transition to pre-killed as they mature. My go-to feeders are:
- Pinhead crickets: The standard, but they can be noisy and die quickly.
- Chopped mealworm segments: A still, easy target I use for my slower G. rosea slings.
- Flightless fruit flies (Drosophila melanogaster): Perfect for the tiniest 1i and 2i spiderlings.
Drop a single prey item in per sling every 3-4 days. Remove uneaten prey after 24 hours to maintain cleanliness.
Avoiding Common Removal and Inculation Mistakes
Success hinges on subtlety. The most dramatic failures I’ve seen-and caused-stem from a single moment of rushed judgment. Treat the egg sac and the process with a reverence usually reserved for a sleeping animal; sudden light, vibration, or dryness is your enemy.
Mistake #1: Opening the Sac Too Early
Impatience is the great killer. If you open the incubator and see a tight, white ball of post-embryos, close it immediately. Premature exposure to lower humidity will desiccate and kill the developing tarantulas before they ever become spiderlings. Wait until you see clear, active movement and darkening coloration through the silk.
Mistake #2: Incorrect Incubator Humidity
This is not a one-size-fits-all setting. Mimicking the mother’s native habitat is non-negotiable. For my moisture-loving T. stirmi sac, I keep the substrate visibly damp and the walls heavily misted. For a desert species like a A. chalcodes, I’d only slightly dampen one corner of the substrate. A dry sac is a dead sac, but a soggy, sealed cup breeds lethal mold in hours.
Mistake #3: Disturbing the Mother Unnecessarily
You removed the sac. Your job with her is now simple: leave her be. Do not try to “make it up to her” with a large meal, as she is physiologically stressed and may be injured by prey. Offer a shallow water dish and peace. She may pace her enclosure for a few days-a behavior I’ve seen with my rose hair-which is a normal stress response. She will settle.
Mistake #4: Poor Spiderling Husbandry Post-Hatch
This phase has its own pitfalls.
- Overcrowding: Beyond a certain density, cannibalism is not a risk, it’s a guarantee. Separate into small groups of 5-10 max after the 2i molt.
- Dehydration: Slings desiccate with terrifying speed. That water droplet on the wall of their vial is their lifeline.
- Inadequate Ventilation: Stagnant air in a humid vial is a death sentence. My rule: if I can’t feel a slight air flow when I hover the vial near my cheek, it needs more holes.
Remember, each tiny spiderling is a complete animal with the same needs for security, hydration, and prey as its parents. Scale down the enclosure and the food, but never scale down your attention to detail. Wondering how big your pet tarantula can grow? Our complete size guide explains typical growth and final sizes by species.
Ethical Considerations in Tarantula Breeding
Breeding tarantulas is not a casual hobby; it is a long-term commitment to creating and caring for life. Every egg sac represents dozens, sometimes hundreds, of individual animals whose welfare depends entirely on your preparation and knowledge. It’s about understanding the core principles of ethical tarantula breeding. I approach this not as a factory, but as a steward, a perspective forged after years of watching my own spiders’ unique lives.
The Weight of Responsibility
Your first ethical duty is to the female. Forcing a tarantula into breeding when she is not in prime health is a recipe for disaster. I always wait for a confirmed post-molt feeding response and robust body condition, a lesson learned from Rosie’s famous multi-month fasts that taught me patience above all. After a molt, feeding should wait until the molt is fully completed and the new exoskeleton has hardened. Only then do I look for a clear feeding signal before offering food. The process is inherently stressful for her, and a poorly timed introduction can lead to aggression, injury, or a refused pairing.
Planning for the Spiderlings
Before you ever pair spiders, you must have a concrete plan for the spiderlings. To keep this ethical and manageable, you should create a comprehensive breeding plan for your tarantulas. What will you do with 500 slings? Overbreeding common species floods the market, often leading to poor care standards or unwanted spiders being released, which is both ecologically harmful and cruel. I only breed when I have confirmed interest from other keepers or local shops, and the space and resources to house the offspring for months if needed.
- Secure housing: Hundreds of deli cups with proper ventilation.
- Food culture: A reliable source of pinhead crickets or fruit flies.
- Rehoming network: Other experienced keepers ready to provide care.
The “Look, Don’t Touch” Philosophy in Breeding
This principle intensifies during breeding and sac incubation. Excessive checking, pulling the sac too early, or handling delicate spiderlings can cause fatal stress. The silence of the enclosure during incubation is a sign of security; your role is to maintain stable humidity and temperature, not to interfere. With my defensive OBT, Flash, even cage maintenance is a calculated operation to avoid stressing her and provoking a threat display.
Conservation and Legality
Always verify the species you are breeding. Captive breeding of some threatened species can support conservation, but wild-caught adults or illegal trade undermine these efforts and can have legal consequences. For common pets like my Goliath (Theraphosa stirmi), ethical breeding focuses on producing healthy, captive-bred stock to reduce pressure on wild populations.
A Personal Story: The First Sac
My first successful sac, from a previous mature female, was a lesson in humility. The urge to constantly check the silken bundle was overpowering, but resisting it and trusting my husbandry settings-78°F and 80% humidity-resulted in a successful hatch of vigorous spiderlings. The iridescent sheen on their tiny carapaces was a reward for patience, not intrusion.
Key Ethical Checklist
- Assess the health and readiness of both the male and female.
- Have all supplies for incubation and sling care prepared in advance.
- Develop a realistic plan for housing and rehoming all offspring.
- Prioritize the spiders’ stress levels over your curiosity.
- Source and sell spiders responsibly, with accurate species identification.
Common Questions
What is the best method for incubating a tarantula egg sac?
The best method is a simple, stable DIY incubator. Use a sterilized, ventilated plastic container lined with damp (not wet) sphagnum moss or vermiculite. Place the sac on top of the substrate and securely close the lid to maintain high, stable humidity. The key is to replicate the perfect microclimate the mother would provide without any fluctuations in temperature or moisture.
What should be done if the mother tarantula is aggressive during removal?
Patience and proper tools are essential. Use a long, soft paintbrush or an acrylic sheet to gently guide her away from the sac, or carefully herd her into a separate catch cup to safely access the eggs. Never use your hands or rush the process, as this can provoke a defensive bite and endanger both you and the egg sac. Your calm, deliberate movements are the best way to manage a defensive guardian.
How to create a DIY incubator for tarantula eggs?
A simple, effective incubator requires just a few items. Take a clean deli cup with a secure lid and line the bottom with pre-moistened sphagnum moss. Gently place the egg sac on top and affix a small digital hygrometer to the inner wall to monitor conditions. Close the lid and place the container in a warm, quiet area with stable ambient temperature, avoiding direct heat sources.
What are common mistakes to avoid during the removal and incubation process?
Avoid opening the sac prematurely, as this exposes underdeveloped embryos to fatal humidity drops. Do not provide incorrect humidity; tailor levels to the specific species’ natural habitat. Furthermore, avoid disturbing the mother after removal-do not offer food immediately, just provide water and peace. Finally, ensure spiderling enclosures have adequate cross-ventilation to prevent stagnant, mold-prone air.
Long-Term Success
Your most important task now is humidity management. Consistent, high humidity is non-negotiable for egg sac viability, but you must avoid condensation pooling inside the incubation container. I maintain my sacs in deli cups with a single, tiny pinprick hole, on damp-never wet-vermiculite.
Watch for the silent drama within the silk. In a few weeks, you may see tiny, pale shapes moving inside, the post-embryos beginning their development. This is your reward for patience. Resist the urge to open the sac to check progress; trust your setup and the spider’s natural timing. The long wait, culminating in that first glimpse of dozens of tiny spiderlings, is one of the hobby’s greatest rewards.
Further Reading & Sources
- giantspiders.com – Breeding
- Incubation | Theraphosids (tarantulas) of the World. Keeping and breeding in captivity
- Watch 1,400 Tarantula Babies Emerge from Their Mother’s Egg Sac | Live Science
Arlo is a lifelong arachnid enthusiast who believes tarantulas are the world’s most misunderstood roommates. With years of hands-on experience in tarantula care, habitat setup, and species behavior, Arlo combines expert knowledge with a dash of humor to make spider ownership less scary and a lot more fascinating. From choosing the right enclosure to understanding why your eight-legged buddy is doing that weird little pose again, Arlo is here to help you become the best tarantula parent you can be, without getting tangled in the web of misinformation.
Breeding Tarantulas