
What Happens After Tarantula Mating? (Post-Mating Care for Species from G. rosea to P. murinus)
Tarantula mating is a fleeting, high-stakes encounter where the male’s survival is never guaranteed, but the female’s subsequent journey into motherhood demands your focused attention and adjusted care. From my years breeding everything from docile Chilean Rose Hairs to defensive Orange Babbler Tarantulas, I’ve learned that the real work begins once the male has fled or been accepted as a post-copulatory snack. This guide breaks down the critical behavioral shifts and husbandry changes you must implement to support a gravid female, from recognizing successful mating to safeguarding her precious egg sac.
Quick Stats:
- Post-Mating Focus: Female hydration, enclosure stability, and minimal disturbance.
- Typical Gestation: 4 weeks to 6 months, highly species and temperature-dependent.
- Key Risk: Female stress leading to egg sac abandonment or cannibalism.
Based on my experiences with Rosie’s stubborn fasts and Goliath’s humidity needs, I promise this guide provides the specific, step-by-step husbandry to navigate the precarious path from mating to your first clutch of slings.
The Male’s Fate: Post-Mating Risks and Behavior
The male’s role in this drama reaches its climax the moment his pedipalps make contact. What follows is a tense and often dangerous denouement.
Immediate Risks: Escape and Sexual Cannibalism
His primary objective is now to disengage and flee. Success is not guaranteed. I have watched males, like my old P. murinus “Flash,” execute flawless, lightning-fast retreats. I have also seen less fortunate suitors become a post-coital meal. Sexual cannibalism is a genuine, frequent outcome in the wild and in captivity, driven by the female’s instinctive predatory response and the male’s depleted state.
The risk is highest with highly defensive or food-motivated females. My burly T. stirmi, Goliath, once sent a male scrambling with a cloud of urticating hairs before he even made contact. Not all species carry equal risk. The often docile G. rosea, like my Rosie, may simply ignore the male after mating, allowing a calm exit.
- High-Risk Scenarios: Aggressive species (e.g., OBTs, some Phormictopus), hungry females, or an enclosure that offers the male no clear escape route.
- Lower-Risk Scenarios: Docile species, well-fed females, and setups with ample open space or a pre-made male escape path.
Male Post-Mating Care and Long-Term Outlook
If the male survives, his care becomes critical. He is exhausted, often physically damaged from the female’s fangs or his own frantic escape, and his biological purpose is fulfilled.
Immediately move him to a quiet, secure recovery enclosure with a shallow water dish and no prey items for at least 24-48 hours. He needs hydration and absolute calm. Observe closely for injuries, particularly to his legs or the crucial pedipalps.
The long-term outlook for a post-mature male is a matter of months, not years. His focus shifts from eating to wandering, as his instinct to find another female persists. You may notice a gradual decline:
- Complete loss of appetite, even for favored prey.
- Increased, aimless pacing.
- Development of a “bald spot” on the abdomen from frequent contact drumming.
- General lethargy and loss of coordination, often culminating in a curled “death curl.”
This is the natural end of his cycle. Providing peace, water, and a stress-free environment is the most compassionate care you can offer during his final days.
The Female’s Journey: From Mating to Gravidity
For the female, the work is just beginning. Her behavior post-mating offers the first clues to the mating’s success.
Signs of Successful Spermatophore Transfer and Fertilization
You did not see the microscopic transfer, but her actions hint at it. A definitive sign is the female performing a “ventral rub” hours later, where she lowers her abdomen to the substrate, possibly cleaning away residual spermatophore material.
The most reliable indicator is a pronounced increase in appetite weeks to months after mating, as she begins building resources for egg production. My typically finicky Rosie, who once fasted for 14 months, began taking prey ravenously after a successful pairing. This “building phase” can last several molts, as she stores nutrients in her body.
- Immediate Sign: Ventral rubbing of the abdomen post-mating.
- Short-Term Sign: A return to normal behavior, then a voracious feeding response.
- Long-Term Sign: A significant increase in abdominal size over subsequent months, distinct from pre-molt plumpness.
Behavioral Changes and Health Monitoring
As she becomes gravid (egg-bearing), her routine shifts. She may seal herself within her burrow or web fortress, creating a silent, private nursery. For terrestrial species, this often means heavy webbing at the burrow entrance or a complete retreat. My Goliath, a prolific webber, once completely shrouded her entire enclosure in a dense silk curtain for weeks.
Health monitoring is paramount during this period. Ensure her water dish is always full and overflow it slightly to maintain a localized humidity spike, crucial for species like Theraphosa. Continue offering food, but remove uneaten prey immediately to avoid stress or injury to the reclusive female.
Do not attempt to excavate or disturb her. The stress can cause her to abandon or consume her egg sac. Your role shifts from active keeper to observant guardian. Watch for subtle signs: the faint sound of her moving in her sealed chamber, the refusal of food, the patient, slow enlargement of her abdomen. This quiet vigil is the heart of breeding-respecting her process while ensuring her environment remains flawless.
Caring for a Gravid Female Tarantula
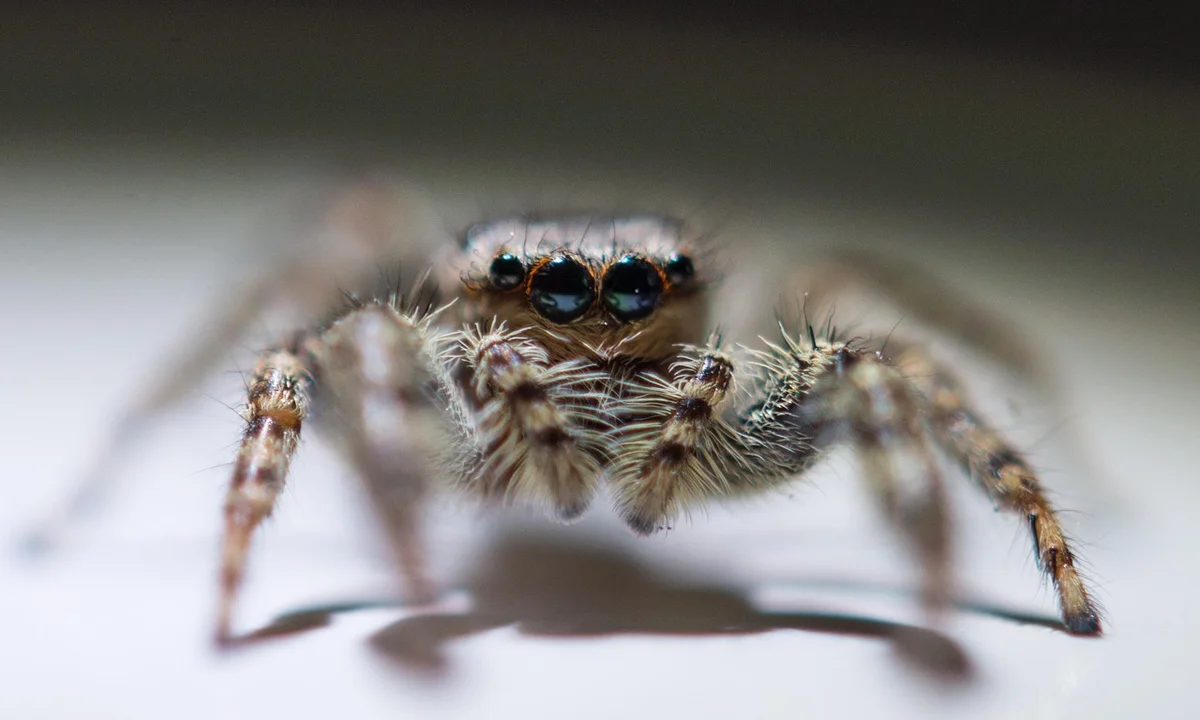
After a successful mating, your female tarantula enters a critical gravid phase. Her body will dedicate immense resources to developing eggs. Your care shifts from routine maintenance to creating a stable, stress-free nursery that supports her health and the viability of her future offspring (especially when it comes to birthing and caring for the spiderlings). I’ve guided several of my own tarantulas, like Rosie and Goliath, through this process, and attentive husbandry makes all the difference.
Optimizing Enclosure Conditions for Egg Development
Think of the enclosure as an incubator. Your goal is to provide consistent, species-specific parameters that mimic the ideal conditions for egg development inside her abdomen. Fluctuations can lead to infertility or the female reabsorbing her eggs.
Focus on these three pillars:
- Humidity: This is non-negotiable. Eggs require moisture. For moisture-dependent species like my Theraphosa stirmi (Goliath), I maintain 80-85% humidity. For arid species like Grammostola rosea (Rosie), 60-70% is sufficient. Use a digital hygrometer, not guesswork.
- Temperature: A steady warmth of 75-80°F (24-27°C) gently accelerates metabolic processes. Avoid heat mats under the tank; use room ambient heating or a space heater for the room. Sudden spikes are dangerous.
- Substrate and Space: Provide a deep, packable substrate like coconut fiber or peat moss. The female will often excavate or modify her hide to prepare a laying site, so a secure, darkened retreat is essential. My OBT, Flash, webbed every inch of her cork bark hide into a fortified silken chamber.
Feeding and Disturbance Protocol
A gravid female’s appetite can be unpredictable. Some eat ravenously, others refuse food entirely as laying approaches. Offer pre-killed prey, like a gutted cricket or small roach, once a week. Always remove uneaten food within 24 hours to prevent mold and stress.
Minimizing disturbance is the most crucial aspect of post-mating care. This is the ultimate “Look, Don’t Touch” scenario. Vibrations, bright lights, and unnecessary enclosure openings can cause her to abandon her nest site or damage her eggs. I perform water changes using long tongs and avoid any decor rearrangement. Remember, a defensive tarantula is a stressed tarantula. My Burgundy Goliath became a prolific hair-kicker during her gravid period, a clear sign she wanted absolute privacy. These practices reflect the core principles of ethical tarantula breeding: prioritizing welfare, minimizing stress, and respecting the spider’s natural behaviors.
The Egg Sac: Creation, Protection, and Removal
The appearance of a silk egg sac is the breeding project’s pinnacle moment. It is a delicate, football-shaped cradle containing hundreds of potential spiderlings. Witnessing a female tend her sac is a profound lesson in arachnid parental care, a behavior far more complex than many assume. To identify one, look for a pale, football-shaped silk sac anchored to the web or tucked into crevices. It is typically held close by the female until the spiderlings emerge.
Timeline from Mating to Egg Sac Laying
The interval varies dramatically by species, size, and conditions. From my records, fast-growing species like Pterinochilus murinus (OBT) can lay in 4-6 weeks. Slower species like Grammostola can take 3-8 months. Rosie took a full five months after mating. Warmer temperatures and ample feeding often shorten this timeline, but patience is your primary tool.
Female Parental Care and Egg Sac Protection
The female spins the sac in the safety of her hide, often over several hours. She will then guard it ferociously. She regularly turns the sac with her fangs and pedipalps to prevent the eggs from clumping and to ensure even development, a behavior I’ve observed in my own females during cautious peek-ins. She may repair minor silk tears. Disturbing her now risks her eating the sac-a survival response to perceived threat. This is not a failure, but a natural reaction you must work to prevent.
Step-by-Step Guide to Safe Egg Sac Removal
Many breeders remove the sac for artificial incubation to boost spiderling survival. This is a delicate operation that prioritizes safety for both you and the tarantula. Appropriate precautions and gentle handling are essential when safely remove and incubate the egg sac. Always follow established guidelines to minimize stress and promote healthy spiderlings.
- Prepare Your Incubator: Have a deli cup with slightly damp, sterile vermiculite ready. Poke small air holes in the lid. Place it in a warm, dark spot.
- Lure the Female Away: Gently use long, soft-tipped forceps to offer a pre-killed prey item at the opposite end of the enclosure. The goal is to distract her, not to provoke.
- Swift and Gentle Removal: Once she is briefly occupied, use a separate pair of forceps or a soft paintbrush to carefully lift the sac from its anchor points. Move with calm precision; sudden jerks can damage the eggs inside.
- Immediate Transfer: Place the sac directly into the prepared incubator. Do not open or examine it now. Close the lid.
- Minimize Fallout: Secure the female’s enclosure and leave her be. She may search for the sac briefly. Offer water and peace.
I once removed an egg sac from my OBT, Flash. Her incredible speed made the process a tense, focused dance. Wearing gloves and using long tools was non-negotiable. Artificial incubation is a common practice, but it requires respect for the animal’s stress thresholds and your own safety around a defensive mother.
Incubating the Egg Sac: From Fertilization to Emergence
This is where patience becomes your primary tool. After the female creates her silken nursery, your role shifts from observer to guardian. The egg sac is a living ecosystem, and its environment is everything.
Artificial Incubation Setup
I always recommend artificial incubation. It protects the sac from the mother’s potential stress-induced cannibalism and lets you monitor progress. My method uses a simple, sterile deli cup. Some keepers also weigh bioactive versus sterile enclosures. This full comparison helps you decide which approach best suits your setup.
- Prepare the Incubation Chamber: Use a clean plastic container with a secure lid. Poke several small air holes in the sides, never the top, to avoid dripping condensation.
- Create a Cradle: Line the bottom with slightly damp (not wet) paper towel or a layer of moist vermiculite. This maintains ambient humidity around 75-80%.
- Secure the Sac: Gently remove the sac from the mother’s enclosure using soft, long tweezers. Place it in a smaller, ventilated vial or deli cup, cushioned with dry tissue. Then, place that smaller container inside your main incubation chamber. This double-container method prevents the sac from touching any wet surfaces.
- Find the Right Spot: Place the chamber in a quiet, dark cupboard where temperatures stay a consistent 78-82°F (25-28°C). Fluctuations can be deadly.
The silence of the incubation chamber is deceptive; inside, hundreds of lives are developing through their embryonic stages.
Monitoring Development and Viability
Resist the urge to open the sac for weeks. Candle it instead. In a dark room, shine a penlight through the silk. After 3-4 weeks, you should see a clustered, grainy mass-the eggs. By weeks 5-6, they transform into tiny, recognizable embryos with a distinct pearlescent sheen.
Signs of trouble are clear. A sour smell means fungal attack; the sac must be removed immediately to save the rest. If the contents appear shrunken or desiccated, your ambient humidity is too low.
I learned this the hard way with an old-world sac; one peek introduced contaminants and cost me the entire clutch. Now, I only open a sac once I see legs moving inside against the silk, indicating they are post-embryos and nearly ready.
Spiderling Emergence and Early Care
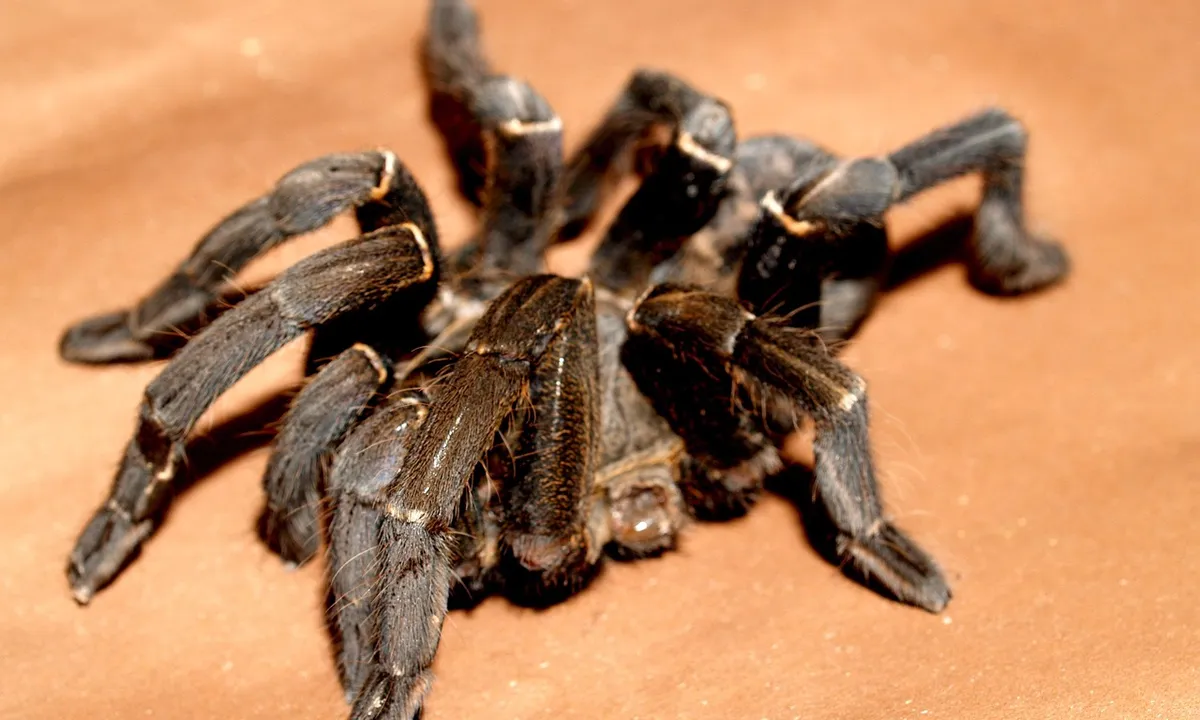
The first wiggle inside the sac is a thrill that never fades. You are about to meet an entire colony of lives you helped shepherd into the world.
The Moment of Emergence and Dispersal
The mother will eventually open the sac, or you will carefully cut it open when most are mobile inside. What emerges are not true spiderlings yet, but post-embryos-pale, legless, and grub-like. Within days, they molt into first instar (1i) spiderlings, miniature versions of the adults. For those curious about tarantula reproduction, a step-by-step guide covers courtship and mating, as well as how females produce and guard egg sacs. This helps explain how the post-embryos develop into spiderlings and the reproduction process.
Their first instinct is dispersal. In the wild, this avoids cannibalism and spreads genes. In your incubator, it means a sudden explosion of movement. You must be prepared; have all your housing ready before you open that sac. A fast species like an OBT’s offspring will scatter in a heartbeat.
Use a soft, dry paintbrush to gently guide them into their individual enclosures. Avoid breathing directly on them-the force of your breath can injure them.
Setting Up Your First Spiderling Enclosures
Forget adult-sized tanks. Spiderlings need security and accessible moisture.
- Containers: I use 2-ounce deli cups or small dram vials. Provide ample cross-ventilation via melted pin holes.
- Substrate: A shallow layer of slightly moist coconut fiber or peat. It should hold a burrow but not be soggy.
- Furnishings: A single, curved piece of cork bark or a dried leaf offers a hiding spot. This reduces stress immensely.
- Hydration: Never use a water dish. Instead, gently drip water down one side of the enclosure every 3-4 days to create a damp corner. They will drink from the droplets.
- Feeding: Start with pre-killed pinhead crickets or chopped mealworm segments. Remove uneaten food within 24 hours to prevent mold.
Watching a spiderling take its first meal, that slow, deliberate strike on a prey item almost as big as itself, is a masterclass in instinct and survival. You’ll learn to read the tarantula’s food dance—the subtle cues it shows when it’s ready to eat. Keep them in a warm, stable area and disturb them only for maintenance. With this careful start, your spiderlings will be on their way.
The Full Timeline: From Mating to Independent Spiderlings
Following a successful pairing, the clock starts ticking on one of nature’s most meticulous processes. The journey from mating to free-roaming spiderlings is a marathon, not a sprint, often spanning two to six months depending heavily on species and temperature. I’ve waited with Rosie for a seemingly endless 90 days, while my humidity-loving T. stirmi, Goliath, progressed faster in his warm, moist enclosure. Patience isn’t just a virtue here; it’s a requirement, especially since tarantulas aren’t always more active even during their mating season.
Phase-by-Phase Breakdown of the Post-Mating Process
Think of this process in four distinct acts, each with its own husbandry demands and behavioral cues. Your role shifts from observer to guardian of a delicate environment.
Phase 1: Pre-Laying (Weeks 1-6)
The female’s abdomen will noticeably swell as she develops eggs. You must provide absolute peace and consistent, ideal conditions; any major stress can cause her to reabsorb her eggs, ending the cycle prematurely. Feeding responses vary-some stop eating, others take prey ravenously. I always offer food but remove it uneaten within 24 hours to prevent pest issues.
Phase 2: Egg Sac Construction & Sealing (Usually 4-12 Weeks Post-Mating)
This is the pivotal moment. The female spins a silken hammock, lays hundreds of eggs into it, and deftly wraps it into a tight, pill-shaped sac. The architecture of this sac is incredible-multiple layers of silk that regulate humidity and protect against microbes. Species like my OBT, Flash, will often incorporate substrate and webbing into a dense, fortress-like nursery. Do not disturb her. Increased webbing and a sudden, reclusive hiding period are your clues.
Phase 3: Guarding and Incubation (6-10 Weeks Typically)
The mother cradles the sac, turns it regularly to prevent yolk adhesion, and fiercely defends it. Maintaining stable temperature (75-80°F for most species) and appropriate humidity is your sole job now; fluctuations are the greatest threat to developing eggs. For arid species like G. rosea, I provide a gentle, shallow water dish. For tropicals like Goliath, I maintain 80% humidity through moist substrate and careful ventilation.
- Do not attempt to remove the sac during this phase unless you are an experienced breeder with a clear reason (e.g., maternal abandonment or visible mold).
- Do not shine bright lights into the enclosure or cause vibrations.
- Do monitor the female for signs of distress or sac abandonment from a respectful distance.
Phase 4: Eclosion and First Instar (I1) Spiderlings
Inside the sac, eggs hatch into immobile post-embryos, which then molt into tiny, first-instar (I1) spiderlings. You’ll know this phase has begun when you see the mother carefully tear open the sac, revealing a writhing mass of miniature tarantulas. They will remain with her for days to a week, living off yolk reserves before their first molt (to I2) inside the nursery web. This marks the start of the spiderlings’ molting cycles, which they’ll repeat as they grow. Understanding these molts helps explain their development and the care they require during each stage.
Assessing Outcomes and Offspring Viability
Not every mating yields a viable sac, and not every sac yields thriving spiderlings. Dispassionate observation is key to assessing your results.
Fertile vs. Infertile Sacs
An infertile “phantom” sac is common. It may be smaller, discarded carelessly, or eaten by the female within a few days. A fertile sac is almost always guarded with relentless dedication and appears robust and tightly woven. If you must pull a sac for artificial incubation, its weight and a faint, rustling sound from within can indicate life.
The Mold Threat
Mold is the arch-nemesis of the egg sac. It appears as fuzzy green, black, or white spots. Poor ventilation combined with excessive moisture is the usual culprit, highlighting why a one-size-fits-all humidity approach fails. A slightly damp corner for arid species is safer than a soaked substrate. If mold infiltrates the inner layers, the sac is often lost.
Maternal Care Spectrum
Behavior varies wildly. Old World species like P. murinus can be surprisingly good mothers but are dangerously defensive. New World heavyweights like Theraphosa are often clumsy, sometimes accidentally harming the sac. Know your species’ tendencies-this isn’t indifference, but instinctive programming with varying degrees of finesse. My docile Rosie once turned frantic defender of her sac, a stark contrast to her usual “pet rock” demeanor.
Spiderling Readiness
True independence begins at the second instar (I2), after they’ve molted away from the nursery web. You’ll see them start to disperse, their exoskeletons hardening and taking on true color-this is your cue to prepare for separation. They are now ready for individual housing or communal setups, depending on species, and will accept pinhead crickets or pre-killed prey. The incredible post-mating journey is complete, and a new chapter of care begins.
Common Questions
Does the female tarantula always eat the male?
No, sexual cannibalism is not a guaranteed outcome. Whether the male is eaten depends on the species’ temperament, the female’s hunger level, and the male’s speed and agility. In many cases, a healthy male can disengage and escape successfully after mating, especially with more docile species.
What are the signs a female tarantula is gravid (carrying eggs)?
A key early sign is a ventral rub, where she drags her abdomen on the substrate shortly after mating. In the following weeks, you may notice a significant increase in her appetite and abdominal swelling. As laying approaches, she often becomes reclusive, sealing off her burrow or hide with heavy webbing.
How should you care for a gravid female tarantula?
Your primary goals are stability and minimal stress. Ensure her enclosure maintains a consistent, species-appropriate temperature and humidity. Continue offering pre-killed prey, but remove it promptly if uneaten. Most importantly, avoid any unnecessary disturbances, vibrations, or enclosure intrusions to prevent egg abandonment.
When and how should you remove an eggsac from the mother?
Removal is typically done for artificial incubation and is best attempted 2-3 weeks after she creates it. The process involves carefully luring the female away from the sac with food and then swiftly but gently using tools to lift the sac from its anchors. This should only be done if you are prepared with a proper incubation setup. Common problems with tarantula egg sacs include mold, fungus, or desiccation, which can jeopardize hatching success. If you notice these issues, review your incubation setup and seek guidance from reputable care resources or professionals.
How do you care for spiderlings after they leave the eggsac?
House them individually in small, ventilated containers with a slight moist substrate and a tiny hide. They hydrate by drinking water droplets gently dabbed on the enclosure walls, as water dishes are a drowning risk. Offer pre-killed prey, such as pinhead cricket parts, and remove any uneaten food within a day.
How long does the entire post-mating process take, from mating to independent spiderlings?
The timeline varies dramatically by species and temperature, typically ranging from 2 to 6 months total. This period encompasses the female’s gestation, egg sac incubation, and the spiderlings’ development to their second instar (I2) stage, when they are ready to live independently.
The Long Game of Legacy
The single most critical factor for a post-breeding female is hydration. A well-hydrated female is a metabolically efficient female, better equipped to produce a robust egg sac and survive the energy-intensive period of guarding it. For moisture-dependent species like my Goliath (T. stirmi), I keep the substrate damp enough to squeeze a drop of water. For my arid Rosie (G. rosea), I simply ensure her water dish is perpetually full.
Now, your role shifts from active participant to quiet steward. Watch for the deliberate architecture of a retreat, the subtle thickening of silk in a burrow’s entrance. She may become reclusive or restless, her appetite a memory. This is not inactivity, but profound biological work. I have spent hours simply observing the quiet focus of a gravid female, knowing that patience is the most valuable resource in this hobby. Your reward is not immediate, but in the silent promise of continuation, a cycle completed in the privacy of her enclosure.
Further Reading & Sources
- Tarantula Breeding: The Basics of Pairing and Mating Your Ts | Tarantula Forum
- Guide to breeding tarantulas? | Arachnoboards
- When Is Tarantula Mating Season & What To Look Out For
Arlo is a lifelong arachnid enthusiast who believes tarantulas are the world’s most misunderstood roommates. With years of hands-on experience in tarantula care, habitat setup, and species behavior, Arlo combines expert knowledge with a dash of humor to make spider ownership less scary and a lot more fascinating. From choosing the right enclosure to understanding why your eight-legged buddy is doing that weird little pose again, Arlo is here to help you become the best tarantula parent you can be, without getting tangled in the web of misinformation.
Breeding Tarantulas