
How to Assemble a DIY Tarantula Enclosure on a Budget
Building a custom enclosure is the cornerstone of responsible tarantula keeping, transforming a simple container into a secure, stress-free habitat that prioritizes the animal’s well-being over flashy aesthetics. This guide cuts through the confusion of online tutorials and overpriced pet store kits. I’ve housed hundreds of tarantulas, from fast Old Worlds like my OBT Flash to humidity-loving giants like Goliath, in DIY setups that cost less than a fancy coffee. The truth is, a successful enclosure isn’t about expensive materials; it’s about understanding ventilation, security, and space.
- Tools Required: Utility knife, drill, silicone sealant, measuring tape
- Estimated Cost: $10 – $30 USD
- Time to Complete: 1-2 hours
- Skill Level: Beginner-friendly
This guide will provide the exact methods I use to create safe, functional homes for tarantulas at every life stage, ensuring your construction skills support a lifetime of observant care.
Why Choose a DIY Tarantula Enclosure?
Pre-made glass terrariums are beautiful, but they are not the only-or often the best-option for housing your spider. Building your own enclosure places you in direct control of the three pillars of good husbandry: safety, environment, and cost. This hands-on approach lets you engineer a perfect home that a mass-produced tank rarely can.
Cost Comparison: DIY vs. Store-Bought Terrariums
A standard 10-gallon glass aquarium can cost between $40 and $60, and that’s before you buy a secure lid, which is non-negotiable. For my large terrestrial species like Goliath, I needed something wider, and commercial options exceeded $100. My solution was transformative.
- Store-Bought Glass Tank: $40-$150+, often with inadequate ventilation or insecure lids.
- DIY Plastic Enclosure: A Sterilite or Rubbermaid container costs $5-$20. With careful modification, it becomes a perfect, secure habitat.
- The Real Savings: The $30+ you save per enclosure can be invested in better substrate, cork bark hides, or even another tarantula.
I house my docile Chilean Rose Hair, Rosie, in a modified 10-quart storage box. The total cost was under $15, including the cost of the drill bits used to add ventilation. That budget-friendly choice allowed me to allocate funds toward creating a more naturalistic, engaging setup for her.
Customization for Your Tarantula’s Personality
Every tarantula species has unique needs, and individual spiders have distinct behaviors. A generic enclosure forces the animal to adapt. A DIY home lets you adapt the environment to the animal.
- For my moisture-loving T. stirmi (Goliath), I used a deep, wide plastic tub and drilled ventilation low on the sides to maintain a humid microclimate at substrate level.
- For my defensive, web-happy OBT (Flash), I selected a taller container and installed anchor points on the lid for his dense silk tunnels, reducing his stress.
- For an arid species like my G. rosea, I can add extensive cross-ventilation to prevent stagnant, moist air, mimicking her native dry slopes.
This level of customization is not a luxury; it’s a direct contributor to your tarantula’s long-term health and observable natural behaviors.
Understanding Your Tarantula’s Essential Habitat Needs
Before you modify a single container, you must understand what your specific tarantula requires to thrive. Getting this wrong can lead to stress, difficulty molting, or respiratory issues. Substrate selection is a common pitfall that can undermine those needs. To help you avoid problems, we’ll cover seven types of substrate mistakes you should never use with your tarantula.
Terrestrial vs. Arboreal: Space and Orientation
This is the most critical distinction. A terrestrial tarantula, like a Chilean Rose Hair or a Goliath Bird Eater, lives on the ground. An arboreal species, like a Pink Toe (Avicularia avicularia), lives in trees.
- Terrestrial Setup: Priority is floor space. The enclosure’s length and width should be at least 3 times the spider’s legspan. Height is a danger-too much vertical space and a fall can rupture their abdomen. I keep no more than 1.5 times the legspan in height for my terrestrial pets.
- Arboreal Setup: Priority is height. These spiders need vertical space to climb and build their funnel webs on cork bark or branches. The enclosure should be tall, with anchor points near the top.
Choosing the wrong container orientation is a common and dangerous rookie mistake that DIY lets you avoid completely.
The Critical Role of Ventilation and Humidity
Ventilation and humidity exist in a delicate balance. Poor airflow leads to mold and stagnant air, while too much ventilation desiccates a moisture-dependent species.
I use a power drill with small (1/8″ to 1/4″) bits to create ventilation holes. The pattern is strategic.
- For dry species: Create cross-ventilation with rows of holes on opposite sides of the container, near the top and middle.
- For humid species: Place most holes on the upper half or lid of the enclosure. This allows fresh air in while letting the moist air from the damp substrate linger below.
You cannot guess humidity needs; you must research your species’ native environment and replicate the air flow that environment would have. My Goliath’s tub has a “humidity pocket” because of this precise hole placement.
Selecting a Safe and Secure Enclosure Material
The material of your DIY enclosure must be non-toxic, escape-proof, and easy to modify. Not all plastics are created equal.
- Polypropylene (PP #5) or High-Density Polyethylene (HDPE #2): These are the gold standards. They are food-safe, durable, and don’t leach chemicals. Most opaque storage containers are made from these.
- Avoid PVC and Styrene: These can be brittle and may off-gas, especially when drilled, which is a hidden risk.
- Security is Key: Lids must seal firmly. I use bungee cords or small luggage straps on the enclosures for my stronger species, like Goliath, as a failsafe. An escaped tarantula is often a dead tarantula, and the stress it causes the animal-and you-is entirely preventable. I learned this lesson early when a poorly secured lid led to a heart-pounding search for a juvenile.
Gathering Your DIY Materials and Tools
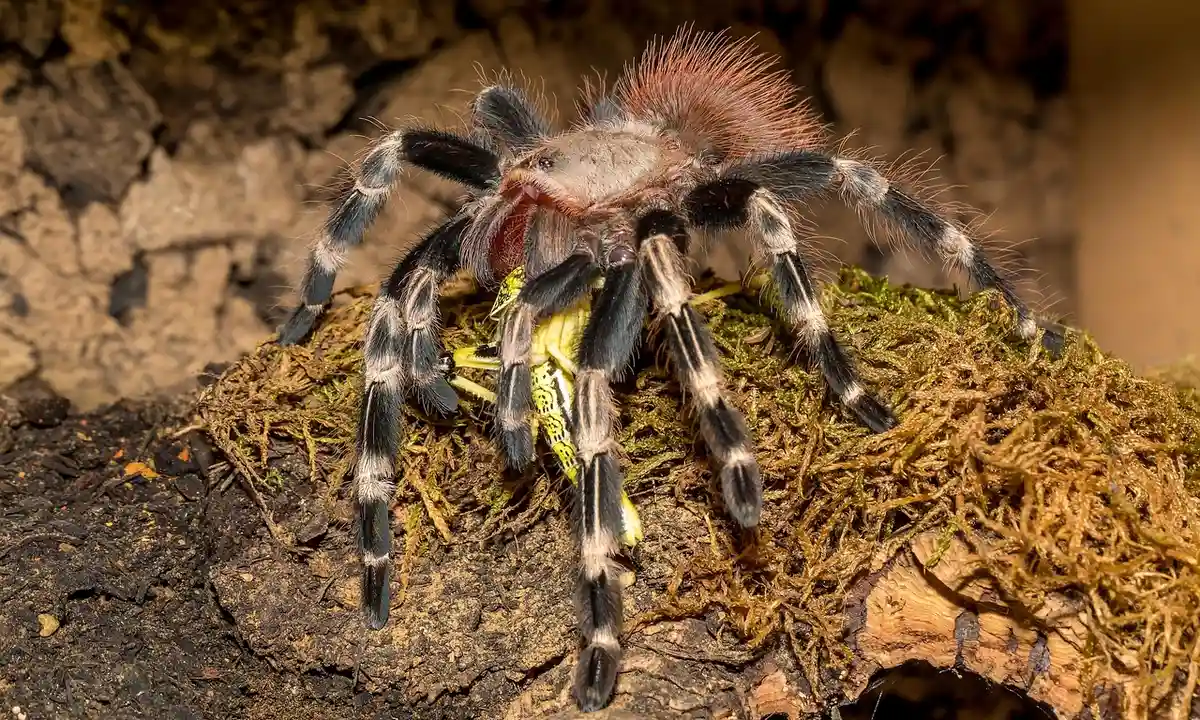
The Budget Materials List: From Tubs to Substrate
A successful build starts with smart sourcing. For enclosure walls, clear plastic storage containers are my unequivocal top pick. I rely on Sterilite or Rubbermaid shoeboxes for slings and juveniles, moving up to 10-gallon totes for adults like my docile G. rosea, Rosie. They are durable, affordable, and provide excellent visibility.
Your substrate choice directly impacts humidity and burrowing success. For most species, a mix of coconut fiber (coir) and pesticide-free topsoil creates a firm, moisture-retentive base. My Burgundy Goliath, T. stirmi, requires consistently high humidity around 80%, so I use deep, packed coir to hold that crucial moisture. Avoid sands and pure potting soils, which can collapse or grow mold.
- Enclosure: Clear plastic storage container with a secure, locking lid.
- Substrate: Coconut fiber brick, expanded with water. Add topsoil for firmness in arid species setups.
- Hides: Cork bark flats or rounds. Terracotta pot halves work but sand the sharp rim.
- Decor/Anchors: Plastic or silk plants, sterilized driftwood, or PVC pipe segments for web anchors.
- Water Dish: A bottle cap for slings, a shallow ceramic dish for adults.
Essential Tools for Assembly and Modification
You do not need a workshop. My core toolkit fits in a single drawer. A cordless drill with a 1/8-inch to 1/4-inch bit is indispensable for creating clean, controlled ventilation holes quickly. For smaller projects, a soldering iron melts perfect, smooth-edged holes in plastic, a technique I use for all my OBT Flash’s enclosures to prevent web snagging.
Never underestimate the value of a sharp utility knife and a roll of strong vinyl tape. The knife scores plastic for lid modifications, while the tape secures any internal wires or gauges safely outside the enclosure, eliminating a curious tarantula’s pinch point. Always wear safety glasses during drilling or melting.
- Ventilation: Cordless drill & bits, or a soldering iron.
- Cutting/Smoothing: Utility knife, fine-grit sandpaper.
- Safety & Securing: Safety glasses, vinyl tape, a reliable ruler.
- Substrate Prep: Large bucket for mixing, spray bottle for misting.
Step-by-Step Assembly: Building Your Tarantula’s Home
Step 1: Planning and Measuring Your Enclosure Layout
Before making a single hole, consider your tenant’s lifestyle. A terrestrial Chilean Rose Hair needs floor space exceeding twice its leg span horizontally. My 15-year-old Rosie lives in an enclosure 18 inches long, which provides ample roaming room for her sedentary nature without causing stress. An arboreal or heavy webber, like an OBT, requires less floor space but more vertical height and anchor points.
Mark all planned modifications with a dry-erase marker on the outside of the plastic. I sketch ventilation zones on the upper sides and lid, and mark exactly where the hide and water dish will sit to visualize the final layout and avoid clutter. This prevents over-drilling and ensures a functional environment.
Step 2: Creating Safe and Adequate Ventilation
Cross-ventilation is non-negotiable. Using your drill or soldering iron, create multiple small holes along the upper third of two opposite long sides of the enclosure. For my moisture-loving T. stirmi, I also add a single row of holes near the substrate level on one side to encourage air flow without dropping humidity drastically (ensure proper ventilation and security). Holes should be no larger than the tarantula’s carapace to prevent escape.
The goal is a gentle air exchange that prevents stagnant, mold-friendly conditions. You should hear no hiss of air when you close the lid, but a faint, fresh scent of substrate should greet you when you open it days later.
Avoiding Common Ventilation Mistakes
More holes is not always better. A rookie error is drilling the entire lid, which sucks all humidity out and can dehydrate a molting tarantula. I learned this the hard way with a juvenile A. avicularia that struggled to molt in an overly vented cage; now I am meticulous with hole placement. Another mistake is placing holes only on the lid, which creates a “chimney effect” and fails to remove stale air from the enclosure’s bottom.
- Do not: Cluster holes only on the lid.
- Do not: Use holes so large a leg could hook into them.
- Always: Sand the interior of each hole smooth to prevent micro-cuts.
Step 3: Preparing and Adding the Substrate Base
Expand your coconut fiber brick in warm water, then squeeze it until it is damp, not dripping. For arid species like G. rosea, I let the substrate dry completely for several days before use. The ideal consistency is where a handful clumps briefly but breaks apart without releasing water, protecting your tarantula from fungal issues.
Add substrate to a depth that suits the species. For terrestrial burrowers, this should be at least the leg span of the tarantula. I provide my Goliath bird eater with a full 8 inches of packed substrate, which allows for natural burrowing behavior and helps maintain that crucial high-humidity microclimate. Pack it down firmly to prevent collapses. When considering depth, remember that deep vs shallow substrate is species-specific. Some tarantulas thrive with deep burrows, while others do best in shallower, more open setups.
Step 4: Installing Hides, Anchors, and Decor
Place the hide first, burying its edges slightly for stability. Position it away from the water dish to create distinct humidity zones. For my defensive OBT Flash, I anchor cork bark vertically against the back wall, providing a preferred retreat and a foundational frame for his extensive, orange-silk webbing. This reduces his stress by offering immediate security.
Add plastic plants or sticks, securing them in the substrate or to decor with non-toxic hot glue if needed. Every anchor point you provide is an opportunity for web-building, which is a clear sign of a settled, content tarantula in its new home. For arboreal tarantula webbing, these anchor points are essential for safe, elevated webbing and exploration. Providing secure anchors helps mimic a natural canopy and supports healthy, stress-free behavior. Keep decor simple to avoid injurious falls and to make spotting your pet easier.
Step 5: Final Safety Checks and Escape-Proofing
Run your fingers along every interior seam and hole. Any sharp plastic burr must be sanded smooth. The most critical test is the lid seal; a determined tarantula, especially a fast Old World species, can exploit a gap you’d swear was too small. I test this by trying to slide a piece of paper between the lid and the tub-if it slides, so could a leg, and eventually, the spider.
Do a 48-hour “dry run” before introducing your tarantula. Place the fully assembled enclosure in its intended spot, add water to the dish, and monitor the humidity with a gauge to ensure your ventilation scheme creates the stable environment you planned for—it’s an essential part of setting up the enclosure correctly. This final wait is what separates a hasty setup from a secure, species-appropriate home built on a budget.
Adding Functional and Aesthetic Accessories
DIY and Budget-Friendly Decor Ideas
An empty box is a prison; a furnished enclosure is a home. Your tarantula doesn’t need expensive resin castles. It needs functional structures that provide security and enrichment, which you can source creatively. The goal is to create a landscape that minimizes stress by offering ample hiding opportunities, reducing open space, and facilitating natural behaviors.
Start with the cornerstone of any good setup: a hide. Terrestrial species like my Rosie require a secure, appropriately-sized cave.
- Upscale the Humble Flowerpot: A simple terracotta pot, either whole or carefully broken in half to create a cavern, is my top budget pick. Bury it partially in the substrate for stability.
- Repurpose Packaging: Clean, plastic food containers with an entrance carved out work perfectly. I’ve used yogurt cups and margarine tubs for slings for years. Just sand any sharp edges.
- Forage for Cork: While whole cork bark rounds can be pricey, many reptile shops sell bags of broken cork bark pieces. These irregular chunks create perfect, naturalistic crevices.
Next, add visual complexity and anchor points with foliage. My OBT, Flash, will turn any object into a web anchor.
- Silk or Plastic Plants: Dollar store artificial plants are a goldmine. Soak them in hot, soapy water, rinse thoroughly, and trim to size. They add color and break up sightlines.
- The Clean Stick Method: Collect hardwoods like oak or maple from pesticide-free areas. Bake branches in your oven at 250°F for about an hour to sterilize them. This provides natural climbing structures.
Finally, consider a water dish. A shallow bottle cap works for small tarantulas, while a heavier ceramic dish prevents tipping for larger ones like my Goliath. Every accessory should pass a safety check: no sharp points, non-toxic materials, and stable enough not to collapse if your tarantula decides to remodel. To complement water dishes, remember that essential tarantula handling tools and safety equipment matter just as much. A basic kit might include soft-tipped forceps, a secure transport container, and non-slip gloves.
Monitoring Climate: Hygrometers and Thermometers
Guessing humidity is a recipe for disaster. My *T. stirmi* (Goliath) thrives at 75-85% humidity, while my *G. rosea* (Rosie) would develop mold in those conditions. An accurate digital hygrometer/thermometer combo is the single most important tool for preventing health issues related to incorrect moisture and temperature.
Skip the analog dials stuck to the glass. They are notoriously inaccurate. Invest in a small digital unit from a pet or hardware store. I use ones with a probe, placing the main unit outside the enclosure and threading the probe inside. This protects the electronics from moisture and curious tarantula feet.
Placement is key. For terrestrial species, position the probe just above the substrate surface. For arboreal setups, place it in the middle third of the enclosure’s height. Take readings in the morning and evening to understand the daily fluctuation. Your goal is to maintain a stable gradient, not a single, rigid number, mimicking the subtle shifts they’d experience in nature.
Specialized DIY Enclosure Considerations
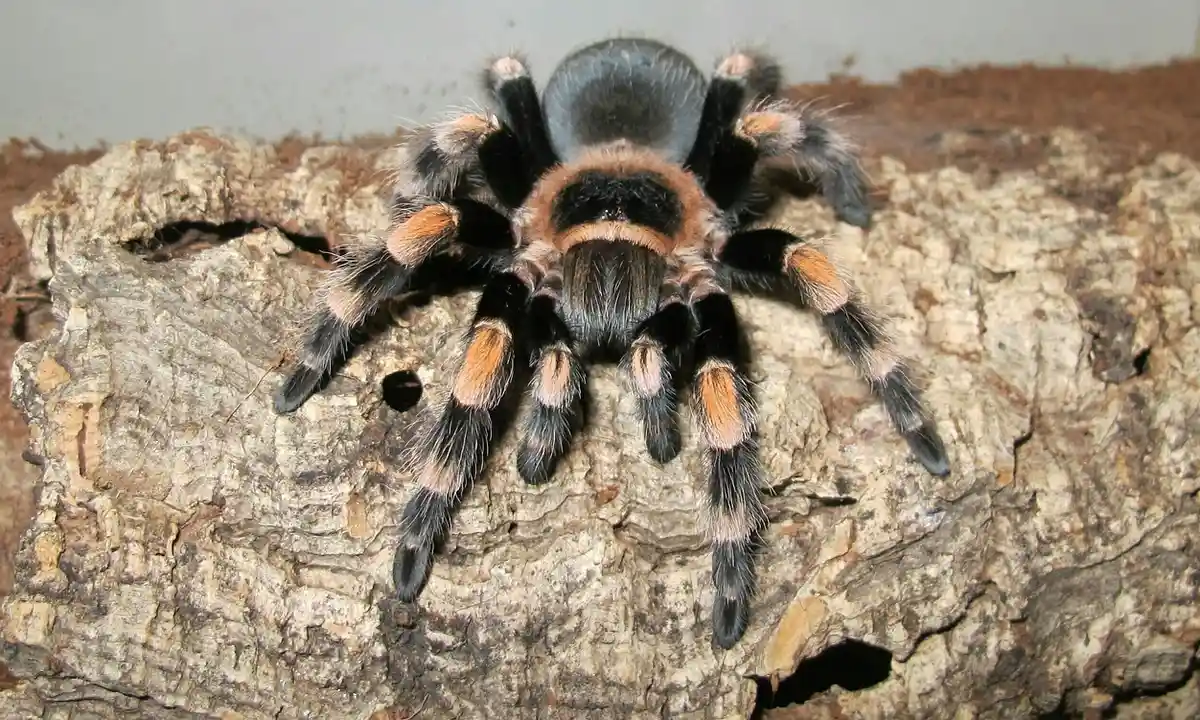
Building a DIY Arboreal Tarantula Enclosure
Housing an arboreal species like my *P. murinus* (Flash) isn’t about a bigger footprint-it’s about exploiting vertical space. A terrestrial tank on its side is a common, effective hack, but requires modification to be secure. Arboreal tarantulas are powerful, determined climbers, and a poorly secured lid is an engraved invitation for an escape.
When converting a tank, you must address ventilation and access. The former glass front becomes the new top.
- Secure the New Lid: The old front glass panel needs to be firmly attached. Use small, sturdy cabinet latches on both sides. I learned this after Flash nearly prized a weighted lid open.
- Create Cross-Ventilation: Drill or melt rows of small holes on both the new *side* walls (the former bottom and back). Stagnant air kills. This promotes airflow without creating drafts.
- Furnish for Height: Anchor a large vertical piece of cork bark or wood from the substrate to near the top. Provide foliage or branches in the upper third. They will web from these high points down.
The feeding dynamic changes, too. I often pre-kill prey and gently place it in their web matrix, as a fast cricket can lure an arboreal tarantula into a reckless, potentially injurious fall during a hunt. Some keepers still use live prey to stimulate natural hunting behavior, while others prefer pre-killed offerings to reduce risk. When choosing between live and pre-killed feeding methods, consider your tarantula’s temperament, species, and enclosure setup.
Working with Acrylic for a Sleeker Look
For a custom, professional look, acrylic is the next step up from modified plastic bins. It’s lightweight, crystal clear, and workable with home tools. Working with acrylic requires patience and the right technique to avoid cracking, melting, or creating hazardous sharp edges.
You’ll need sheets of cast acrylic (not cell cast, which cracks easily), a fine-toothed saw or scoring tool, acrylic cement, and a drill. Plan your design so the front panel is a single, sliding piece for easy access.
- Cutting and Drilling: Score and snap thinner sheets, or use a slow saw speed for thicker pieces. Always drill ventilation holes at a slow RPM to prevent melting. Wear a mask-the dust is irritating.
- The Magic of Solvent Welding: Acrylic cement doesn’t glue-it chemically melts the pieces together. Apply it with a needle applicator along the seam; capillary action pulls it in. The bond becomes as strong as the original material.
- Finishing is Non-Negotiable: Every cut edge *must* be sanded smooth, starting with coarse grit and moving to fine. An unsanded edge is razor-sharp and can injure you or your tarantula.
I built my first acrylic enclosure for Flash. The silence of the sliding front panel, compared to a clicking lid, significantly reduced his defensive posturing. The clarity of acrylic offers an undistorted window into their world, showcasing every iridescent sheen on the carapace and every precise movement of silken engineering.
DIY vs. Purchased: Making the Right Choice for You
Choosing between a store-bought terrarium and a handmade habitat isn’t just about money. It’s about matching the enclosure to both your skills and your tarantula’s specific needs. A fancy glass box can be wrong for a moisture-loving species, while a clever DIY build can create the perfect microclimate. The right choice prioritizes the animal’s welfare over convenience or aesthetics every single time. Your goal is a secure, stress-free environment, whether the parts came from a pet store or a hardware store.
Cost, Time, and Skill Investment Analysis
Let’s break down the real investment. A purchased acrylic enclosure for a terrestrial tarantula might cost $40 to $80. For that, you get a finished product, often with ventilation and a secure lid, ready to fill. My first enclosure for Rosie was a basic pet store tank. It worked, but it was deep and made feeding a docile, ground-dwelling rose hair awkward. A DIY enclosure using a plastic storage bin can cost under $15. The price difference is clear, but the currency isn’t just dollars.
Your time and confidence are part of the budget. Modifying a container requires tools (a drill, soldering iron, or hot knife for ventilation holes), a workspace, and a willingness to make mistakes. I once melted too many holes in a bin for a sling, creating a wind tunnel I had to patch. The initial savings of a DIY project are directly proportional to the time and effort you must spend on its design and execution.
Consider your tarantula’s behavior. My OBT, Flash, is a heavy webber and moderately defensive. Her purchased acrylic enclosure has front-opening doors, allowing me to service her fortress of silk without reaching in from above. Building that kind of safe access myself would be a major project. For my calm Goliath, a large, modified storage tub with high walls is perfect for containing his itchy hair-flicking and holds the humidity he craves. That said, décor dangers are real—there are five common enclosure items that can harm tarantulas. By choosing safe, inert décor and avoiding sharp edges or treated woods, you reduce risk for Flash and Goliath.
| Factor | DIY (Modified Container) | Purchased (Acrylic/Glass) |
|---|---|---|
| Upfront Cost | Very Low ($5 – $20) | Moderate to High ($30 – $100+) |
| Time Investment | High (Sourcing, measuring, modifying) | Very Low (Open box, set up) |
| Skill Required | Basic tool use, planning ventilation | None |
| Customization | Total control over size, vent placement | Limited to manufacturer designs |
| Best For | Beginners on a tight budget, simple terrestrial setups, humid species needing sealed sides | Keepers valuing convenience, arboreal species, defensive tarantulas where safe front access is critical |
Long-Term Durability and Maintenance
How will your choice hold up in five years? A quality acrylic or glass enclosure is designed for the long haul. It will resist scratches from decor, withstand frequent cleaning, and maintain its structural integrity. A durable purchased enclosure is a one-time investment that can house multiple tarantulas over a decade or more. I’ve repurposed my old glass tank for isopod cultures after upgrading Rosie; it’s still perfectly functional.
Plastic storage bins, however, can become brittle with age, especially under heat lamp exposure (which you should never use anyway). The plastic may warp or the thin latches can fail. I learned this the hard way with an old bin that developed a hairline crack near a ventilation hole, creating an unseen escape route. Regular, careful inspection is non-negotiable for DIY setups.
Maintenance is another key difference. Purchased enclosures with smooth surfaces and removable panels are easier to wipe clean during a full rehouse. The intricate web castles of my OBT, Flash, are much simpler to manage through her front doors. A DIY bin might have rougher interior surfaces or fixed lids that make removing packed substrate and thick webbing a more tedious, disruptive process for the animal. Your future self will thank you for considering how easy the enclosure is to clean during inevitable tank transfers.
Think about sealing. For species like my T. stirmi, Goliath, who needs 80% humidity, a DIY bin’s tight-fitting lid is a virtue. But you must ensure all ventilation holes are smoothed to prevent injury. A purchased screen-topped glass tank would be a constant battle to retain moisture. Every choice has a trade-off that impacts the daily life and health of your eight-legged charge.
FAQs
Are there specific plans I should follow for a DIY tarantula enclosure?
The best “plans” are the guidelines for your specific tarantula’s needs, not a rigid blueprint. Focus on the core principles: ensuring the enclosure’s dimensions (terrestrial vs. arboreal) are correct for your specific tarantula, planning strategic ventilation, and selecting safe materials. You can adapt these rules to almost any appropriately sized container, using the step-by-step assembly in the main article as your flexible guide.
Can I use PVC sheets or pipes to build an enclosure?
It is generally not recommended to use PVC sheets as the primary material for a DIY tarantula enclosure. Certain types of PVC can be brittle and may off-gas chemicals, especially when cut or drilled, which could pose a risk in a confined space. Safer, more common materials like polypropylene (#5) storage containers or cast acrylic are preferable and easier for beginners to work with.
What are the most essential DIY accessories for a basic setup?
The essential accessories are a secure hide, a water dish, and anchor points for webbing or climbing. These can be very budget-friendly: a terracotta pot half, a bottle cap or ceramic dish, and pieces of cork bark or sterilized branches. The goal is to provide security and facilitate natural behaviors without cluttering the space or creating fall risks.
Is it worth buying a DIY tarantula enclosure kit?
Most commercial “DIY kits” are often just pre-cut materials (like acrylic) without assembly, and they can be as expensive as a finished enclosure. For true budget DIY, sourcing your own container and materials is far more cost-effective and allows for full customization. A kit might save planning time but rarely saves money compared to the methods outlined in the article.
How can online communities like Reddit help with my DIY build?
Online forums, such as those on Reddit (e.g., r/tarantulas), are invaluable for seeing real-world examples, troubleshooting ventilation issues, and getting species-specific feedback before you build. They provide a platform to share your design plans with experienced keepers who can spot potential problems, like unsafe gaps or poor ventilation patterns, that you might have missed.
What’s the biggest mistake to avoid when building an enclosure from scratch?
The most critical mistake is inadequate or misplaced ventilation, which can lead to fatal mold growth or dehydration. A close second is failing to properly escape-proof the enclosure, especially the lid seal. Always perform a final safety check by feeling for sharp edges and testing for gaps before introducing your tarantula to its new home, as these errors are some of the most common for tarantula enclosures.
The Final Molt
Your DIY enclosure is now a habitat. Its success hinges on one rule you must never forget. For a moisture-dependent species like Theraphosa stirmi, maintaining consistently high humidity through deep, damp substrate and a large water dish is the single most important factor for its health and survival. The enclosure you built facilitates this, but the daily stewardship of its atmosphere belongs to you. A weekly check, pouring water into the corners of the substrate, will create the humid microclimate these giants crave without drowning the layers below.
Now, place the enclosure in a quiet spot and let the spider claim its space. The real joy begins not in building, but in watching. Observe the meticulous webbing of an OBT, the silent excavation of a burrow, or the patient ambush from a hide. I spent months watching my Goliath methodically flatten every mound of substrate I made, teaching me she preferred her own architecture. Patience is not just a virtue here; it is the primary tool of the hobby. The greatest insights come from quiet observation, revealing the individual personality and needs of the creature you now care for.
Further Reading & Sources
- What are recommendations for building a …
- Tarantula Enclosures – Premium and DIY | Tom’s Big Spiders
- Quick and Easy DIY Tarantula Enclosure – Arboreal | Tom’s Big Spiders
Arlo is a lifelong arachnid enthusiast who believes tarantulas are the world’s most misunderstood roommates. With years of hands-on experience in tarantula care, habitat setup, and species behavior, Arlo combines expert knowledge with a dash of humor to make spider ownership less scary and a lot more fascinating. From choosing the right enclosure to understanding why your eight-legged buddy is doing that weird little pose again, Arlo is here to help you become the best tarantula parent you can be, without getting tangled in the web of misinformation.
Enclosures and Sizes