
How to Handle and Quarantine During Enclosure Cleaning: The Keeper’s Protocol
A tarantula enclosure is a silent, self-contained world, and cleaning is our most significant intrusion into that space. For the keeper, it’s routine husbandry. For the tarantula, it can be a seismic event of strange vibrations, sudden light, and giant tools. This guide isn’t about handling for fun-it’s about the necessary, careful management of your spider during essential maintenance, treating the animal with a respect that prioritizes its safety and minimizes its stress.
Quick Stats:
- Origin: Universal Protocol
- Type: Applies to New World & Old World
- Growth Rate: From Sling to Adult
This protocol will guide you through creating a safe temporary space and executing the transfer, whether your tarantula is a docile ‘pet rock’ like my 15-year-old Rosie or a defensive, fast webbing species like my OBT, Flash.
Preparing for the Process: Tools and Mindset
Essential Tools for Safe Tarantula Removal and Quarantine
Successful tarantula relocation hinges on your toolkit. Gathering these items before you begin eliminates frantic searches and keeps the mood calm for your nervous arachnid. Based on years of rehousing everything from my docile G. rosea to my lightning-fast OBT, I rely on a core set of implements.
- Catch Cups: Use clear plastic deli containers or similar with secure, ventilated lids. Have multiple sizes; a large cup for my T. stirmi Goliath prevents him from feeling cornered.
- Long Handling Tools: A 12-inch pair of soft-tipped tweezers and a soft, wide paintbrush are your primary guides. They maintain a safe distance, especially from urticating hairs.
- The Quarantine Enclosure: This is a simple, bare-bones setup-a small, ventilated kritter keeper with damp paper towel substrate works for most species. For humidity-dependent tarantulas like Goliath, I pre-moisten the paper towel to maintain his crucial 80% RH range during the short quarantine.
- Personal Protection: Safety glasses are non-negotiable with hair-kickers. A dust mask can prevent inhalation of irritating urticating hairs.
The silence of the enclosure before a move is palpable. Your prepared tools are the best way to honor that quiet tension and ensure a smooth transition.
Setting Up a Secure Workspace
Your environment is as critical as your tools. I always perform enclosures cleans on a large, cleared table in a room with closed doors and windows. This contained space is your first line of defense against a potential escape, a scenario I’ve narrowly avoided with my OBT Flash more than once.
- Remove all clutter, houseplants, and other pets from the immediate area.
- Ensure bright, direct lighting so you can see every movement and shadow.
- Lay down a light-colored towel or non-slip mat. It provides contrast if a tarantula bolts and dampens any falls.
- Have your quarantine enclosure and all tools within arm’s reach before you open the main enclosure.
Your mindset must match this physical preparation: move with deliberate slowness, breathe steadily, and have every next step visualized. Rushing stresses the animal and increases mistakes.
Safely Removing Your Tarantula from Its Enclosure
Step-by-Step Guide to Using a Catch Cup
This method is the cornerstone of safe removal. The goal is to use the cup as a passive guide, not a chasing trap, which minimizes defensive reactions. Here is the exact sequence I use with my 15-year-old Rosie.
- Place the open catch cup directly in front of your tarantula within the enclosure.
- Using your soft paintbrush, gently touch the legs or abdomen from behind to encourage forward movement into the cup. For reluctant tarantulas, a slight airflow from blowing can work.
- The moment the tarantula is fully inside, smoothly slide the lid between the cup and the enclosure wall to seal it. Avoid a downward chopping motion.
- Lift the secured cup and immediately transfer it to the pre-set quarantine enclosure. Tilt and let the tarantula walk out on its own.
- Secure the quarantine enclosure lid before attending to the dirty main enclosure.
Patience here is a form of respect; allow the tarantula to move at its own pace even if it takes several minutes.
Techniques for Defensive, Fast, or Heavy Urticating Hair Kickers
Standard procedures need adaptation for species like my defensive P. murinus or hair-kicking T. stirmi. These techniques prioritize safety and stress reduction by accounting for specific defensive behaviors.
For fast, defensive tarantulas like Flash (OBT), I employ a two-cup method. I place one large catch cup over the tarantula, then slide a second cup underneath to form a secure sandwich before lifting. I always perform this over a large plastic bin to contain any sudden, sprouting escape.
For heavy urticating hair kickers like Goliath, direct frontal approaches are asking for trouble. I work from the side or above using a piece of clear acrylic as a temporary shield, guiding him into a cup with long tweezers from behind his line of sight. Wearing a long-sleeved shirt, gloves, and safety glasses is mandatory. The goal is to avoid triggering the kicking reflex at all.
For a burrowed, defensive specimen, I gently flood the burrow with water from a syringe to encourage emergence into a waiting cup, rather than digging and risking a confrontation. Observing and adapting to the individual’s personality is the mark of experienced husbandry.
Setting Up Temporary Quarantine Housing
Criteria for a Safe Quarantine Container
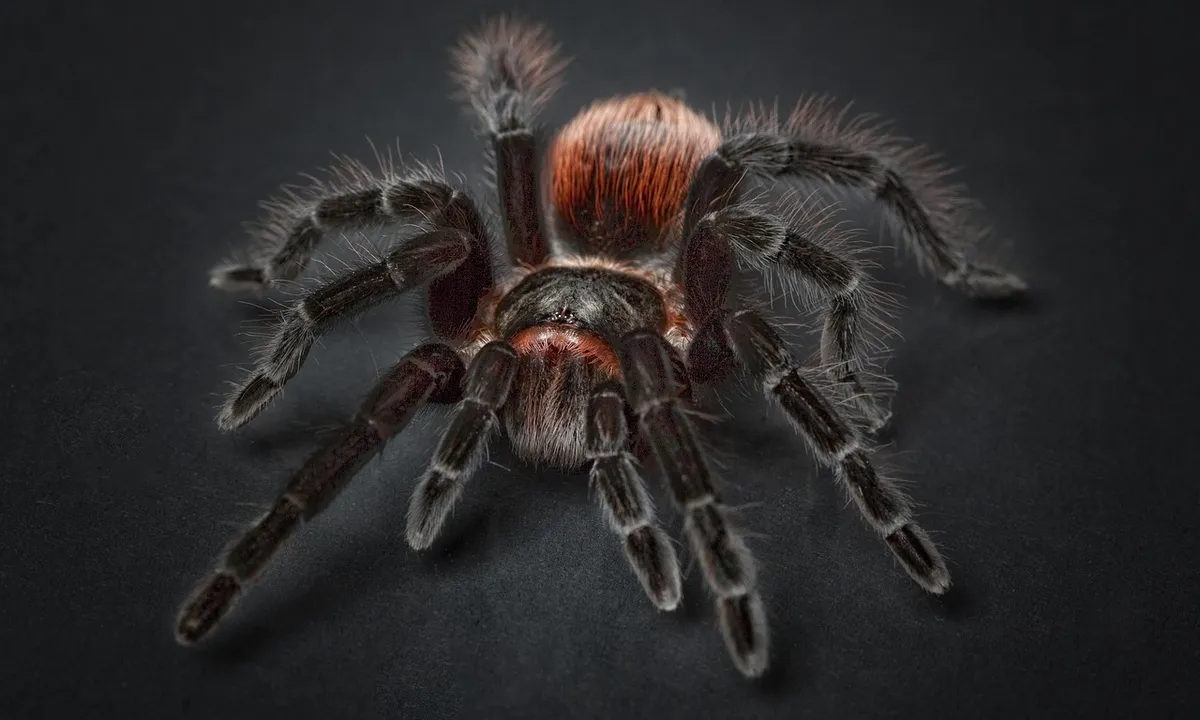
This container serves one purpose: secure, stress-free confinement. It is not a display. Your primary goal is to select a container that completely prevents escape and provides zero climbing opportunities for the tarantula. Smooth, vertical walls are non-negotiable. I use large, clear plastic food storage containers with locking lids. For smaller tarantulas, a deli cup works perfectly. Ventilation is critical; melt or drill small air holes along the upper sides, never in the lid where a climbing tarantula could injure its tarsi.
The interior must be barren. Provide a shallow bottle cap of water, but no substrate, no decor, no hides. A bare floor means you always have a visual on your animal. This minimalist approach reduces hiding spots you’d need to dismantle later and prevents the transfer of any potential pests or mold from the old enclosure.
Quick Setup: Creating a Minimalist Temporary Enclosure
You can assemble a perfect quarantine container in under two minutes. Follow this sequence every time.
- Grab your chosen clean, dry, and ventilated plastic container.
- Place a single, shallow water dish (a bottle cap is ideal) securely on the bottom.
- Add a single, plain paper towel sheet, loosely crumpled, to give a shy tarantula a visual barrier. That’s it.
I keep a dedicated “rehouse kit” with these pre-drilled containers ready. When I needed to clean Flash the OBT’s web fortress, having this kit prepared meant I could focus entirely on her lightning-fast movements, not on fumbling for supplies. Preparing this temporary housing before you even open the main enclosure is the single best way to reduce your stress and the tarantula’s.
How Long is Temporary Housing Safe?
This bare-bones setup is designed for short-term confinement, typically a few hours while you clean. I would never leave a tarantula in this minimal state for more than 24 hours. The lack of a hide and substrate creates prolonged stress. For longer-term quarantine due to illness or mites, a proper, albeit sterile, enclosure with substrate and a hide is mandatory. Additionally, when you bring home a new tarantula, quarantine it in a separate enclosure for several weeks to monitor health. This careful step helps prevent introducing parasites or infections to your existing collection.
If your cleaning project is interrupted, prioritize getting your tarantula back into its cleaned, furnished primary home, even if you haven’t perfectly arranged the decor. A secure hide and proper substrate for tarantula enclosures are more important than aesthetic placement. Choosing the right substrate matters, with options like coconut fiber or peat-based mixes depending on the species. Maintain it by spot-cleaning, monitoring moisture, and replacing it as it breaks down or mold appears.
Cleaning the Main Enclosure: A Step-by-Step Guide
Removing and Replacing Substrate
I treat all used substrate as waste. Even if it looks clean, it harbors waste, discarded boluses (food packets), and mites. For my moisture-dependent T. stirmi, Goliath, I replace all substrate every six months to prevent fungal bloom. For my arid G. rosea, Rosie, a full change happens yearly.
Wear a particle mask during this process, especially with New World species; disturbed substrate aerosolizes those irritating urticating hairs. Dump the old substrate into a trash bag, seal it, and take it outside immediately. Wipe the empty enclosure with a damp cloth before adding fresh, pre-packaged substrate. Never use garden soil or anything with fertilizers or pesticides.
Cleaning and Disinfecting Decorations and Fixtures
Any item from the enclosure gets cleaned. I use a dedicated plastic bin filled with a 10% bleach-to-water solution. Soak decor, water dishes, and hides for 15-20 minutes. This kills any pathogens or mite eggs. After soaking, rinse every item under scalding hot water for at least two full minutes to eliminate all bleach residue. Air-dry completely on a clean towel.
Plastic plants and porous cork bark can retain bleach, so I triple-rinse these and let them air-dry for an extra day to be safe. For my heavy-webbers like Flash, I often cut away and discard webbed-in fake plants, replacing them with freshly cleaned ones. It’s easier than trying to disentangle a defensive tarantula’s home.
Special Consideration: Cleaning Around a Tarantula in Premolt
This scenario requires a complete shift in protocol. A tarantula in premolt (darkened, shiny abdomen, often sealed in its hide) is at its most vulnerable. Disturbance can cause a fatal mismolt.
If your tarantula is in premolt, postpone the full cleaning. Do only what is necessary. Use long tongs to remove any visible moldy boluses or prey items. Refill the water dish with extreme care. Do not change the substrate. Do not move or clean near the tarantula’s hide. The priority is absolute stillness. I once delayed Rosie’s enclosure cleaning for nearly three months because she entered premolt; patience is not a virtue here, it is a requirement for their survival. After the molt is complete, give your tarantula time to harden before handling or feeding. Resume routine care only once the exoskeleton is firm.
Safely Returning Your Tarantula to Its Clean Enclosure
Preparing the Cleaned Enclosure for Rehoming
Never place your tarantula into a stark, empty tank. A prepared enclosure mimics a safe burrow entrance, reducing relocation stress immediately. I always have everything set up before the tarantula even leaves its temporary cup. Your primary goal is to create an instant refuge that encourages settling, not exploration. Following a best enclosure setup tarantula step-by-step guide will help you prepare the enclosure and essentials before introducing your tarantula. This ensures a smooth, stress-free transition and a secure refuge from the start.
Start by gently firming the new substrate, creating a stable base that won’t collapse. For moisture-dependent species like my Theraphosa stirmi Goliath, I mix water directly into the lower layers of substrate until it holds its shape when squeezed, a technique called “bottom watering.” For arid species like my Grammostola rosea Rosie, I lightly moisten one corner only.
Place the hide first, anchoring it securely. Position the water dish on the opposite side from where you plan to release the tarantula; this guides them past their new home. I often add a single, very gentle fake leaf or piece of cork near the hide’s entrance to break the sightline. The enclosure should feel invitingly cluttered from a tarantula’s perspective, not bare.
The Gentle Transfer: From Cup to Enclosure
This is the moment of truth. Your movements must be deliberate, slow, and predictable. Place the temporary catch cup, with the tarantula inside, directly into the clean enclosure. Angle the cup’s open end downward against the substrate, right next to the hide’s entrance. This forms a tunnel.
Now, patience is your most important tool. Do not tap, tilt, or prod the cup. Simply wait. In the quiet, the tarantula will assess the new space. You might see a pedipalp cautiously tap the new ground. Allow the animal to exit the cup on its own terms; a self-motivated exit is a low-stress exit. My old G. rosea might take ten minutes, while my Pterinochilus murinus Flash would bolt instantly-the method remains the same.
Once they have fully left the cup and are on the new substrate, slowly and smoothly lift the empty cup out. Immediately secure the enclosure lid. Do not fuss with decorations or try to guide them. Your job is done. Watch as they investigate, often tapping their way directly into the hide. That is the sign of a successful transfer.
Critical Safety Precautions for Keeper and Tarantula
Personal Protective Equipment (PPE) for Arachnid Care
This isn’t overkill; it’s basic respect for the animal’s defenses. My PPE kit lives right with my cleaning supplies. For all species, I wear nitrile gloves. They protect me from any residual urticating hairs on surfaces and protect the tarantula from oils or residues on my skin.
For New World tarantulas known for kicking hairs, like my T. stirmi, I add eye protection. A simple pair of lab goggles or safety glasses prevents airborne urticating hairs from causing severe eye irritation. Urticating hairs are a passive defense; they become airborne easily and are a far more common issue than a bite. A long-sleeved shirt is also wise. This gear is for the keeper’s comfort, allowing you to remain calm and focused during the procedure.
Escape Prevention During Every Stage
An escaped tarantula is a stressed, vulnerable animal and a panicked keeper. Your entire process must be a series of closed systems. I perform all transfers inside a large, empty bathtub—a pristine, smooth-walled arena. It’s especially important when transporting or rehousing your tarantula. If the tarantula makes a run for it, they are contained.
Always have your catch cups and tools within arm’s reach before you open any enclosure. When moving the tarantula in its temporary cup to the cleaning area, place that cup inside a larger, lidded container. This provides a double-containment system. Using the right essential tarantula handling tools and safety equipment—such as secure catch cups, proper containers, and long-handled forceps—helps you maintain control and stay safe. Always inspect tools for wear and ensure a proper fit before you begin. Never turn your back on an open enclosure or an unsecured catch cup, not even for a second. I learned this the hard way years ago with a swift juvenile; a five-second distraction became a forty-five-minute furniture-moving adventure.
Sanitation and Hygiene Post-Cleaning
Cleaning isn’t finished when the tarantula is back home. Proper sanitation prevents cross-contamination between enclosures and protects you. All tools-tongs, paintbrushes, catch cups-must be washed with hot, soapy water and thoroughly dried before being stored. I keep a dedicated sponge and bottle of dish soap in my tarantula room for this purpose. For a safe, deep clean of the tank, relocate the tarantula to a secure temporary enclosure first. Then scrub and rinse all components and replace the substrate before returning the tarantula.
Remove and dispose of your gloves carefully, turning them inside out as you peel them off. Wash your hands and arms up to the elbows, even if you wore gloves. If you were working with a species that kicks hairs, immediately change your shirt and wash the exposed clothing separately. This routine eliminates the risk of accidentally transferring mites, mold spores, or urticating hairs to yourself, your home, or your other pets. It’s the final, non-negotiable step in a responsible cleaning cycle.
Recognizing and Minimizing Tarantula Stress
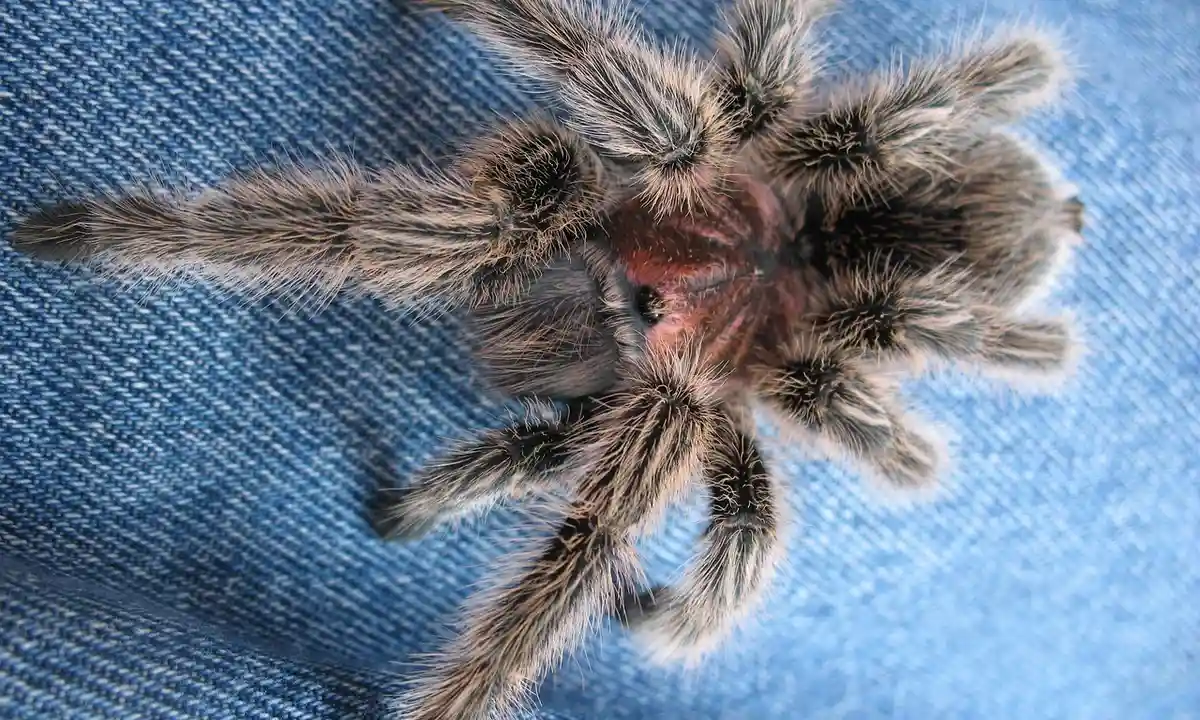
Your tarantula communicates stress through subtle body language, not sounds. Learning these silent signals is your first duty in providing compassionate care during any enclosure disturbance. I have seen all three of my spiders display unique stress behaviors, from Rosie’s stubborn stillness to Flash’s explosive web-building. Each behavior can be a clear indicator, much like common signs your tarantula is stressed or aggressive.
Common Stress Indicators During Handling and Quarantine
Watch closely during any interaction. A stressed tarantula is not being ‘bad’-it is communicating fear or discomfort in the only way it can. Reading your tarantula’s body language, stress cues, and defensive signs helps you respond appropriately and keep interactions calm. Here are the most frequent signs I monitor for.
- Threat Postures: Raising the front legs and abdomen, often with fangs bared. My OBT, Flash, does this if I move too quickly near his web.
- Flicking Urticating Hairs: New World species like my Goliath will kick a cloud of irritating hairs from their abdomen. This is a clear “stay back” signal.
- Sudden, Jerky Movements: Panicked running or teleporting across the enclosure. Speed is a primary defense for many species.
- Excessive Webbing in New Space: If a tarantula rapidly webs the walls of a quarantine container, it is trying to create a secure hide. Flash does this in minutes.
- Refusal to Move or “Playing Dead”: My rose hair, Rosie, will sometimes tuck her legs in and refuse to budge for an hour if disturbed. This is freeze-mode stress.
- Abdominal Stroking: Rubbing the back legs over the abdomen is often a prelude to hair-flicking. See this, and you should retreat.
How to Create a Low-Stress Cleaning Routine
A predictable routine minimizes fear for your spider. The goal is to be a quiet, predictable force in their environment, not an alarming intruder. This is my method, refined after years of rehousings, including a memorable escape attempt by Goliath.
- Prepare Everything First: Assemble all tools-catch cups, long tweezers, new substrate, the clean enclosure-before you ever open your tarantula’s home. Fumbling creates delays and anxiety.
- Work During Calm Hours: Perform cleaning in the evening or when your household is quiet. Tarantulas are sensitive to vibrations from loud music or footsteps.
- Use Gentle Guidance: Instead of grabbing, use a soft brush or the lid of a catch cup to encourage movement. Let the spider walk on its own terms into the quarantine container.
- Limit Quarantine Time: Have the new enclosure ready so the spider spends less than 30 minutes in temporary housing. I use plain, bare plastic containers with air holes for this brief period.
- Recreate the Hide: In the clean enclosure, position the hide and any anchor points exactly as they were. Familiarity reduces post-move exploration stress.
- Walk Away Afterwards: Once the spider is in its clean home, leave it completely alone for at least a week. Do not offer food. This allows it to re-establish its territory without pressure.
How Often Should You Perform a Full Enclosure Cleaning?
There is no universal calendar. Full cleans are major events, and their frequency hinges on observing your specific spider and its ecosystem. I do full cleans for Rosie maybe once every two years, but for Goliath, it’s a more annual task.
Factors That Determine Cleaning Frequency
Several variables dictate how often you need to completely break down the enclosure. The primary rule is to interfere as little as possible while maintaining a healthy environment.
- Species and Humidity Needs: High-moisture species like Theraphosa stirmi (my Goliath) can develop mold faster in damp substrate, prompting more frequent changes.
- Enclosure Size and Ventilation: A larger, well-ventilated tank stays cleaner longer than a small, stuffy one.
- Tarantula Age and Diet: Fast-growing spiderlings eat more and produce more waste. Adults like my 15-year-old Rosie are neater and eat less.
- Presence of Clean-Up Crews: A bioactive setup with springtails and isopods can process waste and mold, drastically extending time between full cleans.
- Visible Mold or Pest Outbreaks: White fuzz or mite explosions are immediate signs a full clean and substrate replacement is necessary.
Sample Cleaning Schedules for Common Pet Tarantulas
These are general guidelines from my experience. Always let the condition of the enclosure override any schedule.
| Tarantula Type (Example) | Full Enclosure Clean Frequency | Notes from Experience |
|---|---|---|
| Chilean Rose Hair (Grammostola rosea) | Every 18-24 months | My Rosie is a true ‘pet rock.’ She barely disturbs her substrate, so mold and waste are minimal. |
| Burgundy Goliath Bird Eater (Theraphosa stirmi) | Every 12 months | Goliath’s high humidity needs and large waste boluses mean I check for mold every few months. |
| OBT (Pterinochilus murinus) | Every 2-3 years, if ever | Flash webs everything into a solid fortress. Disturbing it causes immense stress. I only clean if there’s a health issue. |
| Fast-Growing Terrestrial (e.g., Aphonopelma species) | Every 12-18 months | Younger, more active spiders may require more frequent substrate changes. |
When to Spot-Clean Versus When to Do a Full Clean
Most maintenance should be spot-cleaning. A full clean is a last resort, not a regular chore. Here is how I decide.
Spot-Clean When You See:
- Prey carcasses or boluses (inedible parts of crickets).
- Small patches of mold that disappear after adjusting ventilation.
- Localized webbing coated in substrate or debris.
- Water dish spillage or contamination.
Use long tweezers to remove these items without disturbing the spider’s main hide or web structure.
Perform a Full Clean Only When:
- The entire substrate surface smells foul or is extensively molded.
- A mite infestation is visible in the substrate and on the enclosure walls.
- The tarantula has a serious illness, like a fungal infection, requiring a sterile restart.
- You are upgrading to a permanently larger enclosure.
- The substrate is consistently too wet or too dry and cannot be corrected by partial changes.
I once did an unnecessary full clean on Flash’s enclosure and it took him six months to re-web properly. When in doubt, spot-clean and observe; your tarantula’s peace is more valuable than a perfectly spotless tank.
FAQs
How do I safely remove a burrowed or very defensive tarantula?
The standard catch cup method may need adaptation. For a defensive, fast species, use a two-cup “sandwich” technique for secure containment. If your tarantula is burrowed, avoid digging; instead, gently encourage it to exit by introducing a small amount of water into the burrow entrance with a syringe, guiding it towards a waiting cup. Always work over a large, contained area like a bathtub to prevent escapes.
What can I use as temporary housing if I don’t have a kritter keeper?
Any clean, smooth-sided plastic container with a secure, ventilated lid is suitable. A large deli cup, food storage container, or even a large plastic bowl with a breathable covering like mesh secured with a rubber band will work. The key is that the walls are vertical and escape-proof, and the interior is kept bare with only a water dish and perhaps a plain paper towel for a visual barrier.
How long can my tarantula safely stay in temporary housing?
Temporary minimalist housing is designed for short-term confinement of a few hours during the cleaning process. It is not advisable to leave a tarantula in this barren setup for more than 24 hours, as the lack of a proper hide and substrate becomes stressful. If your cleaning is interrupted, prioritize returning the tarantula to its furnished primary enclosure over perfect décor placement.
What are the signs my tarantula is overly stressed during this process?
Common stress indicators include raising the front legs and abdomen into a threat posture, flicking urticating hairs (for New World species), or making sudden, panicked running movements. In temporary housing, rapidly webbing up the entire container is also a sign of stress, as the tarantula attempts to create security. If you see these signs, move slowly, ensure you are protected, and complete the process as calmly and quickly as possible. For more details on stress versus hunger signs, check this guide.
What are the absolute essential safety precautions I must take?
Always wear appropriate Personal Protective Equipment (PPE), including gloves and safety glasses when working with species known to kick urticating hairs. Your primary operational rule must be escape prevention: work in a contained area, never turn your back on an open enclosure, and use a double-containment system when moving the tarantula. Finally, always wash your hands, arms, and tools thoroughly after the process to prevent cross-contamination.
Should I ever delay a full enclosure cleaning?
Yes, you must delay if your tarantula is in premolt, indicated by a dark, shiny abdomen and often refusal to eat or sealing its hide. Disturbance during this vulnerable time can cause a fatal mismolt. Postpone the full clean and perform only critical spot-cleaning until well after the tarantula has molted and its new exoskeleton has fully hardened.
Cultivating a Calm Routine
The single most critical practice for safe enclosure maintenance is the use of a pre-set, escape-proof quarantine container that allows you to transfer the tarantula without any physical contact. I learned this definitively when my P. murinus, Flash, made a blindingly fast dash for freedom during a routine substrate change; now, his temporary acrylic box is always ready and sealed before I even approach his main web fortress.
Use this quiet time while your tarantula is in its temporary housing to simply watch. Observe the deliberate pace of a G. rosea like Rosie, or the focused investigation of a large T. stirmi like Goliath as it tests the container’s seams. This ritual of observation, not interaction, is where you build true husbandry skill and respect for the animal’s nature. Patience, in both the keeper and the kept, is the non-negotiable tool that ensures a lifetime of successful, stress-free care.
Further Reading & Sources
- How to Quarantine Terrarium Plants for Reptile Enclosures – Zen Habitats
- Our Methods & Services – Marine Collectors
- Quarantine Room Guidelines // Sue & Bill Gross Stem Cell Research Center // UCI
Arlo is a lifelong arachnid enthusiast who believes tarantulas are the world’s most misunderstood roommates. With years of hands-on experience in tarantula care, habitat setup, and species behavior, Arlo combines expert knowledge with a dash of humor to make spider ownership less scary and a lot more fascinating. From choosing the right enclosure to understanding why your eight-legged buddy is doing that weird little pose again, Arlo is here to help you become the best tarantula parent you can be, without getting tangled in the web of misinformation.
Handling and Interaction