
How to Create a Proper Substrate Moisture Gradient for Your Tarantula
A proper substrate moisture gradient is the cornerstone of intelligent tarantula husbandry, transforming a static enclosure into a dynamic landscape where your spider can find precisely what it needs. This simple technique prevents the two most common substrate failures: a uniformly soggy floor that breeds mold and a parched wasteland that leads to dehydration. Based on my experience with everything from my arid-loving Chilean Rose Hair to my humidity-dependent Burgundy Goliath, I’ll show you how to build this vital gradient correctly the first time.
Quick Stats:
- Origin: Replicates the natural microclimates found from desert floors to rainforest burrows.
- Type: A non-negotiable practice for both New World and Old World tarantula species.
- Growth Rate: Directly influences successful molting and long-term vitality for slings and adults.
This guide will provide the specific, actionable steps to establish this gradient for any tarantula in your care, from a tiny sling to a formidable adult.
What Is a Substrate Moisture Gradient and Why Does Your Tarantula Need One?
Picture your tarantula’s enclosure not as a uniform box, but as a tiny landscape. A substrate moisture gradient is the intentional creation of varying dampness levels across this floor, from bone-dry to suitably moist. This gradient replicates the microclimates found in nature, giving your tarantula the power to choose its perfect spot. Some tarantula species are burrowers and benefit from deeper substrates. Others roam more on the surface and prefer shallower bedding.
In my years keeping everything from arid Grammostola rosea to swamp-dwelling Theraphosa stirmi, I’ve seen how critical this choice is. My old Chilean Rose Hair, Rosie, will spend weeks on her completely dry side, her dusty pink carapace looking dull until she suddenly decides to hydrate near a damp corner. Without that dry refuge, constant moisture can lead to stress and a refusal to eat, a common issue with so-called ‘pet rock’ species.
Why is this non-negotiable? Consider these points:
- Self-Regulation: Tarantulas instinctively know their needs. A gradient lets them seek out humidity for a pending molt or escape to aridity to avoid perceived dampness.
- Respiratory Health: Stagnant, uniformly wet substrate promotes mold and bacteria, risking fungal infections in your tarantula’s book lungs.
- Molting Success: A soft, malleable area aids in the delicate process of ecdysis. My Burgundy Goliath, who kicks hairs if I so much as breathe near her, always seeks the wettest part of her cork bark hide before splitting her old exoskeleton.
- Species-Specific Care: An OBT (Pterinochilus murinus) like Flash needs mostly dry substrate with a modest damp corner, while a Theraphosa requires over 80% humidity in sections of its space.
Creating a gradient is the cornerstone of ‘Look, Don’t Touch’ philosophy, reducing animal stress by providing environmental control instead of intrusive handling. It turns a cage into a habitat.
Choosing the Right Substrate for a Stable, Long-Lasting Gradient
Not all substrates are created equal for building a reliable moisture gradient. The wrong choice can collapse into a soggy mess or a dusty, hydrophobic brick. You need a material that holds structure, retains water without pooling, and is safe if ingested during feeding.
Through trial and error with my collection, I’ve settled on a few trusted options. For my moisture-loving Goliath, I use a deep blend of coconut fiber (coir) and sterilized topsoil. This mix holds the high humidity she craves while allowing drier pockets to persist near her heat lamp. For arid species like Rosie, I add more sand to the topsoil mix for faster drainage, preventing any lingering dampness at the surface.
Here is a comparison of common substrate materials:
| Substrate | Best For | Moisture Retention | Note from Experience |
|---|---|---|---|
| Coconut Coir/Fiber | Most species, burrowers | High | Expands when wet; can compact if used alone. I always mix it. |
| Sterilized Topsoil (no additives) | Bioactive setups, heavy species | Moderate | Provides excellent structure for burrows. Check for fertilizer. |
| Peat Moss | Maintaining humidity gradients | Very High | Acidic; avoid for species needing neutral pH. Holds water too well for arid tarantulas. |
| Vermiculite | Mixing to retain moisture | Extreme | Use sparingly as a mixer. I learned the hard way that pure vermiculite is a drowning risk. |
| Sphagnum Moss | Topping damp corners | High | Perfect for creating a visual damp zone. My OBT webs his right over it. |
To build a lasting gradient, follow this method. I use it every time I rehouse my fast and defensive OBT, Flash, to minimize his stress and my anxiety.
- Start Dry: Fill the enclosure with your primary, mostly dry substrate mix. Pack it firmly for burrowing species.
- Create the Wet Zone: Choose one corner or side. Remove a section of substrate and replace it with pre-moistened mix. For high humidity, I moisten this until it clumps without dripping water.
- Blend the Border: Gently mix the edges where wet and dry meet to create a transitional area, preventing a sharp, unnatural line.
- Maintain with Precision: Water only the damp section. Use a small watering can or syringe to target hydration, leaving the rest bone-dry. This targeted approach prevents the entire enclosure from slowly equalizing in humidity.
For bioactive enthusiasts, a stable gradient supports clean-up crews like springtails. They thrive in the moist zone, processing waste while leaving the tarantula’s preferred dry retreats undisturbed. Remember, the substrate is the foundation of your tarantula’s world; choosing wisely prevents problems you may never see until it’s too late.
Step-by-Step: Building the Gradient in Your Tarantula’s Enclosure

Preparing the Substrate and Enclosure
Start with a clean, dry enclosure and a block of compressed coco fiber or a bag of sterile, additive-free topsoil. I prefer coco fiber for its consistency and ease of use, especially for beginners. You will need enough substrate to create a depth at least 1.5 times your tarantula’s leg span for terrestrial species; this allows for burrowing and provides a substantial moisture reservoir. Choosing the best substrate is central to tarantula enclosure maintenance. A well-chosen substrate helps regulate humidity, reduces mold risk, and makes routine cleaning easier.
Break up your substrate material in a large, clean bucket and add warm water. Mix it thoroughly with your hands until it reaches a consistency where it clumps when squeezed, but only a couple of drops of water escape. This ‘field capacity’ is your perfect starting point-hydrated but not waterlogged. Let it sit for an hour to ensure even moisture distribution before placing it in the enclosure.
Pour the prepared substrate into the enclosure, creating a level surface. Use a spoon or your hand to gently tamp it down; you want it firm enough to support a burrow but not compacted into concrete. For my heavy-webbing species like Flash, my OBT, I pack it a bit more around the edges to support extensive tunnel networks.
Creating the Damp Side and Establishing the Gradient
Identify one side of the enclosure as your designated ‘damp’ zone. Using a clean cup or a large syringe, slowly pour a calculated amount of dechlorinated water into the substrate on this one side only. I aim to saturate an area roughly one-third the enclosure’s floor space. Watch as the moisture wicked into the substrate, creating an immediate visual gradient from dark brown (wet) to light brown (dry).
The goal is a gradual transition of moisture, not a stark line. The water will naturally spread sideways through capillary action over the next 24-48 hours, softening the gradient. If you see pooling water or the substrate becomes soupy, you have added too much; use paper towels to wick the excess out immediately. A soggy substrate is a recipe for mold and hazardous, stagnant pockets.
This method gives your tarantula a true choice. My Burgundy Goliath, who requires high humidity, will often sit directly on the damp side, while my arid-loving Chilean Rose, Rosie, rarely ventures from her bone-dry corner. Do arboreal tarantulas need different humidity levels than terrestrial species? In my experience, many arboreals benefit from higher humidity and vertical humidity gradients, though individual variation remains key.
Final Placement of Hides and Decor
Now, place your hide or cork bark retreat. I always position the primary hide entrance on the dry side of the enclosure, but situated right along the moisture gradient. This allows the tarantula to thermoregulate and access humidity from the safety of its den without feeling trapped in a damp corner. Being aware of common tarantula enclosure setup mistakes to avoid can help you keep them comfortable. Avoid errors like placing the hide in an area with poor airflow or overly damp substrate; maintain a balanced moisture gradient instead.
Add any other decor-fake plants, cork pieces, water dish. Always place the water dish on the dry side. This seems counterintuitive, but it prevents rapid evaporation from the damp side from fouling the water and ensures your tarantula has access to clean drinking water away from the humid microclimate. Anchor points for webbing, like tall branches or anchored plastic plants, can be placed anywhere, but I find my OBT often connects them from the dry side into the more humid air above the damp substrate.
Maintaining the Perfect Balance: Moisture Levels and Monitoring
Ideal Moisture Levels for the Dry Side Versus the Damp Side
For most species, your target humidity (measured as Relative Humidity or RH) should reflect a clear choice. Use a digital hygrometer placed at substrate level in the center of each zone. The dry side should read between 50-65% RH, mimicking a comfortable room. The damp side target is species-specific but generally sits between 70-80% RH for moisture-loving tarantulas like my *Theraphosa stirmi*. Temperature matters just as much as humidity, and together they define the tarantula’s ideal temperature-humidity range. Aim to keep ambient temps within the species’ natural range while maintaining the humidity gradient described above.
Remember, these numbers are guides, not absolutes. The tarantula’s behavior is your most reliable hygrometer. If Goliath is constantly hanging off the walls or trying to push the lid, his damp side isn’t humid enough. If Rosie, a desert species, is sealed in her hide avoiding a moderately damp gradient, it’s still too wet for her preferences.
How Often to Re-wet and Tools for the Job
Frequency depends on enclosure ventilation, room humidity, and the species. The damp side in a well-ventilated tank for a moisture-dependent species might need attention every 3-4 days, while an arid setup may only need a top-up every two weeks. Never fully replace all the substrate; simply rehydrate the existing gradient.
My toolkit consists of a large syringe and a spray bottle with a fine mist setting. The syringe is for targeted watering: I insert it deep into the substrate on the damp side and slowly depress the plunger, hydrating the lower layers without disturbing the surface. The spray bottle is for lightly misting the surface web of my OBT or the side walls of the enclosure to provide drinking droplets. Pouring water directly onto the surface repeatedly compacts the substrate and destroys its structure.
Signs Your Substrate is Too Wet or Too Dry
Watch for these clear indicators of imbalance:
Too Wet:
- Visible white or green mold patches on the substrate surface or decor.
- A sudden bloom of grain mites (tiny, fast-moving white specks).
- A persistent, unpleasant, sour smell.
- Your tarantula refusing to use the damp side, or climbing constantly.
Too Dry:
- Substrate is dusty, pulling away from the enclosure walls, and won’t clump.
- Your tarantula spends excessive time over its water dish.
- For slings or moisture-dependent species, difficulty molting (getting stuck).
- Dehydration in a tarantula presents as a shrunken, wrinkled abdomen.
Correcting a wet tank involves increasing ventilation and letting it dry out. Correcting a dry tank means a slow, deep rehydration of the damp side with a syringe. Adjust gradually; sudden, drastic changes in humidity are more stressful than a slightly imperfect constant level. Observing your pet’s quiet, eight-legged choices will always steer you right.
Species-Specific Adjustments: Tailoring the Gradient to Your Tarantula
Creating a universal moisture recipe is impossible. Your tarantula’s natural history dictates its needs. My three tarantulas—Rosie, Goliath, and Flash—require three completely different approaches. Do all tarantula species have the same hydration needs? Not at all—[hydration requirements vary by species](https://eightleggedlife.com/do-all-tarantula-species-have-the-same-hydration-needs) and environment. Treating a moisture-dependent species like an arid one is a slow path to dehydration, while soaking a desert spider can be fatal.
For Arid & Desert Species (e.g., Grammostola, Aphonopelma)
Think dry canyon with a secret spring. My 15-year-old G. rosea, Rosie, exemplifies this. The gradient is shallow and the moist zone minimal.
- Moist Zone: Dampen only one corner, about 25% of the enclosure’s floor space. For an adult, this might be a salad plate-sized area.
- Substrate Depth: 4-6 inches is sufficient for burrowing species.
- Humidity Goal: 40-55% ambient. The water dish provides most humidity.
- Personal Rule: I only remoisten Rosie’s corner when the top inch of substrate there is completely dry, which can take 4-6 weeks. She chooses when to use it.
For Tropical & Rainforest Species (e.g., Caribena, Avicularia)
These spiders need consistent, elevated humidity without swimming. The gradient is more of a gentle slope across the entire enclosure.
- Moist Zone: Dampen one entire side, roughly 40-50% of the substrate. The moisture should penetrate deeper.
- Key Technique: Pour water down this side’s enclosure walls to wet the lower substrate layers while leaving the surface slightly drier. This mimics forest floor dampness.
- Humidity Goal: 70-80%. A large, full water dish and cross-ventilation are non-negotiable to prevent stagnant air.
- Substrate: Use a highly moisture-retentive mix like coconut fiber and sphagnum moss.
For Moisture-Dependent Species (e.g., Theraphosa, Xenesthis)
My T. stirmi, Goliath, falls here. These are swamp creatures. The “dry” zone is merely “less damp.”
- Moist Zone: A full 60-75% of the enclosure should be damp to the touch. For a large spider, I pour a liter of water directly into one end’s substrate weekly.
- Substrate Depth: 8+ inches for burrowing. The bottom layers should hold moisture like a wrung-out sponge.
- Humidity Goal: 80-85%. I monitor this with a digital hygrometer placed at substrate level on the dry side.
- Warning: Even with high humidity, airflow is critical. I use a computer fan for 30 minutes daily to cycle air and prevent mold, which these setups grow eagerly.
Troubleshooting Common Moisture Gradient Problems
Seeing condensation for days? Spotting white fuzz? Your gradient needs adjustment. These are fixable issues.
Preventing and Addressing Mold Growth
Mold appears as white, green, or blue fuzzy patches. It signals excess organic matter, poor ventilation, or stagnant moisture. A bioactive cleanup crew (springtails and isopods) is the single most effective prevention tool, consuming mold and waste before they become a problem.
- Identify the Source: Is it on leftover prey? Remove it immediately. Is it blooming from the damp substrate? Your moisture is too high or ventilation too low.
- Spot Treatment: For small patches, remove the moldy substrate with a spoon. Increase ventilation slightly. Springtails will handle the rest.
- Major Infestation: If mold is widespread, you must rehouse. Replace all substrate, sterilize decorations with hot water, and re-establish your gradient with less moisture initially.
- Ventilation Check: Ensure cross-ventilation-holes on opposite sides for air flow. For sealed tanks, add more ventilation holes in the upper third of the enclosure.
Fixing a Soggy or Bone-Dry Substrate
Scenario: The Soggy Swamp. Water pools at the bottom. The entire enclosure feels wet and smells musty. This is dangerous and can cause fungal infections.
- Immediate Action: Stop all watering. Remove the tarantula to a temporary holding cup.
- Solution: You likely need to replace the substrate. If only one section is bad, you can remove the soggy portion and mix in a large amount of new, dry substrate to the remaining bed. Always pour water slowly against the glass to monitor absorption; dumping water in the center is a common mistake.
- Long-Term Fix: Use a substrate with better drainage. Mix your coconut fiber with orchid bark or vermiculite to create air pockets.
Scenario: The Arid Wasteland. The substrate is dusty and pulls away from the enclosure walls. Your tarantula may be sequestered in a dry hide. Could these signs point to incorrect humidity in the enclosure? Are the humidity levels off for this species?
- Immediate Action: Do not flood the enclosure. This can shock the spider.
- Solution: Slowly rehydrate. Pour a small amount of water (50-100ml for a medium enclosure) down one corner. Wait an hour. Repeat until the substrate in that zone is damp at least 3 inches down. This can take several cycles.
- Check the Water Dish: Ensure it is always full. A tarantula can survive a dry gradient with a full dish, but not the reverse.
Integrating the Gradient with Enclosure Design and Equipment
Substrate Depth, Ventilation, and the Water Dish
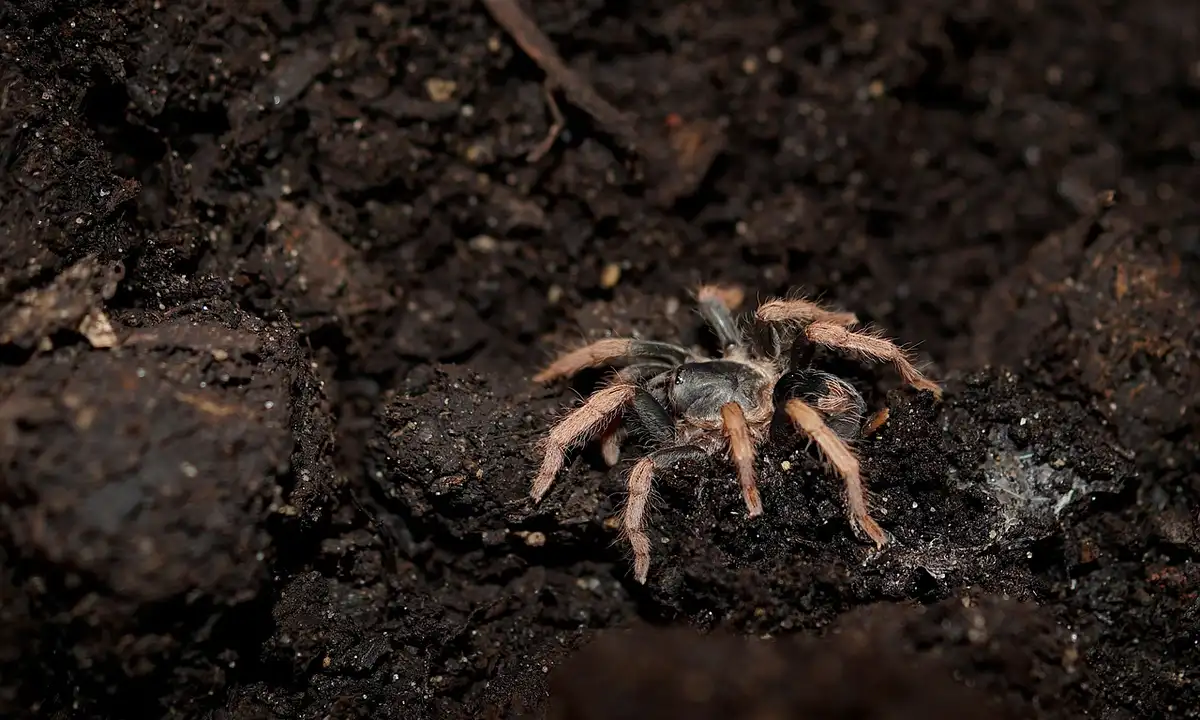
Your substrate depth directly dictates how well a moisture gradient can form and persist. For terrestrial species like my Chilean Rose Hair, Rosie, a minimum of 5-6 inches is non-negotiable. Deep substrate acts as a humidity battery, slowly releasing moisture from the damp end while keeping the opposite side bone-dry for weeks. For my moisture-loving Burgundy Goliath, T. stirmi, I pack at least 10 inches of damp coconut fiber to support both her size and her need for 75-85% humidity at the substrate level.
Ventilation is the silent partner in this system. Cross-ventilation-holes on opposing sides-is superior to top-only mesh. Proper airflow prevents stagnant, mold-prone pockets of air without stripping all humidity from the enclosure. I learned this the hard way with Flash’s OBT enclosure; inadequate side vents led to condensation webbing on the glass, creating a frustrating cycle of wet and dry extremes.
- Substrate Depth Guide:
- Lightweight Burrowers (e.g., Grammostola species): 5-8 inches.
- Heavyweight/Moisture-Dependent Species (e.g., Theraphosa, Megaphobema): 8-12 inches.
- Arboreal Species: 2-3 inches for anchor points, with a focused moist corner.
- Ventilation Check:
- Listen for stillness; a healthy enclosure has no foul, earthy smell.
- Look for gentle air movement; a misted side should dry within 24-36 hours.
- Feel the gradient; the air above the dry side should feel fresher than above the wet side.
Place your water dish decisively on the drier end of the gradient. Positioning the dish on the moist side is a common error that floods the gradient and eliminates the tarantula’s choice. I keep Rosie’s shallow dish on her preferred dry side, refilling it weekly. This provides drinking water without undermining the moisture retreat she uses only before a molt.
Heating Elements and Hiding Spots
External heat sources dramatically alter your gradient. Heat mats placed on the bottom or back of the enclosure will desiccate the substrate from one direction, collapsing your careful moisture work. Always use overhead heating, like a ceramic heat emitter or a low-wattage bulb on a thermostat, positioned exclusively over the dry end. This creates a complementary heat gradient: warm & dry on one side, cool & moist on the other.
Hides are more than decoration; they are microclimate generators. A cork bark slab partially buried on the moist side will create a humid retreat. Your tarantula’s chosen hide location is a direct report card on your gradient’s success. My Goliath rarely uses her moist-side hide except for premolt, preferring to bask near her dry-side hide, telling me the gradient offers her perfect options.
- Setting Up Heat:
- Place thermostat probe at substrate level on the dry side.
- Set temperature for 75-80°F (24-27°C) for most species.
- Never let the moist side exceed 72°F (22°C) to prevent rapid drying.
- Positioning Hides:
- Offer at least one hide on each end of the gradient.
- Bury the base of the moist-side hide slightly into the damp substrate.
- Keep the dry-side hide fully on the surface to maximize airflow.
Observing Your Tarantula: Signs of a Successful Moisture Gradient
Watch where your tarantula spends its time. A healthy tarantula will utilize the entire enclosure over time. My Rosie’s long fasts are less worrisome when I see her move from her dry daytime loafing spot to patrol the humid corner at night, confirming she feels the options. A tarantula perpetually pressed against the glass in one spot may be escaping unfavorable substrate conditions.
Inspect the substrate itself. A successful gradient shows a clear visual and tactile transition. The damp end should feel cool and hold a shape when pinched, while the dry end should be loose and crumbly, with no visible water pooling or surface mold. With my OBT Flash, I watch his web tunnels; if they sag with moisture, I know ventilation needs adjusting.
- Positive Behavioral Signs:
- Burrow construction or webbing that incorporates both damp and dry substrate.
- Regular movement between different zones of the tank, especially at night.
- Drinking from the water dish and then retreating to a preferred area.
- Physical Enclosure Signs:
- Condensation only forms, if at all, on the glass nearest the moist side and dissipates daily.
- Absence of foul odors or explosive springtail populations (a few are normal).
- The tarantula completes molts with ease, its old exuvia often found in the humid zone.
The ultimate sign is a stress-free animal. A tarantula that readily eats, explores, and exhibits species-typical behaviors is your best indicator that the hidden world of the substrate is perfectly tuned to its needs. After dialing in Goliath’s gradient, her frequent hair-kicking displays ceased, replaced by calm, observant stillness-a victory for both keeper and spider.
Common Questions
How much of the enclosure should be dry versus damp?
This is species-dependent, but a general rule is to make the damp area between one-third to one-half of the total floor space. For arid species, aim for a smaller damp corner of about 25%. For moisture-dependent species, the damp zone can cover 60-75% of the enclosure, with the remaining area being less damp. The key is ensuring there is a clear, gradual transition so your tarantula can always find its preferred microclimate. Make sure to adjust the damp area according to humidity requirements for popular tarantula species.
Should the water dish be placed on the dry or damp side?
Always place the water dish on the drier side of the enclosure. This prevents rapid evaporation from the damp side from quickly fouling the water and ensures your tarantula has access to clean drinking water away from the humid microclimate. Positioning it on the dry side also preserves the integrity of your moisture gradient by not adding unintended moisture to the already damp area.
What type of substrate holds a moisture gradient best?
A blend of coconut coir (fiber) and sterilized, additive-free topsoil is excellent for most species. This mix provides good structure, retains moisture effectively without pooling, and is safe if ingested. For moisture-dependent tarantulas, adding sphagnum moss to the blend can enhance humidity retention. Avoid substrates like pure vermiculite, which can become waterlogged and hazardous.
How can I tell if the substrate is too wet or too dry?
Substrate that is too wet may develop visible mold, have a sour smell, or cause your tarantula to climb the walls excessively. Substrate that is too dry will be dusty, pull away from the enclosure walls, and won’t clump when squeezed. Your tarantula’s behavior is a key indicator; constant hovering over the water dish or difficulty molting can signal dryness, while refusing the damp area can signal it’s too wet. Excess moisture or overhydration can also show up as persistent condensation and a consistently damp substrate. If you notice these signs of overhydration, reassess humidity, ventilation, and watering to prevent an overhydrated enclosure.
Does the required moisture gradient change for different tarantula species?
Absolutely. The gradient must be tailored to the species’ natural habitat. Arid species like many Grammostola need a large, bone-dry area with only a small damp corner. Tropical and rainforest species require a more evenly elevated humidity with a gentle slope. Moisture-dependent giants like Theraphosa need the majority of the enclosure to be damp, with only a slightly drier retreat.
Your Tarantula’s Habitat Journey
The single most reliable indicator of your success is not a hygrometer reading, but the spider’s behavior. For moisture-dependent species, a proper moisture gradient is the fundamental husbandry act that supports everything from successful molting to long-term organ health. Get this foundation right, and you create the conditions for your tarantula to express its full natural repertoire.
Beyond the numbers, the real reward is in the silent observation. Patience is your most valuable tool. You may watch your tarantula meticulously plaster the damp corner of its burrow with silk, or see it spend nights excavating a tunnel that will maintain perfect humidity. I learned this watching my OBT, Flash, who transformed his dry-starter setup into a complex, glittering veil of webbing only after I dialed in his moisture gradient. The work you do with the substrate directly enables these fascinating behaviors, turning a container into a living landscape.
Further Reading & Sources
- Keeping Moisture Dependent Tarantula Species | Tom’s Big Spiders
- Curly Hair Tarantula (Tliltocatl albopilosus) Care – The Tarantula Collective
- Choosing the Right Substrate for Your Tarantula | Tom’s Big Spiders
Arlo is a lifelong arachnid enthusiast who believes tarantulas are the world’s most misunderstood roommates. With years of hands-on experience in tarantula care, habitat setup, and species behavior, Arlo combines expert knowledge with a dash of humor to make spider ownership less scary and a lot more fascinating. From choosing the right enclosure to understanding why your eight-legged buddy is doing that weird little pose again, Arlo is here to help you become the best tarantula parent you can be, without getting tangled in the web of misinformation.
Substrates and Decor