
How to Set Up a Tarantula First Aid and Emergency Kit
Even our most docile tarantulas, like my fifteen-year-old Chilean Rose Hair Rosie, can face sudden health crises that demand immediate, knowledgeable action. This guide isn’t about paranoia; it’s about respectful, prepared stewardship for the quiet lives in our care. We’ll assemble the physical tools and the critical knowledge you need to respond to common emergencies, from a bad molt in a fragile sling to a dangerous fall for a heavy-bodied adult. Having a dedicated kit transforms panic into a calm, effective response.
Quick Stats:
- Purpose: Targeted intervention for tarantula-specific emergencies.
- Scope: Covers issues from dehydration and injury to escape and enclosure failure.
- Key Principle: Minimize stress and handling; your tools are an extension of careful observation.
This guide will walk you through assembling a targeted kit and developing the protocols to use it, ensuring you’re prepared to support your tarantula from a vulnerable sling to a venerable adult.
Understanding Tarantula Emergencies: Why a Prepared Keeper is Essential
Guide Content:
Explain the fragile nature of tarantulas and the types of acute crises.
Tarantulas are fragile despite their size. Their abdomen, or opisthosoma, is a fluid-filled sac protected only by a thin cuticle. A fall from even a modest height can cause a rupture, leading to a rapid and fatal leak of hemolymph. Crises strike silently and demand immediate, calm action.
The most common acute emergencies include abdominal rupture from a fall, a tarantula stuck in its molt (dysecdysis), severe dehydration signaled by a shriveled abdomen, and sudden enclosure failures like a collapsed burrow or a dangerous temperature spike. Each scenario threatens the spider’s life within hours if not addressed.
This is where the “Look, Don’t Touch” philosophy becomes critical. Panicked handling worsens stress and injury. A prepared kit lets you stabilize the situation with minimal contact. I once found my Chilean Rose Hair, Rosie, on her back beneath a decor piece after a late-night climb. My heart sank. Because I had my kit ready, I could gently contain her and assess for damage without fumbling for supplies. She was fine, but the kit turned panic into procedure.
- Falls and Abdominal Rupture: The most critical emergency. A rupture looks like a wet, dark spot on the abdomen.
- Stuck Molts: The tarantula is partially trapped in its old exoskeleton, often during the crucial leg or carapace extraction.
- Severe Dehydration: The abdomen appears wrinkled and small, with the tarantula lethargic and often huddled over the water dish.
- Enclosure Failures: This includes escapes, flooded tanks, or overheating from a malfunctioning heat source.
The Core Components: Assembling Your Tarantula First Aid Kit
Guide Content:
Provide a detailed, categorized list of essential items. Use a main bulleted list for categories, with sub-lists for specific items.
Store everything in an airtight container to keep items sterile and organized. Your kit is not for routine care but for urgent intervention. Check expiration dates on antiseptics every six months.
A well-stocked kit transforms you from a frantic observer into a capable first responder for your eight-legged charge. Here are the non-negotiable categories and their contents.
- Category 1: Wound and Injury Care
- Sterile Tweezers: For carefully removing any debris from a wound or assisting with a stuck molt fragment. Blunt tips are safer.
- Sterile Gauze Pads: To apply gentle pressure or create a clean, dry surface for the tarantula if needed.
- Antiseptic Wipes: Use only chlorhexidine or povidone-iodine, diluted to a light tea color with water. Never use alcohol or hydrogen peroxide.
- Cornstarch or Styptic Powder: For minor bleeds from a lost leg or small puncture. A tiny dab can help clot hemolymph.
- Category 2: Hydration and Climate Control
- Small Water Dish: A bottle cap or shallow vial for immediate offering of water.
- Oral Syringes or Pipettes: For placing water droplets near the mouthparts of a dehydrated tarantula (droplet feeding).
- Unflavored Electrolyte Powder: A pinch in water can aid a severely dehydrated spider. Use pediatric rehydration formulas.
- Instant Cold Pack: To tape to the outside of an enclosure if temperatures dangerously exceed 85°F (29°C).
- Safe Heat Source: A small, adjustable heat pad for external use on one side of the enclosure if temps drop below 65°F (18°C).
- Category 3: Safety and Containment
- Safety Gloves: Powder-free nitrile gloves protect you from urticating hairs and keep your hands clean.
- Clear Rescue Containers: Various-sized deli cups with ventilation holes for safely containing an escaped or injured tarantula.
- Soft Paintbrushes: For gently guiding a tarantula into a cup without direct contact.
- Airtight Container: This is the kit box itself, keeping all components dust-free and together.
- Category 4: Documentation and Contacts
- Observation Log: A small notebook to note the time, symptoms, and your actions. This is vital for tracking recovery or informing a vet.
- Vet Contact Information: Have the name and number of an exotic vet experienced with arachnids. Not all vets will see tarantulas.
- Emergency Phone Numbers: Include your own contact info in case someone else is caring for your pets.
Organizing and Storing Your Emergency Kit for Instant Access
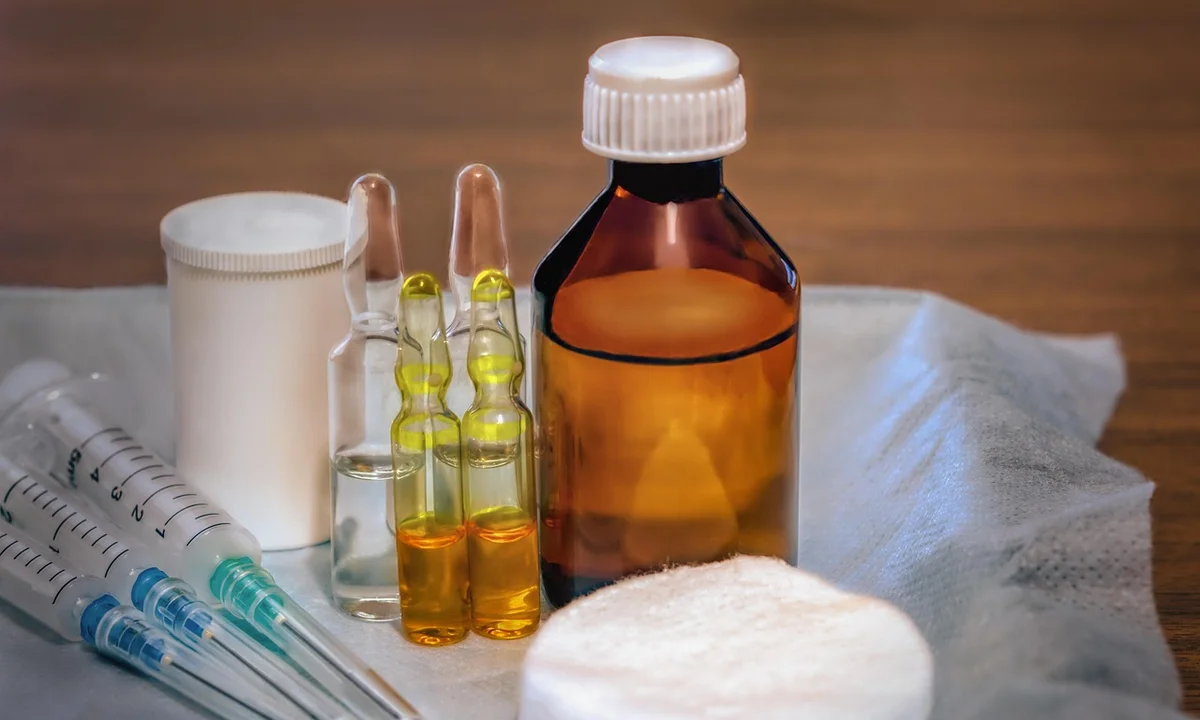
A perfectly stocked kit is useless if you’re fumbling through a drawer during a crisis. Your emergency supplies must be organized and instantly accessible to be effective. The silent panic of a ruptured abdomen or a frantic escape leaves no time for searching.
Guide Content:
Offer step-by-step advice on kit assembly and location.
- Choose Your Container: I use a small, clear plastic tackle box. It’s waterproof, has movable dividers, and fits neatly on my tarantula shelf. A labeled pencil case or small storage bin works perfectly. The goal is immediate identification.
- Organize by Category: Use the dividers or small zipper bags to group items. Keep all molt-assistance tools (pipette, mister) together. Isolate the cornstarch and cotton swabs in their own section. This prevents a frantic spill of contents when you just need one item.
- Strategic Storage: Store the kit in the same room as your tarantulas, on a shelf or in a cabinet away from direct heat or sunlight. Mine sits between my docile Rosie’s enclosure and my faster species, a constant visual reminder. It must be in a cool, dry place to preserve the integrity of items like cornstarch.
- Communicate Its Purpose: Ensure anyone in your home knows what the box is for and where it is. A simple, “This is the spider first-aid kit,” prevents confusion. When my orange baboon tarantula, Flash, made a dash for it, having my partner know where the catch cups were saved precious seconds.
Responding to Common Tarantula Emergencies
Knowing how to use your kit is the final, critical step. Calm, pre-planned action is the single greatest advantage you can give your tarantula in an emergency. I’ve faced each of these scenarios, and a methodical response makes all the difference. For everyday safety, follow a safe step-by-step tarantula handling guide to learn how to hold and support your pet properly. This approach keeps both you and your spider calm during every check and handling session.
Guide Content:
Break down specific scenarios with clear action steps.
Managing a Stuck or Disrupted Molt
Watching a tarantula struggle in its old exoskeleton is a heart-sinking experience. My old Chilean rose, Rosie, has had prolonged, difficult molts. The primary goal is to soften the old exoskeleton and reduce fluid loss without causing further injury. During molts, tarantulas can regrow lost legs, a gradual process explained by the molting cycle. This perspective helps you understand what Rosie is going through.
- Step 1: Increase Local Humidity: Gently mist the inside walls of the enclosure near the tarantula. Do not spray the tarantula directly. For a severe case, placing a damp piece of sponge or a humidity chamber (like a deli cup with damp moss) over part of the enclosure can help.
- Step 2: Apply Targeted Moisture: Use your plastic pipette to place tiny beads of lukewarm water along the seam of the old carapace and around stuck limbs. The aim is capillary action, not force.
- Step 3: Never Interfere Mechanically: Do not attempt to pull the tarantula free. You will cause catastrophic injury, tearing the new soft abdomen or limbs. Their bodies are under immense hydraulic pressure during this process.
- Step 4: Create a Recovery Space: If the tarantula becomes separated from the molt but is still alive, use your rescue container. Line it with damp paper towel, provide a bottle cap of water, and keep it in a quiet, dark place. The stress of a standard enclosure can be too much.
Addressing a Fall or Abdominal Rupture
A fall from a significant height can cause the delicate abdomen to rupture, leaking clear or pale blue hemolymph (the tarantula’s blood). This is a critical situation. Your immediate job is to clot the leak and minimize stress to prevent further fluid loss. My heavy-bodied Goliath is always at higher risk for such an injury.
- Step 1: Secure the Tarantula: Gently guide the injured animal into your clean, paper-towel-lined rescue container. Limit its movement.
- Step 2: Apply Clotting Agent: Using a cotton swab, dab a generous amount of plain cornstarch or styptic powder directly onto the rupture site. You may need to apply a second layer. This forms a seal over the wound.
- Step 3: Minimize All Stress: Place the container in a dark, quiet location. Do not offer food. The tarantula’s metabolism must focus on repair.
- Step 4: Seek Expert Help: Contact an exotic veterinarian experienced with arachnids immediately. They can advise on further care and possible sealing compounds. This is a true medical emergency.
Containing an Escape and Preventing Injury
The sudden absence of a tarantula from its enclosure triggers a unique adrenaline rush. My P. murinus, Flash, is an escape artist of the highest caliber. The rule is: contain the area first, then contain the tarantula. A lost tarantula is at risk of desiccation, crushing, or venomous confrontation.
- Step 1: Stay Calm and Isolate: Close the room door. Block gaps under doors with towels. Clear the floor of hazards. Turn off ceiling fans. Your calm prevents frantic movements that could scare the tarantula into a dangerous hide.
- Step 2: Gentle Recapture: With your large catch cup and soft paintbrush in hand, locate the tarantula. Slowly use the brush to guide it toward the cup, then lower the cup over it. Slide the rigid card underneath to complete the trap. Never chase or grab.
- Step 3: Post-Escape Check: Once secured in the rescue container, carefully inspect the tarantula for any injury sustained during its adventure. Look for limb damage or abdominal wetness. Provide a water dish and allow it several hours of absolute quiet to recover from the stress.
Creating a Safe, Temporary Recovery Enclosure
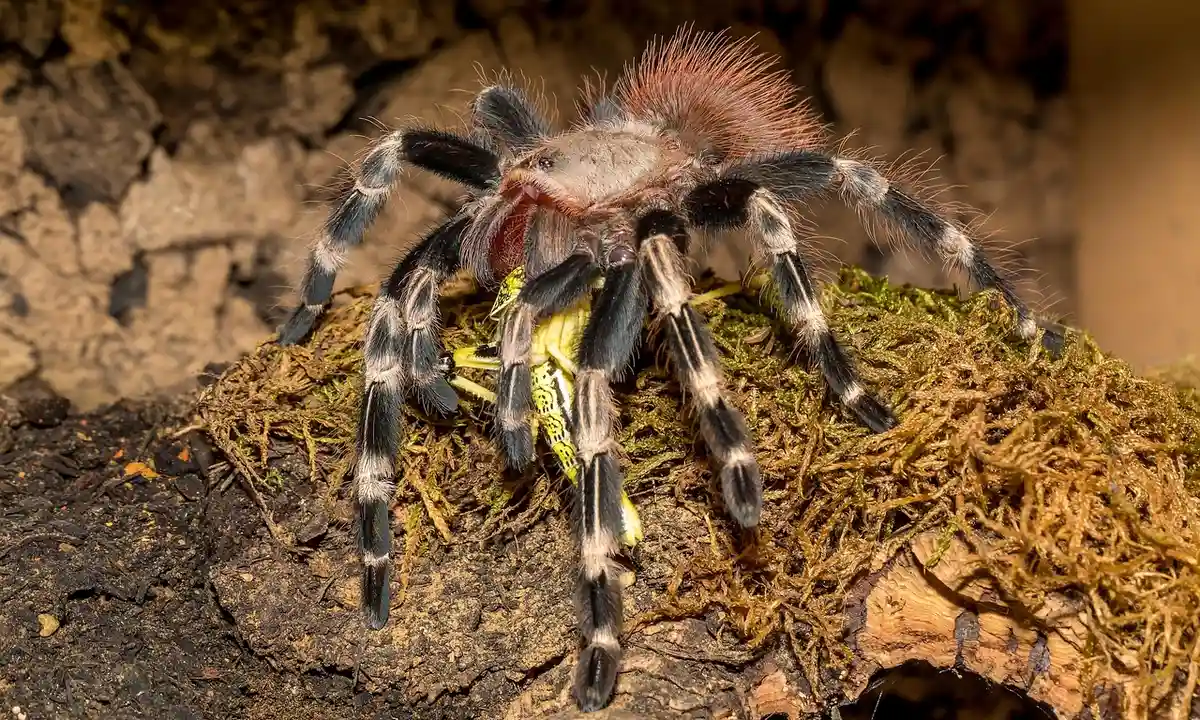
When a tarantula is injured or post-surgery, its normal, beautifully-decorated home can become a hazard. A simple, sterile space is critical for healing. This minimalist setup reduces stress, eliminates fall risks, and lets you monitor vital functions like drinking and wound condition with a single glance—unlike regular enclosures with décor that might hide or cause injury. I’ve used this method for a leg-injury case with my Grammostola rosea, Rosie, and it made her recovery process infinitely easier to track.
Detail the setup for a minimalist habitat used during convalescence.
The goal is clinical cleanliness and safety, not aesthetics. You are building a small-scale intensive care unit.
- Enclosure: A small, clear plastic container with ample cross-ventilation holes drilled high on the sides. A kritter keeper works perfectly. It must be escape-proof but not overly spacious.
- Substrate: Use several layers of moistened, unbleached paper towels or a shallow layer of sterile, additive-free coconut fiber. This provides secure footing and allows you to control humidity levels directly around a dehydrated or molting tarantula.
- Water Dish: A bottle cap or tiny, shallow dish is non-negotiable. Hydration is often the primary goal of convalescence.
- Hide: A single, low-profile hide-half a toilet paper tube or a small plastic plant pot slice. It offers a security feel without dark, unreachable corners.
Beyond the substrate, environmental control is paramount. Never place a heat pad under or on the side of a recovery enclosure, as an incapacitated tarantula cannot escape overheating. If supplemental warmth is medically necessary, use a space heater to gently raise the ambient temperature of the entire room. The silence and stability of this simple enclosure are its greatest healing tools. This approach helps avoid common heating and humidity mistakes that can harm your tarantula.
Maintaining Your Tarantula Emergency Kit
A neglected kit is as useful as no kit at all. Supplies degrade, contact information changes, and items get used up. Treating your emergency kit like a living document ensures it’s ready the moment a crisis occurs, removing panic from the equation. My own kit has evolved from a jumbled shoebox to a organized go-bag, a transformation that saved time during a frantic escape incident with my quick Pterinochilus murinus, Flash.
Outline a schedule and checklist for keeping the kit functional.
- Perform a brief visual inventory every month. Check for cracked containers, dried-out sealants, or missing tools like your catch cups and paintbrushes. Replace anything compromised immediately.
- Mark your calendar to replace all antiseptic supplies, like iodine swabs or chlorhexidine solution, every six to twelve months. Their efficacy diminishes over time once opened.
- Restock any disposable item the instant it is used. If you use gauze to stem a bleeding leg, add new gauze to your shopping list that same day. Do not wait for the next emergency.
- Review and update your attached veterinary contact sheet and observation log biannually. Vet clinic hours change, and your own notes on what’s normal for each spider should be refreshed as they grow and molt.
This maintenance ritual takes mere minutes but builds an invaluable layer of preparedness in your husbandry practice. When your Goliath bird eater (Theraphosa stirmi) has a bad molt or a fall, you’ll reach for a kit you trust completely, not a collection of dusty maybes.
FAQs
Are there any medications or solutions I should have in my tarantula first aid kit?
Yes, your kit should include specific safe solutions. Always have chlorhexidine or povidone-iodine antiseptics, diluted to a light tea color, for cleaning wounds. Never use alcohol or hydrogen peroxide, as these can severely damage tarantula tissues. Additionally, include cornstarch or styptic powder for clotting minor bleeds and unflavored electrolyte powder for emergency rehydration. These measures help prevent common tarantula health problems such as infections from wounds, dehydration, or molt complications. Being prepared to address injuries promptly can prevent minor issues from becoming serious.
Where can I purchase the specialized items for a tarantula emergency kit?
Many components are readily available from various retailers. Basic first aid supplies like gauze and antiseptic wipes can be found at pharmacies or general stores. For tarantula-specific tools like soft paintbrushes, catch cups, and safe heat sources, check online exotic pet or invertebrate supply websites. Items like cornstarch and oral syringes are often available at grocery stores or pharmacies. Handle with care and be cautious, especially if you are new to tarantulas.
How often should I check and restock my tarantula emergency kit?
Conduct a brief visual check of your kit every month to ensure all items are present and undamaged. Replace antiseptic solutions or wipes every six to twelve months, as they can lose potency over time. Immediately restock any used disposable items, such as gauze, and update your veterinary contact information at least twice a year.
What is the first thing I should do in a tarantula emergency?
Your immediate priority is to stay calm and assess the situation without handling the tarantula. Secure the area to prevent further injury or escape, such as by closing the room door. Having the right safety equipment and essential tarantula handling tools is crucial for humane, low-stress containment. Ensure your kit is ready with items like a rescue container, soft brush, and protective gear before you need it. Then, use tools from your kit, like a rescue container and soft brush, to safely contain the tarantula for observation or treatment with minimal stress.
The Keeper’s Quiet Confidence
Your emergency kit is a vital safety net, but the mesh of that net is woven daily through routine care. The single most important element for any tarantula’s health, and its ability to recover from stress or injury, is not in the kit at all-it is the consistent, appropriate husbandry you provide every single day. A perfect humidity level for a Goliath or a bone-dry corner for a Rosie does more to prevent crises than any tool you can buy.
Beyond the substrate and water dish lies the real reward: observation. Watch the meticulous architecture of Flash’s web fortress, the patient excavation of a Goliath burrow, or the profound stillness of Rosie in her months of fasting. These behaviors are the true indicators of wellbeing. Patience is not just a virtue in this hobby; it is the primary tool. Your kit grants you confidence, but calm, watchful care builds a resilient animal. The greatest success is found in the quiet moments, simply witnessing a life perfectly adapted to its own silent world.
Further Reading & Sources
- Tarantula First Aid | Tarantula Husbandry | TARANTULAS.com
- Tarantula first aid compendium | Arachnoboards
- Tarantulas of the World | Tarantula Caresheets – Supplies – Information Tarantulas of the World » Blog Archive Tarantula First Aid – Creating an ICU – Tarantulas of the World
Arlo is a lifelong arachnid enthusiast who believes tarantulas are the world’s most misunderstood roommates. With years of hands-on experience in tarantula care, habitat setup, and species behavior, Arlo combines expert knowledge with a dash of humor to make spider ownership less scary and a lot more fascinating. From choosing the right enclosure to understanding why your eight-legged buddy is doing that weird little pose again, Arlo is here to help you become the best tarantula parent you can be, without getting tangled in the web of misinformation.
Veterinary Care