
Budgeting for a Tarantula Hobby: From Your First Spider to Your Fiftieth
Published on: February 16, 2026 | Last Updated: February 16, 2026
Written By: Arlo
Many new keepers are drawn to tarantulas thinking they are cheap pets, only to be shocked by the escalating costs of enclosures, feeders, and specialized gear-a reality that can quietly bankrupt a budding passion. This guide cuts through the confusion with a clear, cost-focused roadmap for every stage of the hobby, from your first cautious purchase to managing a sprawling collection. The honest truth is that the biggest expense isn’t the spider itself, but the infrastructure and ongoing care you commit to providing.
Quick Stats:
- Origin: A global hobby with spiders from every continent.
- Type: Encompasses both New World (often docile, with urticating hairs) and Old World (typically fast and defensive) species.
- Growth Rate & Lifespan: Varies wildly; a fast-growing species might reach adulthood in 2 years, while a slow-growing female can be a 25-year financial commitment.
This financial blueprint will show you how to allocate funds wisely for a single terrarium or a dedicated spider room, ensuring your budget scales as thoughtfully as your collection does.
Calculating Startup Costs for Your First Tarantula
Your first tarantula is an exciting commitment. The initial investment covers the animal and its permanent home. Planning your budget prevents overspending and ensures you buy the right gear from day one.
- The tarantula’s price varies wildly. Common starter species like my old Chilean rose hair, Rosie, cost $20 to $50 as juveniles. Rare or large species, like my Burgundy Goliath Bird Eater, Goliath, can be $150 to $300 or more. Adoption from a rehoming group often costs just the price of shipping, sometimes under $50.
- Essential enclosure components are non-negotiable. A basic 5 to 10-gallon glass tank or acrylic terrarium runs $25 to $50. Substrate, like coconut fiber or peat moss, costs $10 to $20 for a bag that fills multiple enclosures. You need a hide ($5-$15), a shallow water dish ($2-$5), and perhaps some basic decor like fake plants or cork bark ($10-$20).
- Climate control is critical for health. A small, low-wattage heat pad costs $15 to $25, but you must pair it with a thermostat ($30-$50) to prevent dangerous overheating. A simple digital hygrometer and thermometer combo to monitor humidity and temperature is another $10 to $15.
| Component | Low-End Estimate | Mid-Range Estimate | High-End Estimate |
|---|---|---|---|
| Tarantula (Juvenile) | $20 (common species) | $75 (desirable morph) | $200+ (rare/large) |
| Enclosure | $25 (plastic tub) | $40 (glass tank) | $80 (front-opening vivarium) |
| Substrate & Decor | $15 | $30 | $60 |
| Climate Control (pad, thermostat, gauge) | $40 | $65 | $100 |
| Total Startup Cost | $100 | $210 | $440+ |
This table shows you can responsibly house a first tarantula for around $100, but investing in reliable equipment pays off in animal welfare and your peace of mind. For beginners, a budget breakdown helps you plan upfront costs and ongoing expenses, so you know exactly where your money goes as you start keeping tarantulas.
Which Tarantula Traits Most Affect Price?
Price hinges on rarity, demand, and the care required. A common, hardy Grammostola rosea is inexpensive, while a fossorial Asian species with intense colors commands a premium.
Spiderlings are cheapest, often $10 to $30, but they require delicate care and years to mature. Juveniles, like most beginners buy, offer a balance of size and hardiness for $20 to $100. Adult females are most expensive due to their long lifespan and breeding potential; an adult female Theraphosa can cost $300. Males are cheaper, as they live only a few years after maturing.
Species and Size
Low-cost species are typically docile, readily bred, and slow-growing. Think Grammostola porteri or Tliltocatl albopilosus (Curly Hair), at $20 to $40. High-cost species include the stunning Xenesthis intermedia or massive Theraphosa stirmi, ranging from $200 to $500. Higher price often reflects specialized care, like the 80% humidity my T. stirmi demands, or limited importation.
Age and Source
Buying from a reputable breeder online ensures health and accurate species identification, costing $30 to $200 plus shipping. Expos offer direct deals and no shipping fees, but research the vendor first. For the true budget option, seek adoption networks; I’ve rehomed several older ‘pet rock’ tarantulas this way, giving them a quiet retirement home for less than $50. When you’re deciding where to get your tarantula, weigh breeder reliability and rescue options against convenience. Pet stores vary widely in expertise, so do your homework if you go that route.
Monthly Maintenance: Feeding and Routine Care Budget
Once set up, monthly costs are minimal but predictable. The biggest recurring line items are feeder insects and substrate for cleaning.
- Feeder insects cost little. Two dozen crickets might be $5, and a juvenile tarantula may eat only one or two a week. Buying dubia roaches in bulk online, say 100 for $15, can feed one spider for months.
- Spot-clean waste and boluses weekly; this uses almost no substrate. A full substrate change happens every 6-12 months, costing $5 to $15 per enclosure depending on size.
- Utilities are negligible. A small heat pad and thermostat use less power than a nightlight, adding pennies to your bill. Water for misting or filling dishes is essentially free.
| Expense | One Tarantula (Monthly) | Five Tarantulas (Monthly) |
|---|---|---|
| Feeder Insects | $3 – $5 | $10 – $20 (bulk discount) |
| Substrate & Spot-Cleaning Supplies | <$1 | $2 – $3 |
| Utilities (Electricity/Water) | <$1 | <$3 |
| Total Monthly Estimate | $5 – $7 | $15 – $26 |
This scalability makes tarantulas a budget-friendly hobby; adding your fifth spider doesn’t quintuple your costs, especially if you buy feeders in bulk. To keep costs down, check out the top 10 tarantula feeding mistakes to avoid at all costs. This quick guide helps you feed efficiently and avoid waste.
Cost of Feeding Tarantulas
Feeders are your main consumable. Crickets cost about $0.10 each, dubia roaches $0.15 each, and mealworms $0.03 each. An adult Grammostola might eat one large roach every 10 days, while a growing sling needs a pinhead cricket twice a week.
To slash costs long-term, start a small dubia roach colony. A starter kit with roaches and bin costs $50, but it can eventually produce all your feeders for free. I maintain a colony for my hungry specimens, and it pays for itself within a year.
Routine Maintenance and Replacements
Equipment lasts years with care. Ceramic water dishes are durable and cheap to replace if cracked, around $5. Hygrometers may need new batteries every year. Cork bark and hides rarely wear out. The biggest replacement cost is substrate during full enclosure clean-outs, which is infrequent and a chance to redesign your tarantula’s landscape for their enrichment, not yours.
Upgrading Enclosures and Equipment Over Time
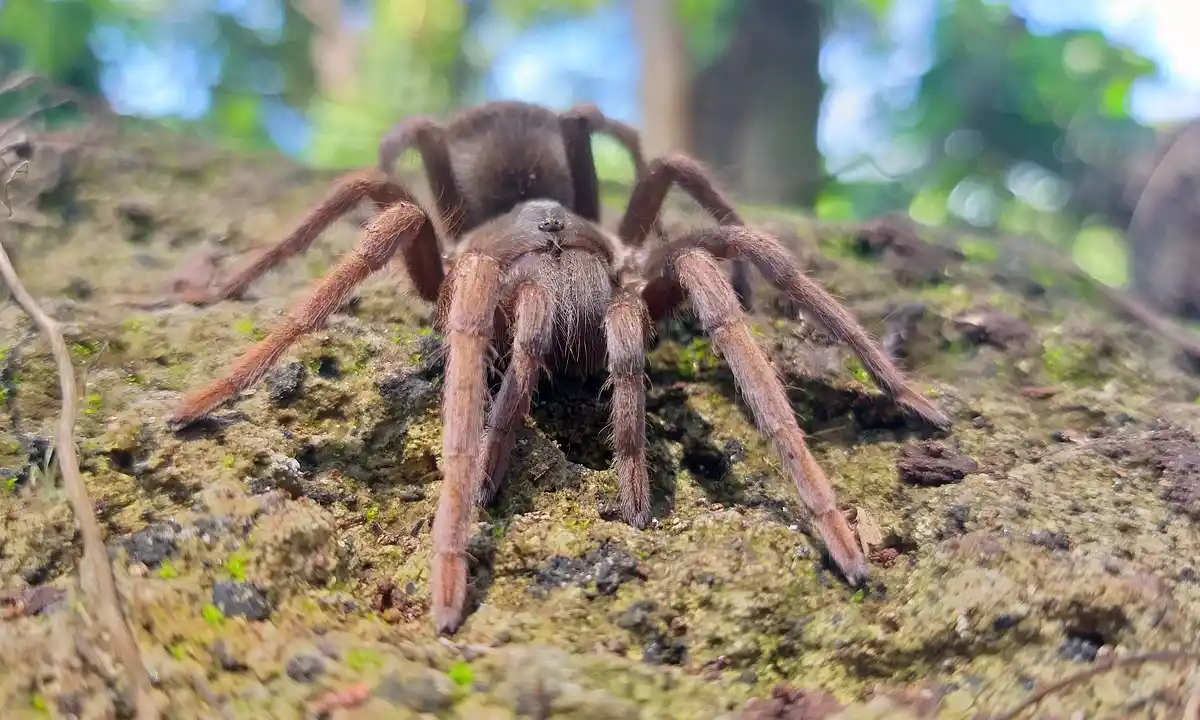
Your tarantula’s housing needs will evolve dramatically from sling to adult. A spiderling thrives in a humble deli cup, but an adult Theraphosa stirmi needs a small fortress. This journey is covered by our complete month-by-month tarantula growth guide, which maps stage-appropriate upgrades. It helps you plan ahead for smooth transitions. A practical upgrade path prevents stress and wasted money.
The journey from a $2 deli cup to a $50 terrarium is a series of intentional, size-appropriate jumps. For most species, rehouse when the legspan is 1.5 times the enclosure’s diagonal. You will rehouse it three or four times. My Burgundy Goliath, Goliath, started in a vial, moved to a small kritter keeper, then a large one, and now resides permanently in a modified 10-gallon tank. This pacing keeps them secure and allows you to spread costs.
From Basic to Advanced Climate Control
Heat and humidity are where budgets can balloon. For a single, hardy species like my Grammostola rosea Rosie, a simple heat pad on the side of a shelf, paired with a $10 digital thermometer, is often sufficient if your room is moderately stable. The cost is minimal.
Premium control becomes a necessity, not a luxury, when you keep moisture-dependent giants or an entire collection. My T. stirmi requires 80% humidity. Manually misting a large enclosure twice daily is inconsistent and laborious. A humidity controller ($80-$150) connected to a reptile fogger automates this perfectly. For heating multiple enclosures, a small space heater for a dedicated “spider room” is far safer and more efficient than a dozen individual heat mats, which can overheat and cause deadly dehydration.
Enclosure Upgrades and Aesthetics
Function always comes first, but aesthetics have value for your enjoyment. A basic plastic enclosure is cheap, lightweight, and functional. A glass terrarium with front-opening doors is costlier but offers better viewing and access-a godsend for rehousing a defensive species. My Orange Babbling Tarantula, Flash, lives in one; the doors let me work without reaching over his extensive web fort.
For decorative elements, invest in pieces that serve the animal. Cork bark is a universal winner for hides and climbing. Background foam can harbor moisture and mold. Live plants in a bioactive setup are a worthwhile investment for humidity and enrichment, but require research. A simple, planted terrarium for a moisture-loving spider can be built for under $50 in extra supplies: drainage layer, soil, plants, and clean-up crew like springtails.
Budgeting for a Growing Collection: From One to Fifty
A single tarantula is a modest expense. Ten requires systemization. Fifty is a lifestyle that demands military-grade logistics and budget forecasting. The cost doesn’t scale linearly; it compounds through bulk buying and space solutions.
Your primary goal-display, breeding, or education-dictates your largest financial outlays. A display collection invests in beautiful enclosures. A breeding project budgets for wholesale sling vials, incubators, and potential losses. An educational focus might prioritize durable, escape-proof setups. Be honest about your goal; it prevents frivolous spending on incompatible gear.
Scaling Your Supply Purchases
This is where you save. Buying a single brick of coconut fiber is fine for one tank. Buying a 5-brick case cuts the unit cost in half. Purchasing a 2.5 cubic foot bag of premium topsoil for bioactive mixes is exponentially cheaper per enclosure. The same logic applies to feeders.
Ordering 1,000 crickets or a colony of dubia roaches eliminates weekly pet store trips and reduces long-term feeding costs by over 60%. I buy enclosures in bulk from plastic wholesalers-simple deli cups and small terrariums by the case. The upfront cost is higher, but having the right size on hand during an unexpected molt or escape is priceless. Speaking of escapes, always budget for backup enclosures. I’ve had an OBT sling vanish during a rehouse (thankfully contained to a room); spare setups are emergency gear.
Planning for Space and Organization
Twenty tarantulas in assorted containers on a desk is chaos. Proper shelving, like sturdy metal wire racks ($100-$200), is a foundational budget item for safety and viewing. Factor in the cost of lighting each shelf with LED strips. Organization extends to supplies: dedicated storage bins for substrates, tools, and feeder supplies keep everything contained and professional.
A simple, scalable labeling system-whether vinyl stickers or a label maker-is non-negotiable for tracking molts, feeds, and identities, saving you from costly husbandry errors. Dedicated long tongs, paintbrushes for gentle prodding, and a dedicated water bottle for each enclosure type (to avoid cross-contamination) are small, recurring costs that add up but are vital for safe, respectful care.
| Collection Size | Estimated Annual Budget (Excluding Spider Cost) | Budget Focus Areas |
|---|---|---|
| 1-5 Tarantulas | $150 – $300 | Individual enclosures, small substrate bags, pet store feeders, basic tools. |
| 5-15 Tarantulas | $400 – $800 | Bulk substrate/feeders, shelving unit, improved climate control for sensitive species. |
| 15-30 Tarantulas | $900 – $1,500+ | Wholesale enclosure purchases, automated humidity/temp systems, dedicated room considerations. |
| 30-50+ Tarantulas | $2,000+ | Commercial-grade storage, breeding incubators, large-scale feeder culturing, significant electricity for climate. |
Use this template as a starting point. Your actual costs will vary based on species choices and your commitment to automation. The key is to anticipate the compound cost of scale before your fifth impulsive purchase at a reptile expo leaves you wondering where to put them all.
Emergency Funds and Unexpected Expenses
A tarantula’s seemingly simple care can unravel quickly. I learned the hard way that a dedicated veterinary fund is not optional, even for invertebrates, when my Goliath (T. stirmi) developed a suspect fungal spot after a humidity spike. Regular prevention—through stable habitat conditions, routine checks, and prompt veterinary attention—can help prevent many common tarantula health problems. Prevention starts with observation and consistent care. The specialized consult and treatment cost over $150. Such funds cover rare but real issues like injuries from falls or bacterial infections.
- Stress the importance of a veterinary emergency fund: Aim to save $100-$300. Exotic veterinarians with arthropod expertise are scarce, and their consultations start at $80 before any medication.
- Detail the cost of replacement gear for escapes or enclosure failures: Always have a backup enclosure ($20-$50), a long-handled catch cup ($10), and spare lid clips ($5). When my OBT, Flash, vanished into a vent during maintenance, my pre-purchased capture kit saved hours of panic.
- Share a personal anecdote about a costly lesson: A cheap, unregulated heat mat cooked the substrate in my old Rosie’s tank, creating a dangerous dry pocket and forcing a full, emergency rehouse. Replacing the mat and upgrading to a thermostat ($65 total) was a preventable expense I now caution every keeper about.
Health and Molting Concerns
Molting is the riskiest moment in a tarantula’s life. Being prepared financially means being prepared to act. My molting intervention kit, assembled after a scary stuck-carapace incident with a sling, costs under $40 but is priceless during a crisis. It lets you assist without causing further stress.
- List supplies needed for molting complications: Soft-tip tweezers for gently removing stubborn molt fragments ($12), a small artist’s brush for hydration ($3), and a dedicated ICU container for critical care ($15). Distilled water is also essential.
- Discuss the reality that some species have higher failure rates: Fast-growing, humidity-sensitive species like many in the Psalmopoeus genus can be prone to molting complications if conditions are off by even a small margin. For a beginner, this translates to a higher budget risk, as losing a prized $80 specimen to a bad molt is a harsh financial and emotional blow.
Advanced Costs for Tarantula Breeding
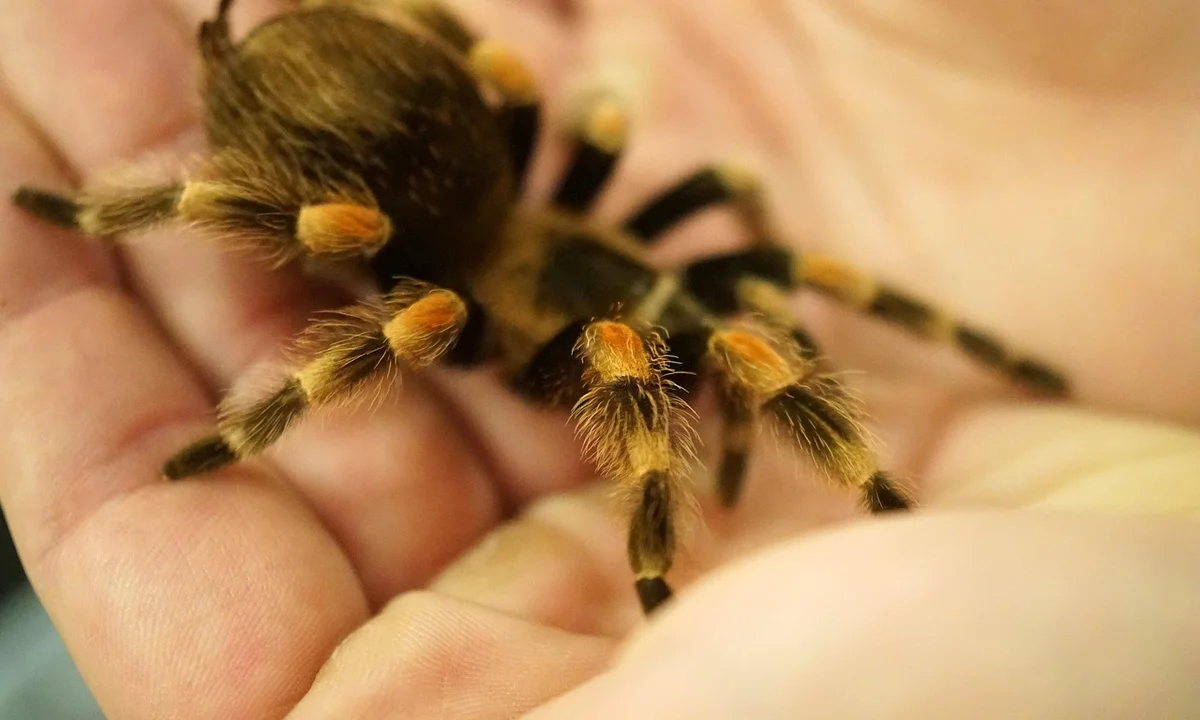
Breeding shifts the hobby from curation to agriculture, with a corresponding budget expansion. The initial outlay for a single breeding project can easily surpass the cost of ten adult tarantulas, with no guarantee of a single spiderling. It is a venture driven by passion, not profit. Additionally, when considering rare advanced tarantula species, their price can be a major budgeting factor. Prices for these rarities vary widely based on lineage, age, and availability.
- Outline the specific startup investment for breeding: A mature, healthy pair of a desirable species can range from $200 to over $1000. You then need an incubation setup ($50-$150 for a reliable digital incubator) and hundreds of individual vials or deli cups for spiderlings ($30-$80).
- Break down the ongoing costs of raising a sac: A successful eggsac of 500 spiderlings will consume 5,000+ pinhead crickets over 3-4 months ($120+ in feeders alone). Add weekly hours for watering and cleaning vial enclosures, a significant time cost.
- Balance this with potential income from selling offspring: While selling slings can generate revenue, the market for common species like Grammostola rosea is saturated. You may only recoup $10-$20 per spiderling, meaning you must sell a large percentage of a large sac just to break even on direct costs.
Breeding Setup and Supplies
Breeding requires specialized tools to ensure safety and success. I dedicate specific, escape-proof enclosures for pairing, as the male’s safety is paramount and chasing a fast male like an OBT is not an option. This gear is a one-time cost but a substantial one.
- Itemize the cost of breeding enclosures, tools for pairing, and incubators: A neutral pairing tub ($25), extra-long soft-tip forceps for gentle manipulation ($18), and a reliable incubator to hold perfect temperature and humidity ($90-$200). A dedicated warm space, like a shelving unit with heat tape, is another alternative.
The Financial Reality of Flipping Spiderlings
Viewing spiderlings as a flip is a common misconception. Consider a real case: breeding Brachypelma hamorii, a popular species. The initial outlay for a proven pair, breeding setup, and incubator might be $500. If the sac yields 400 spiderlings, and you sell 300 at $25 each over a year, gross income is $7500.
- Use a case study or example: From that $7500, subtract $1000 for pinhead crickets, $200 for vials and substrate, $100 for shipping supplies, and countless hours of labor. The net profit is modest and slow, emphasizing that breeding is a long-game hobby supplement, not a side hustle. Market fluctuations can also dramatically lower prices before your slings are ready to sell.
Cost-Saving Tips and Smart Purchases
The initial setup for a tarantula can be surprisingly economical, especially when you think like a resourceful keeper. The heart of budget-friendly arachnoculture is viewing everyday items through the lens of safety and function, not just store-bought solutions. Your creativity is your greatest asset here. Environmental enrichment matters—safe, budget-friendly tweaks like varied textures and hiding spots can keep a tarantula engaged and prevent boredom. This is a central theme in my tarantula bored guide on environmental enrichment for spiders.
For enclosures, clear plastic food containers with secure lids are my go-to for terrestrial slings and juveniles. I’ve housed dozens of young spiders in sterilized deli cups. Drill or melt small ventilation holes on the sides and lid, and you have a perfect, secure home for under a dollar. For hides, a broken clay pot fragment or a section of PVC pipe costs pennies and provides ideal security. My OBT, Flash, has webbed up the same clay shard for two years.
Invest in gear that endures. A cheap, flimsy spray bottle will crack and leak. A sturdy, chemical-free one lasts for years. Durability always wins over disposable convenience, saving you money and preventing escape disasters. This principle extends to tools like soft-tipped feeding tongs; buy one good pair you won’t need to replace.
Know where your money matters most. Splurge on a reliable pulse-proportional thermostat for any heat source-it’s non-negotiable for safety. Save on decorative items. Fancy cork bark is beautiful, but the piece of driftwood you safely baked from the backyard is free and just as functional.
Engage with your local or online hobbyist community. Trading spiderlings for feeder colonies or used enclosures is common. I’ve acquired wonderful species through trades, building my collection while fostering connections with other breeders. It reduces costs and spreads genetic diversity.
Prioritizing Your Purchases
For a beginner, it’s easy to buy the flashy items first. Follow this simple order to ensure your tarantula’s welfare is covered before aesthetics. To help you stay on track, consult the ultimate tarantula pre-purchase checklist — 12 things to verify before you buy. It guides you through care, enclosure, and safety considerations before you commit.
- A Secure, Appropriately-Sized Enclosure: This is your absolute first purchase. No spider should arrive without a prepared home. For a starter terrestrial like a Grammostola rosea, a 5-10 gallon tank with a locking screen or ventilated acrylic lid is perfect.
- A Reliable Thermostat: If you need supplemental heat, this device controls it. Plug any heat mat or cable into the thermostat, and its probe into the enclosure. It prevents dangerous overheating.
- Substrate: Buy a bag of chemical-free topsoil, coco fiber, or peat moss. You need enough for a depth 1.5 times your tarantula’s leg span for burrowers.
- A Water Dish: A simple bottle cap or shallow ceramic dish works. Hydration is vital.
- A Hide: Provide a secure retreat. This can be your DIY clay pot or cork bark.
- Feeding Supplies: A pair of long tweezers and a source of appropriate feeder insects (like small crickets).
Long-Term Value Investments
Some purchases feel costly upfront but save significant money and worry over years of keeping.
- Bulk Substrate Source: Buying a large, compressed brick of coco fiber or a bag of topsoil from a garden center is far cheaper per enclosure than small pet store bags. Store it in a sealed container to keep it pest-free.
- Quality Digital Hygrometer/Thermometer: The cheap dial types are notoriously inaccurate. A good digital unit gives you reliable data on your enclosure’s conditions, preventing guesswork that could lead to a too-dry or too-moldy habitat.
- Versatile Enclosures: Investing in well-made, front-opening acrylic or glass enclosures with good ventilation means you won’t be replacing cracked or warping containers every few years. They can be sterilized and reused for decades.
- A Dedicated Mini-Fridge for Feeder Colonies: This sounds extravagant, but for a keeper with 20+ tarantulas, maintaining your own mealworm or roach colony in a small, dedicated fridge drastically cuts feeding costs and ensures constant supply.
Smart spending in this hobby isn’t about being cheap; it’s about allocating funds where they directly impact animal welfare and your own long-term satisfaction. The silence of a well-set-up enclosure, housing a content spider, is priceless-and it doesn’t require a lavish budget to achieve.
FAQs
What is a reasonable monthly budget for a beginner with one tarantula?
For a single tarantula, monthly upkeep is very affordable, typically between $5 and $10. This covers feeder insects like crickets or roaches and negligible utilities. Your primary budget focus should be the one-time startup cost for a proper enclosure and equipment, which is a much larger initial investment. For a detailed breakdown, you can check out how much a pet tarantula costs initially and ongoing.
How does my primary goal for the hobby impact my budget?
Your goal directly dictates your major expenses. A display collection invests in aesthetically pleasing enclosures, while breeding requires funds for pairs, incubators, and sling-raising supplies. A casual hobbyist can budget minimally for basics, but specialized goals like breeding or keeping rare Old World species require a significantly larger and more structured financial plan.
What are the most cost-effective ways to source tarantulas and supplies?
For spiders, reputable online breeders and reptile expos offer health guarantees and accurate identification. To save, buy common starter species and consider adoption networks. For supplies, purchase substrate and feeder insects in bulk online and use DIY solutions like plastic food containers for enclosures to dramatically reduce recurring costs.
What are the biggest challenges in budgeting for a growing collection?
The largest challenges are the compound costs of scaling infrastructure, like shelving and automated climate control, and avoiding impulsive purchases without a space or budget plan. Additionally, the shift from buying retail to sourcing wholesale for enclosures and feeders requires a higher upfront cost that new keepers often don’t anticipate.
How should I budget if I’m interested in breeding tarantulas?
Breeding requires a separate, substantial budget beyond general care. You must account for the cost of a proven pair, an incubator, hundreds of individual sling vials, and a massive amount of pinhead feeders. It is a long-term investment with high upfront costs and slow, uncertain returns, so it should not be approached as a primary way to fund the hobby.
The Final Molt: Your Journey as a Keeper
Your financial plan is set, your enclosures are prepared, and your first tarantula has arrived. Now, the real transformation begins—not just for the spider, but for you. The single most important budget you will manage is not monetary, but temporal: the consistent, patient observation of your animal’s needs, starting with the absolute necessity of dry substrate for arid species like the Chilean rose hair to prevent fatal mold and stress. Over the next 30 days, follow our week-by-week survival guide for tarantula keepers to translate careful observation into dependable care. It will walk you through feeding, molts, humidity targets, and enclosure checks so you can respond before problems arise.
True success in this hobby is measured in silent, fascinating moments. It is watching your Goliath meticulously plaster the walls with substrate, or finding the intricate, silken trapdoor your OBT has woven overnight. The real return on investment is the profound understanding you gain from their rhythms-the refusal to eat for months, the sudden, vibrating threat posture, the iridescent sheen of a fresh exoskeleton. This requires an investment of attention no money can buy. Your patience is the ultimate tool, far more valuable than the most expensive terrarium. Watch, learn, and let their quiet world change yours.
Further Reading & Sources
- r/tarantulas on Reddit: What got you into the Tarantula hobby?
- Best Pet Tarantulas – The Tarantula Collective
- New Tarantula Keeper Guide – The Tarantula Collective
Arlo is a lifelong arachnid enthusiast who believes tarantulas are the world’s most misunderstood roommates. With years of hands-on experience in tarantula care, habitat setup, and species behavior, Arlo combines expert knowledge with a dash of humor to make spider ownership less scary and a lot more fascinating. From choosing the right enclosure to understanding why your eight-legged buddy is doing that weird little pose again, Arlo is here to help you become the best tarantula parent you can be, without getting tangled in the web of misinformation.
Enclosures and Sizes