
Post-Molt Tarantula Care: What to Do After Your Tarantula Sheds
A tarantula’s molt is less like a simple skin shed and more like a reptilian moon landing-a silent, alien-like process that leaves a perfect, ghostly replica of your pet on the floor of the enclosure. For a new keeper, finding that hollow exoskeleton can be equal parts thrilling and terrifying. Is my spider okay? Why isn’t it moving? When can I feed it? This guide cuts through the uncertainty. Your primary job post-molt is not to act, but to patiently observe and resist the urge to intervene.
Quick Stats:
- Origin: Universal to all tarantula species.
- Type: Critical husbandry phase for both New World and Old World tarantulas.
- Care Focus: Hydration, security, and absolute non-disturbance during the hardening period.
This guide will walk you through the exact steps, from the moment you discover the molt to the day your tarantula confidently takes its first meal, ensuring its new, larger exoskeleton hardens into perfect armor.
The First Moments: Immediate Post-Molt Protocol
The enclosure is silent. Your tarantula lies motionless on its back or side, the old skin discarded beside it like a ghost. This is the most vulnerable point in its life. Your single most important job now is to do absolutely nothing that involves opening the enclosure. Disturbance can cause fatal falls or limb damage while its new exoskeleton is soft as wet paper.
I leave my tarantulas completely alone for a minimum of 48 hours after they flip right-side up. For larger species like my Goliath, I wait a full week. During this quiet period, I only perform three tasks from outside the glass: I verify the water dish is full, I gently mist one corner of the enclosure for species needing high humidity, and I observe. These initial steps are part of a tarantula keeper’s first 30 days survival guide, designed to help you acclimate safely. In a week-by-week plan, you’ll build on this foundation to monitor health and stability as your tarantula settles.
Your Post-Molt Checklist: The First 7 Days
- Days 1-2 (The Hardening Phase): No feeding, no handling, no substrate changes. Ensure fresh water is available. Monitor from a distance.
- Days 3-5 (The Reawakening): The tarantula may begin slow movements. Its coloration will intensify dramatically. Do not offer food yet.
- Days 6-7 (The First Meal): Attempt to feed a prey item 1/2 the tarantula’s body size. If ignored, remove the prey immediately and try again in 3-4 days.
Feeding too soon is a common, dangerous error. A tarantula’s fangs are soft and translucent after a molt, turning black and sclerotized only after several days. Striking prey can break these fangs, leading to starvation. I learned this patience early with my G. rosea, Rosie, who once refused food for a full month after a molt, conserving energy with serene indifference. After a molt, wait several days until the fangs harden before feeding. Feeding only once the tarantula shows renewed interest helps ensure safety and reduces the risk of damage.
Reading the Signs: Successful Molt Versus Complications
Not every molt is a clean, seamless process. Your observational skills are critical for differentiating between normal recovery and a crisis requiring intervention.
Identifying a Healthy Post-Molt Tarantula
A successful molt reveals a tarantula in its most pristine state. Watch for these positive indicators in the days following the shed.
- Self-Righting: The tarantula flips itself back over unassisted, often with slow, deliberate movements.
- Vibrant Coloration: Dull colors are replaced by striking hues. An old-world tarantula’s carapace may gleam with metallic brilliance.
- Complete Limb Extension: All legs and palps are fully extended and free of the old exuvia. The tarantula holds itself tall.
- Normal Posture: Within a few days, it assumes its typical resting stance, whether a regal pose or a hidden retreat within its burrow.
The old exuvia, or shed skin, is a valuable diagnostic tool if removed intact. A clean, full-body shed with no missing legs or palps is an excellent sign. I often sex my tarantulas using these discarded molts, carefully unfolding the abdomen to check for spermathecae.
Recognizing Post-Molt Problems and Stuck Shed
Complications are stressful but often manageable with calm, timely action. Stuck shed, or dysecdysis, is the primary concern.
Stuck shed typically occurs when ambient humidity is too low, leaving the old skin too dry to peel away completely. Problem areas include the tips of the legs, the book lungs (on the underside of the abdomen), and critically, the sheaths around the fangs. A tarantula with fangs still encased in old cuticle cannot eat.
My first encounter with a severe stuck shed was with an arid species kept too dry. Two legs remained trapped, curling uselessly. Creating an ICU, or a simple humidity chamber, can soften stubborn shed and encourage the tarantula to free itself. This involves moving the animal to a small, ventilated container lined with damp paper towels-a last resort that requires immense care to avoid further stress.
| Sign of Trouble | Possible Cause | Immediate Action |
|---|---|---|
| Limp, curled legs stuck in old skin | Low humidity during molt | Increase enclosure humidity slightly; monitor for 24 hours. |
| Tarantula on its back for >48 hours | Potential exhaustion or complication | Do not touch. Ensure warmth and very high humidity nearby. |
| Old skin stuck over abdomen or book lungs | Critical humidity failure | Prepare a humidity chamber (ICU) as a controlled intervention. |
| Lack of movement 5+ days after righting itself | Possible internal injury or weakness | Consult an exotic veterinarian experienced with arachnids. |
Prevention is always superior to intervention. I adjust humidity protocols days before a predicted molt, especially for humidity-dependent giants like my T. stirmi, by overspraying one section of the enclosure. This creates a moisture gradient, allowing the tarantula to choose its preferred microclimate for the delicate shedding process.
The Molt Itself: What to Do with the Old Exoskeleton
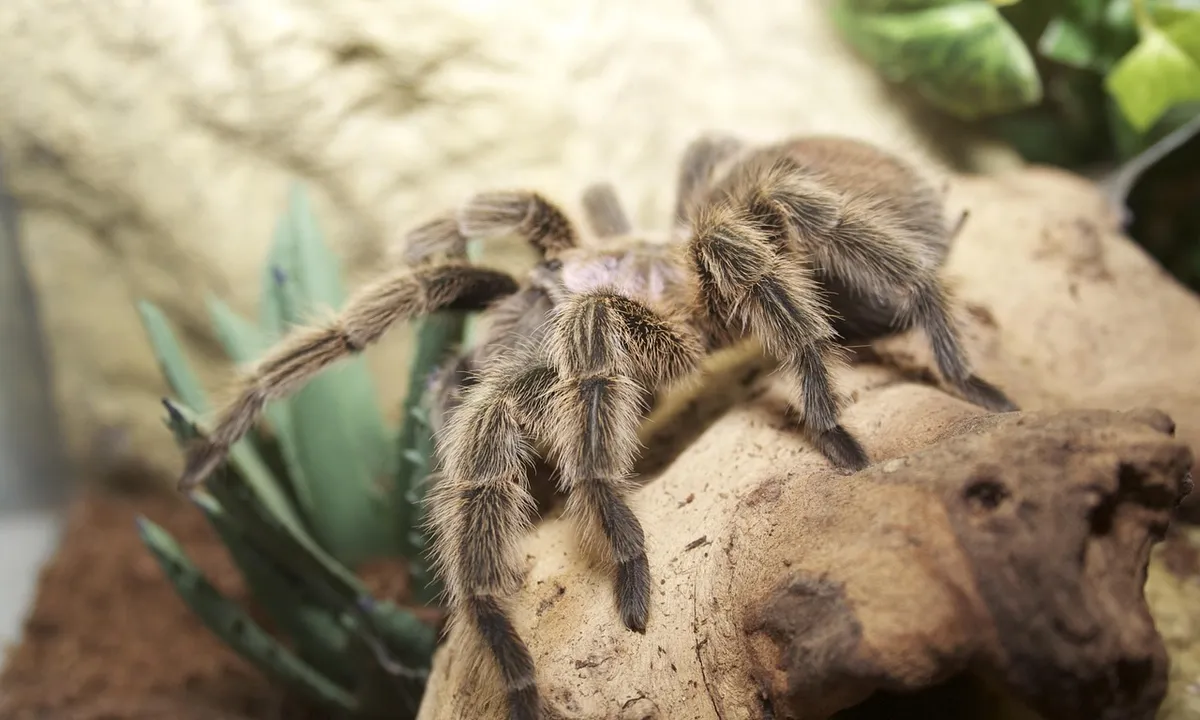
That discarded suit of armor in the corner is a treasure trove of information. The old exoskeleton, or molt, is a perfect cast of your tarantula from minutes before it emerged. Your first job is to resist the urge to immediately retrieve it; disturbing your tarantula now can cause fatal stress. I wait at least 24 hours after my Chilean Rose Hair, Rosie, finishes her long, silent struggle before I even think about opening the enclosure.
When you do safely remove it, handle the molt gently with soft tweezers. It is incredibly fragile. You have two main options:
- Sexing: Carefully unfold the abdomen section to inspect the epigastric furrow for spermathecae (in females). This is how I confirmed my OBT, Flash, was male-a fact that explained his relentless wandering.
- Preservation or Disposal: For a keepsake, gently rinse it in water and let it air-dry in a dust-free box. Otherwise, simply discard it.
This delicate artifact is a one-time snapshot of your spider’s biology, offering clues about its health and future. I learned more from Goliath’s first few molts about his growth rate than from weeks of observation.
The Hardening Phase: Understanding Your Tarantula’s Vulnerability
After the dramatic exit from its old skin, your tarantula enters its most perilous life stage. Its new exoskeleton is soft, like parchment, and offers almost no protection. During this hardening phase, or sclerotization, your pet is utterly defenseless and must be treated with extreme caution. The silence of the enclosure during this time is not boredom-it is intense, vulnerable recovery.
How Long Until the Exoskeleton Hardens?
Hardening times vary dramatically by species and size. As a general rule, the larger the tarantula, the longer the process. My 4-inch Goliath Bird Eater (T. stirmi) takes nearly a week to fully harden, while my 2-inch OBT, Flash, is functional in about three days. My adult G. rosea, Rosie, is a slow-changer, often remaining soft and reclusive for over seven days.
You can observe the progress. Initially, the tarantula will be limp and its colors oddly muted. The first sign of hardening is a return of darker, richer pigments and the ability to hold its legs in a normal posture. Do not offer food until it can stand firmly and move with confidence.
Protecting Your Soft Tarantula from Injury
This phase demands a keeper’s patience. Your goal is to eliminate all physical risks. Absolutely no handling is permitted; a fall from even a few inches can rupture their soft abdomen. I learned this the hard way years ago with an escaped sling that dropped from my hand. Follow these steps to ensure safety:
- Maintain Perfect Humidity: For species like my T. stirmi, keep humidity at 80-85% to aid the hardening process. For arid species like Rosie, a slight bump to 60-65% is sufficient. Dehydration now can cause crippling deformities.
- Check the Enclosure: Ensure all décor is secure and there are no sharp edges. The water dish must be easily accessible but very shallow to prevent drowning.
- Minimize Vibrations and Light: Keep the enclosure in a quiet, dim area. Avoid tapping the glass or sudden movements.
- Delay Feeding: Do not offer live prey until the exoskeleton is completely hard. A cricket can injure a soft tarantula. I wait until I see my tarantula in a firm, defensive posture before even considering food.
This respectful, hands-off approach is the cornerstone of post-molt care, ensuring your tarantula emerges stronger and ready for its next chapter. Watching Goliath gradually regain his imposing stance, day by day, is a lesson in patience and the raw mechanics of life.
Reintroducing Food and Water: Post-Molt Feeding and Hydration
When to Offer the First Meal After a Molt
Watching a tarantula emerge from its old skin is a breathtaking moment, but the real work of the molt happens inside its new, soft exoskeleton. The fangs, which are a critical part of its feeding apparatus, start as pale and flexible. You must wait until these fangs have fully hardened and darkened to a deep, glossy black before attempting to feed. Offering prey too soon risks serious injury to your tarantula’s mouthparts. To read when it’s ready to eat, watch for its feeding dance—a slow, deliberate approach toward the prey, often with a careful leg-tap as a test. When it settles into position and initiates a strike, you know it’s ready.
My general rule, honed from years of breeding and countless molts, is a minimum waiting period based on size. For spiderlings and small juveniles, wait 5-7 days. For larger juveniles and adult females, like my 15-year-old Rosie, I wait 10-14 days. For my massive T. stirmi Goliath, I give him a full two weeks. A refused meal is your clearest signal to wait longer. I once offered my OBT, Flash, a cricket a day too early; she struck but couldn’t pierce it, a frustrating and wasteful lesson in patience for us both.
- Spiderlings & Small Juveniles: Wait 5-7 days post-molt.
- Large Juveniles & Adult Females: Wait 10-14 days.
- Large Terrestrial Species (e.g., Theraphosa, Lasiodora): Wait 14+ days.
- First Meal Protocol: Always offer a smaller, softer prey item (e.g., a pre-killed cricket or a smaller mealworm) to test their readiness and reduce risk.
Ensuring Proper Post-Molt Hydration
While the exoskeleton hardens, internal fluid balance is being restored. A fresh water source is non-negotiable. The single most important thing you can do is provide a clean, shallow, and always-full water dish. I use bottle caps for small tarantulas and small ceramic dishes for my larger ones, ensuring they are heavy enough not to tip.
Many tarantulas will not drink from a dish immediately, preferring to absorb ambient moisture. For species requiring higher humidity, like Goliath, I lightly mist one corner of the enclosure away from the hide, avoiding spraying the tarantula directly. For my arid-adapted Rosie, I ensure her water dish is full and may only lightly dampen a corner of substrate monthly. Observing your tarantula’s posture over the dish-its chelicerae dipping into the water-is a quiet reward for your attentive care.
- Provide a clean, shallow water dish immediately after the molt is complete.
- For moisture-dependent species, light misting on enclosure walls or one corner of substrate can aid hydration.
- Avoid direct spraying on the tarantula, as this can cause stress.
- Dehydration signs include a shriveled abdomen and extreme lethargy; prevention is straightforward with consistent water access.
Enclosure Adjustments: Humidity, Temperature, and Security
Optimizing Humidity and Ventilation Post-Shed
The molting process consumes immense energy and fluids. In the days following, maintaining an appropriate moisture gradient in the substrate is vital for recovery. A successful post-molt period hinges on balancing humidity retention with ample cross-ventilation to prevent stagnant, mold-prone air. I treat this as a species-specific calibration.
For my Burgundy Goliath Bird Eater (Theraphosa stirmi), which thrives at 75-85% humidity, I heavily saturate the lower layers of his deep coconut fiber and peat moss substrate while keeping the top layer slightly drier. His cross-ventilation is high up on the sides. Conversely, for my Chilean Rose Hair (Grammostola rosea), a bone-dry enclosure with a water dish is perfect. The rule is simple: replicate the hydration level of their native habitat more diligently during this sensitive recovery window.
Providing Secure Hiding Spots and Quiet
A tarantula in a new, sensitive body feels profoundly vulnerable. Your primary job now is to minimize stress. Any major environmental change or disturbance now can trigger a defensive response or a frantic, injury-risk flight. I learned this the hard way when a well-intentioned cage cleaning days after a molt sent a juvenile into a panicked bolt.
Ensure their hide-whether cork bark, a half-pot, or a crafted burrow entrance-is secure and undisturbed. Do not rehouse, redecorate, or handle your tarantula. I institute a “look, don’t touch” policy for a minimum of two weeks, often longer. Limit vibrations and bright lights near the enclosure. This quiet, secure period allows the tarantula to complete its physiological hardening in peace. Watching my defensive OBT, Flash, calmly webbing up her hide without threat displays is a sign I’ve provided the security she needs.
- Do not clean, rehouse, or significantly alter the enclosure for several weeks post-molt.
- Verify the hide is stable and accessible; a stressed tarantula needs a guaranteed retreat.
- Minimize loud noises, vibrations, and handling. This is a mandatory rest period.
- Observe from a distance. Increased webbing at the hide entrance is a positive sign of settling in.
Species-Specific Post-Molt Care Considerations
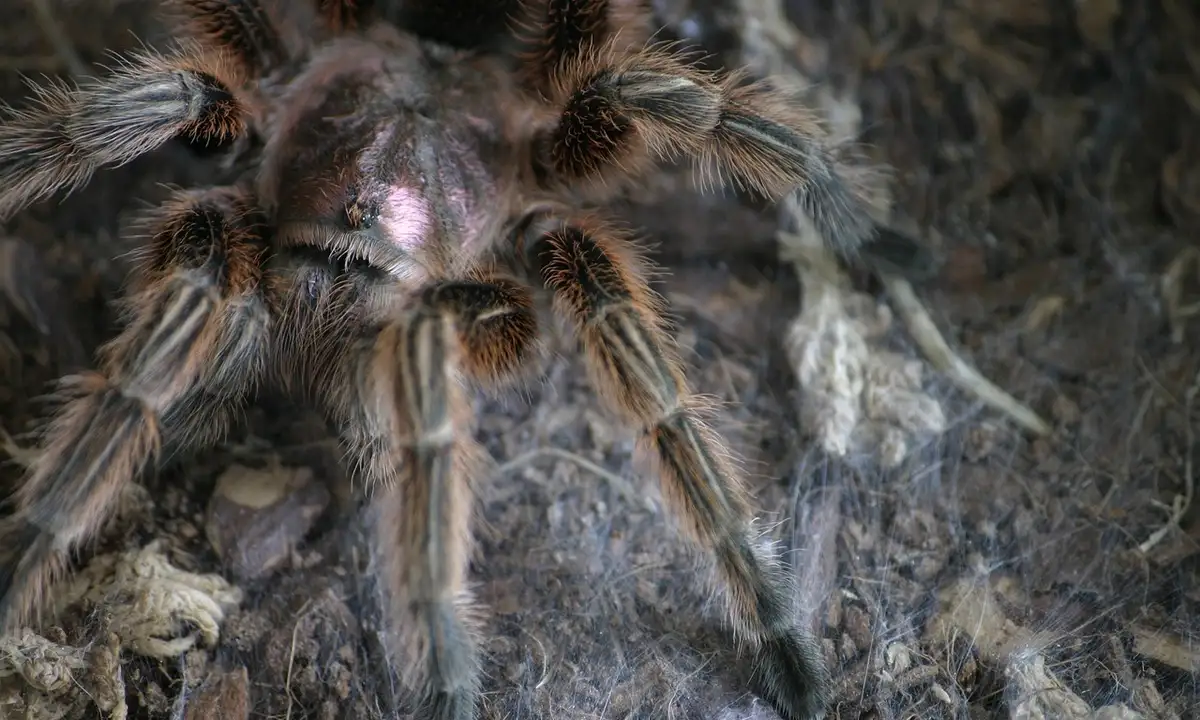
Your tarantula’s natural history dictates its recovery needs. A desert dweller and a rainforest canopy specialist have vastly different requirements. Desert-adapted tarantulas survive by conserving moisture and seeking heat-shaded burrows. Understanding these adaptations helps explain how they endure arid environments. Ignoring these biological blueprints is the fastest way to stress a freshly molted animal.
Care for Terrestrial and Burrowing Species
Think of species like my old Chilean Rose Hair, Rosie. These tarantulas, including Grammostola, Aphonopelma, and Brachypelma, prioritize secure, dry hiding places over humidity. After molting, their primary need is an undisturbed retreat. I keep their substrate barely damp in one corner, ensuring the main burrow or hide stays bone-dry. A waterlogged hide can breed mold and chill a vulnerable tarantula, slowing its hardening process.
For burrowers, never dig them out after a molt. They have chosen that secure spot for a reason. Simply ensure a shallow water dish is available and that ventilation is good to prevent stagnant air. My Rosie once sealed herself in for eight weeks post-molt, a patient reminder of their slow, deliberate rhythms.
- Substrate: Use a deep, dry mix of coconut fiber and topsoil for burrow integrity.
- Humidity: Maintain 50-60% ambient humidity; focus on a dry retreat.
- Key Action: Lightly mist only one far corner of the enclosure weekly, never the burrow entrance.
Care for Moisture-Dependent and Arboreal Species
This group includes heavy-bodied moisture-lovers like my Burgundy Goliath, Theraphosa stirmi, and true arboreals like Avicularia or Psalmopoeus. Their post-molt environment must support higher humidity without drowning them. For Goliath, I maintain 75-80% humidity by saturating the lower layers of his deep peat moss substrate while keeping the surface slightly drier. Cross-ventilation is non-negotiable here to prevent fungal growth while the exoskeleton cures.
Arboreal species molt in their aerial retreats. Your job is to ensure their vertical space has a moisture gradient. I provide a full water dish at the base and mist the enclosure sides lightly, allowing the tarantula to choose its comfort zone. Create a proper substrate moisture gradient so the tarantula can select its preferred microhabitat. Layer the substrate so the upper areas stay drier and the lower areas retain more moisture. Avoid spraying the silken tube web directly, as this can collapse their home and cause immense stress.
- For Moisture-Dependent Terrestrials (Theraphosa, Megaphobema): Soak substrate deeply and let it gradually evaporate. Check humidity daily with a digital gauge.
- For Arboreal Species (Avicularia, Caribena): Focus on ambient air humidity of 70-75%. Use live plants like pothos in bioactive setups to help regulate moisture naturally.
- Universal Rule: Always offer a clean, overflowing water dish for drinking and microclimate control.
The Road to Recovery: Returning to Normal Activity
Patience is your most critical tool. The iridescent sheen of the new carapace signals the start of a weeks-long process, not its end. Rushing this recovery phase is a common husbandry error that can lead to injury or refusal to eat.
Watch for behavioral milestones. Molting frequency varies by species and age, a point often noted in tarantula molt guides. A tarantula will often begin to rearrange its enclosure or take a drink before it considers food. Juveniles molt more often than adults, so the timing during a shed can differ. My OBT, Flash, typically starts repairing its dense silk webbing about a week after molting, a sure sign its fangs have hardened. I wait at least seven days after this activity resumes before offering a prey item.
Here is a safe, general timeline for resuming feeding based on size:
| Tarantula Size (Diagonal Leg Span) | Minimum Wait After Molt | Prey Size to Offer First |
|---|---|---|
| Slings (under 1″) | 5-7 days | Pinhead cricket or pre-killed mealworm segment |
| Juveniles (1″-3″) | 10-14 days | Small cricket or small roach nymph |
| Adults (4″+) | 14-28 days | Medium cricket or large roach nymph |
If the tarantula ignores or seems threatened by the prey, remove it immediately. Avoiding live prey encounters reduces stress and prevents injury to your soft-skinned tarantula. I once offered a cricket too early to Rosie; she merely tapped it with a delicate, unhardened leg and retreated. I learned to watch, not interfere.
Resist all temptation to handle. Their new exoskeleton is initially pliable and sensitive. The “Look, Don’t Touch” philosophy is never more vital than during this period. Observe the silent, remarkable recovery from a respectful distance, and you’ll be rewarded with a thriving pet for years to come.
FAQs
What are the signs that my tarantula is about to molt?
Several key behaviors indicate a pre-molt state. Your tarantula will likely refuse food and may seal itself in its hide or burrow. You might notice a darkening of the abdomen and a bald patch becoming shiny and dark as the new exoskeleton forms underneath. This is one of the 10 key signs your tarantula is about to molt. Being aware of these signals can help you prepare for the molt and adjust care accordingly.
How do I know if the molt was successful and my tarantula is healthy?
A successful molt is indicated by a fully intact shed skin and a tarantula that has righted itself. In the following days, its coloration will become vibrant and intense, and it will hold all its limbs in a normal, fully extended posture without any remnants of the old skin.
What should I do with the old exoskeleton (molt)?
Once your tarantula has fully hardened for at least 24 hours, you can gently remove the molt with tweezers. You can carefully inspect it to determine your tarantula’s sex by looking for spermathecae in the abdominal section. Afterward, you can preserve it as a keepsake by letting it air-dry or simply dispose of it.
Are there any special humidity or temperature requirements during the post-molt period?
Yes, maintaining proper humidity is crucial for a smooth hardening process, but requirements are species-specific. For moisture-dependent tarantulas, ensure high humidity (e.g., 75-85%), while arid species only need a slight increase. Temperature should remain stable at their normal range, as fluctuations can add stress during this vulnerable time.
What are the potential problems or complications to watch for after a molt?
The main complication is stuck shed (dysecdysis), where pieces of the old exoskeleton remain attached, often on the legs or book lungs. Other issues include a tarantula that fails to right itself after an extended period or shows a complete lack of movement days later, which could indicate exhaustion or internal injury.
Does my tarantula need extra water after molting?
Absolutely. Providing a clean, shallow, and full water dish is non-negotiable after a molt for rehydration. While some tarantulas may drink directly, others absorb ambient moisture, so a slight increase in enclosure humidity via light misting (away from the tarantula) can be beneficial for certain species. Understanding heating and humidity needs is important for popular tarantula species, as different species require different humidity targets. Properly balancing heat and moisture supports healthy molts and stable enclosure conditions.
Long-Term Success
Reviewing your care after a molt, the non-negotiable rule is providing a consistently humid microenvironment, as a dehydrated tarantula cannot properly harden its new exoskeleton and may perish. This is especially critical for moisture-dependent species like my Theraphosa stirmi, Goliath, whose post-molt enclosure must feel genuinely damp to the touch.
Beyond parameters, this quiet period invites you to witness natural behaviors reemerge: the meticulous repair of a funnel web, the deliberate exploration of renewed strength. My P. murinus, Flash, spends days weaving intricate lattices across his tank after a shed. Successful keeping hinges on this patient observation, not intervention, allowing the animal to dictate the pace of its recovery.
Further Reading & Sources
- How To Care For Your Tarantula After A Molt
- Signs Your Tarantula Is About to Molt – The Bio Dude
- How to Tell if Your Tarantula Is Molting
Arlo is a lifelong arachnid enthusiast who believes tarantulas are the world’s most misunderstood roommates. With years of hands-on experience in tarantula care, habitat setup, and species behavior, Arlo combines expert knowledge with a dash of humor to make spider ownership less scary and a lot more fascinating. From choosing the right enclosure to understanding why your eight-legged buddy is doing that weird little pose again, Arlo is here to help you become the best tarantula parent you can be, without getting tangled in the web of misinformation.
Molting Process