
Bioactive vs. Sterile Enclosures: A Complete Comparison for Keepers
Published on: December 28, 2025 | Last Updated: December 28, 2025
Written By: Arlo
Selecting an enclosure is not just about housing a tarantula; it is a fundamental choice between fostering a miniature, self-regulating ecosystem or maintaining a precise, clinical environment for observation. In my own collection, the silent, dry sterility of my Chilean Rose Hair Rosie’s home contrasts sharply with the humid, bustling bioactive tank of my Burgundy Goliath Bird Eater, Goliath, where springtails dart through the leaf litter. This guide provides a detailed, practical comparison grounded in years of breeding and keeping, from fast Old Worlds like my OBT Flash to docile New Worlds.
Quick Stats:
- Bioactive Enclosure: Origin: Natural biome replication; Type: Living system with plants and microfauna; Growth Rate: Slow to establish, long-term stable.
- Sterile Enclosure: Origin: Controlled husbandry practice; Type: Inert substrate only; Growth Rate: Immediate setup, consistent maintenance.
This comparison will give you the specific husbandry data and step-by-step plans to confidently select and maintain the perfect enclosure for your tarantula, from its first delicate molt as a sling to its final, impressive adult size.
What Are Bioactive and Sterile Enclosures?
In my years of breeding, I’ve maintained both vibrant, living walls for my T. stirmi and sparse, minimalist tanks for my G. rosea. The choice fundamentally shapes your role as a keeper.
- A bioactive vivarium is a self-sustaining micro-habitat. It combines a deep, layered substrate, living plants, and a introduced ‘clean-up crew’ of microfauna like springtails and isopods. This creates a functional ecosystem where waste is broken down by microbes and tiny custodians.
- A sterile terrarium is a controlled, artificial environment. It uses inert, simple substrates like coconut fiber or vermiculite, with no introduced biology. I use this for my Chilean Rose Hair, Rosie; her arid, slow-paced life doesn’t demand a complex setup.
- The core philosophy pits simulation against simplification. Bioactive aims to replicate the silent, cyclical processes of nature, while sterile focuses on removing variables for ultimate control and ease of intervention. Your choice reflects how you wish to intersect with the tarantula’s world: as an observer of an ecosystem or a curator of a specimen.
Bioactive vs Sterile: A Direct Comparison for Tarantula Keepers
This table breaks down the practical realities, drawn from my own successes and lessons learned housing everything from a docile ‘pet rock’ to a hair-kicking Goliath.
| Feature | Bioactive Enclosure | Sterile Enclosure |
|---|---|---|
| Substrate composition | Layered mix of organic topsoil, sphagnum moss, leaf litter, and horticultural charcoal for drainage and biology. | Single-component, like plain coconut fiber or peat moss. It is uniform and lacks nutritional complexity. |
| Microbiome presence | Rich, diverse community of beneficial bacteria, fungi, and microfauna that process waste and mold. This living engine is the heart of the system. | Virtually absent. You are the sole waste management system, which increases direct responsibility. |
| Maintenance frequency | Very low once balanced. I only disturb my OBT Flash’s webbed fortress to remove large prey remnants, perhaps every few months. | High and regular. You must manually remove boluses, molts, and any mold weekly to maintain hygiene. |
| Initial cost | Higher. Costs include plants, microfauna cultures, and multiple substrate components. | Significantly lower. A bag of substrate and a water dish are often all you need to start. |
| Long-term cost | Lower. The substrate lasts for years, and you rarely need full replacements, saving money and time. | Higher over time. Frequent complete substrate changes become a recurring expense. |
| Pest prevention | Excellent. The clean-up crew out-competes mold and grain mites. A stable bioactive setup is a resilient one. | Moderate. Without natural predators, you must be vigilant to prevent pest outbreaks through quarantine and cleanliness. |
| Keeper involvement | Hands-off, observation-based. This aligns perfectly with the respectful “Look, Don’t Touch” ethos I practice daily. | Hands-on. Requires active, physical cleaning which can stress a defensive species like an OBT. |
| Visual appeal | Lush, dynamic, and naturalistic. The dew on spider silk and growing plants creates a living diorama. | Clean, clinical, and focused. The tarantula itself is the undeniable centerpiece without distraction. |
The Benefits and Challenges of a Bioactive Setup
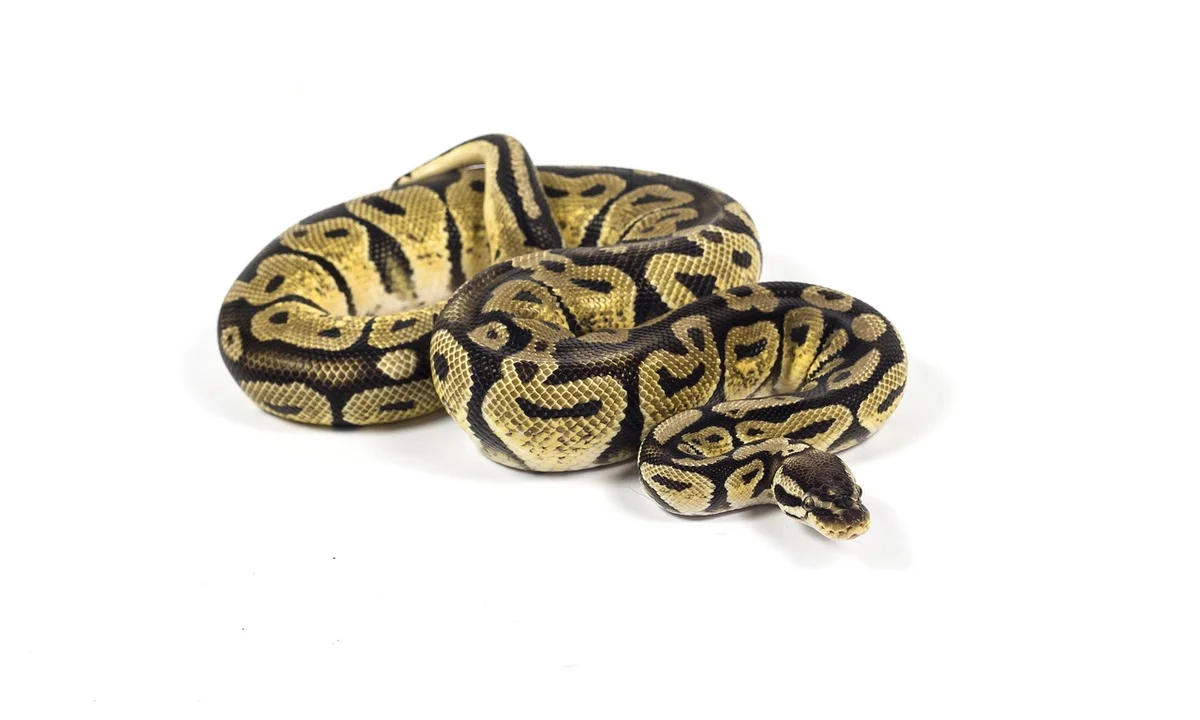
Why Choose Bioactive?
Bioactive keeping builds a tiny, living world inside your tarantula’s enclosure. This method trades your direct cleaning for the invisible labor of microorganisms and clean-up crews. In this guide, you’ll learn which tarantula-safe plants fit bioactive setups and how to design enclosures that support a healthy, thriving habitat. It also covers safe plant choices and practical tips for maintaining a thriving bioactive enclosure.
- Natural waste breakdown: Springtails and isopods consume boluses and molts, dramatically cutting how often you need to disturb the habitat.
- Stable humidity control: Living soil and plants act as a buffer, maintaining consistent moisture levels critical for species like my humidity-loving T. stirmi, Goliath.
- Behavioral enrichment: Complex layers of leaf litter and roots encourage natural burrowing and webbing you simply won’t see in a bare tank.
- Stunning display: A thriving planted vivarium becomes a captivating centerpiece, showcasing your tarantula as part of an ecosystem.
I watched my P. murinus, Flash, weave her orange silk through a network of live moss and cork bark. The enclosure became a living sculpture, with her tunnels integrated into the growing environment instead of just placed on top of it.
The Realities and Risks
This approach demands more foresight and foundational knowledge. A failed bioactive setup can create more problems than it solves if not planned correctly.
- Higher initial cost: You invest in clean-up cultures, appropriate plants, and often dedicated lighting from the start.
- Complex setup: Balancing soil drainage, plant choices, and crew populations requires research beyond basic tarantula care.
- Potential for pest outbreaks: Introducing untreated materials is the most common mistake, leading to infestations of fungus gnats or grain mites.
- Requires plant care knowledge: You must understand basic horticulture, like light needs and watering schedules, to keep the flora alive.
Biosecurity is non-negotiable. I learned the hard way that unbaked oak leaves can introduce predatory soil mites, so I now bake all leaf litter at 200°F for an hour before use.
The Benefits and Challenges of a Sterile Setup
Why Choose Sterile?
Sterile husbandry offers unmatched clarity and control over the environment. This simplicity makes it the safest choice for beginners and for monitoring tarantula health.
- Ultimate cleanliness: Without decomposing matter, you eliminate mold hotspots and can spot parasites or injuries immediately.
- Easy health monitoring: You see every prey item, every droppings, and every movement against a plain background.
- Low cost: A basic enclosure needs only coconut fiber substrate and a water dish, making it very affordable.
- Simple pest prevention: With no soil food web, invasive bugs have nothing to eat and cannot establish a population.
- Total keeper control: You manually set and adjust all parameters like humidity and ventilation with no biological variables.
I house all new arrivals, like my G. rosea Rosie, in sterile bins for a full quarantine period. This practice lets me observe their eating and molting habits without any confounding factors from a complex environment.
Limitations to Consider
The sterile method places all maintenance duties squarely on you. This constant intervention can increase stress for both the keeper and the tarantula.
- Frequent manual cleaning: You must tong-remove waste and prey remains, which often means invading your tarantula’s space.
- Less stable humidity: Inert substrate dries out unevenly, demanding careful misting cycles to avoid sudden swings.
- Minimal environmental enrichment: A plain box offers little mental stimulation for active, curious species which may pace or stress.
- Plain aesthetics: The clinical look lacks the natural beauty that makes many keepers passionate about the hobby.
Full enclosure breakdowns for deep cleaning are particularly disruptive. My burrowing tarantulas have always shown more signs of stress after a complete substrate replacement compared to a spot-clean in a bioactive tank.
Step-by-Step: Building a Tarantula-Safe Bioactive Enclosure
Constructing a living ecosystem for your tarantula is a deeply rewarding project. I built one for my Burgundy Goliath, Goliath, to support his need for constant high humidity without stagnant, mold-prone conditions. Patience is your greatest tool here; a rushed setup will fail, but a carefully built one becomes a self-regulating piece of nature on your shelf. Different tarantula species have distinct heating and humidity needs, so tailoring the setup to your species is key. For popular tarantula species, maintaining appropriate temperature and moisture levels is essential to mimic their natural habitat and prevent stress or mold.
-
Layer the Foundation
Start with a drainage layer of expanded clay pebbles or lava rock, about one to two inches deep. This creates a reservoir for excess water, preventing your primary substrate from becoming a swamp. Cover this completely with a fiberglass window screen or a dedicated substrate barrier. This keeps your soil from mixing into the drainage layer. Now, add your deep soil mix. I use a blend of organic, fertilizer-free topsoil, coconut fiber, and a small amount of play sand or orchid bark for texture. For a moisture-dependent species like Goliath, I aim for a substrate depth of eight inches or more to allow for burrowing and stable humidity.
-
Add Hardscape and Hides
Before planting, position your anchor pieces. Cork bark is ideal-it resists molding, is lightweight, and provides excellent hiding surfaces. Smooth slate stone or cholla wood also work well. Always boil or bake wood and thoroughly wash stones to eliminate pathogens or hidden pests. Structure these elements securely; a collapsing tunnel under a heavy rock is a deadly hazard. For my Goliath, I created a starter burrow under a large, angled cork slab, which he promptly expanded and webbed over.
-
Select and Plant Flora
Choose plants that thrive in low light and can handle occasional bulldozing. Pothos and Snake Plants (Sansevieria) are nearly indestructible. I also have great luck with creeping plants like Baby’s Tears for ground cover. Remove all nursery soil from the roots and plant them directly into your substrate mix. Pack soil firmly around the roots and water them in well. For the first few weeks, you may need to water the plants directly until their roots establish. A gentle LED light on a timer for 6-8 hours a day will keep them healthy without overheating the enclosure.
-
Introduce the Clean-Up Crew
This is the engine of your bioactive system. Add a culture of temperate springtails first-they are the primary mold fighters. Then, introduce a small colony of dwarf white or dwarf purple isopods. These arthropods will process fallen boluses, leftover prey parts, and decaying plant matter, breaking it down into fertilizer for your plants. To sustain them, occasionally add a small piece of leaf litter or a bit of fish food flakes buried under the cork. In my experience, populations self-regulate based on available food.
-
Acclimate Your Tarantula
Wait at least one week after planting before introducing your tarantula. This lets the plants settle and the clean-up crew distribute. On introduction day, gently coax your tarantula from its old enclosure into a catch cup, then place the cup inside the new habitat and remove the lid. Let them explore on their own terms. Do not be surprised if they immediately seek a dark hide and seal themselves in for days or weeks. My old Chilean Rose Hair, Rosie, vanished into her new cork hide for a full month before I saw her again. Resist the urge to dig or disturb them; they are acclimating to a world of new smells, humidity gradients, and vibrations. It’s especially important to safely transport and rehouse your tarantula to minimize stress.
Step-by-Step: Setting Up a Simple Sterile Enclosure
For many species-especially arid dwellers or defensive, fast tarantulas like my OBT, Flash-a sterile setup is the safest, most manageable choice. It prioritizes the keeper’s ability to monitor the animal and its waste with zero obscuring elements. The sterile method reduces variables, making it easier to spot health issues and perfectly suited for tarantulas that would simply destroy delicate plants.
-
Select and Prepare Substrate
Choose a simple, consistent substrate. Pure coconut fiber (coir) or a 100% organic topsoil with no additives are my go-to options. For an adult terrestrial tarantula, provide a substrate depth at least 1.5 times their leg span. To prepare, take your dry block of coir or bag of soil and hydrate it with dechlorinated water. You want it moist enough to hold a shape when squeezed, with only a drop or two of water escaping. For arid species like a Grammostola, let it dry out almost completely before use. Fluff it thoroughly to prevent compaction.
-
Provide Essentials
Pack the substrate firmly to prevent collapses, then add just two key items. First, a shallow, sturdy water dish, sunk flush with the substrate. I use ceramic bottle caps or small reptile dishes. Second, a secure hide. A half-cork round, a plastic plant pot laid on its side, or a resin cave all work. The hide should be just large enough for the tarantula to fit snugly inside, encouraging a sense of security. For my OBT Flash, I use a cork slab leaned against the wall; he immediately webbed it into an impregnable fortress. This is all part of setting up a suitable enclosure for a tarantula.
-
Final Safety Check
Run your fingers along every interior surface. Sand down any sharp plastic seams from the enclosure or hide. Ensure the lid locks or clips securely—many tarantulas are shockingly strong and adept at pushing weak points. Verify the cross-ventilation is adequate for your species; generally, a few rows of small holes on opposite sides are better than large, draft-creating screens. Finally, double-check the distance from the substrate to the lid. This “fall distance” should be no more than 1.5 times the tarantula’s leg span to prevent a potentially fatal rupture from a climb and fall. For tips on securing and ventilating your enclosure, check this guide.
Matching the Enclosure to Your Tarantula’s Needs
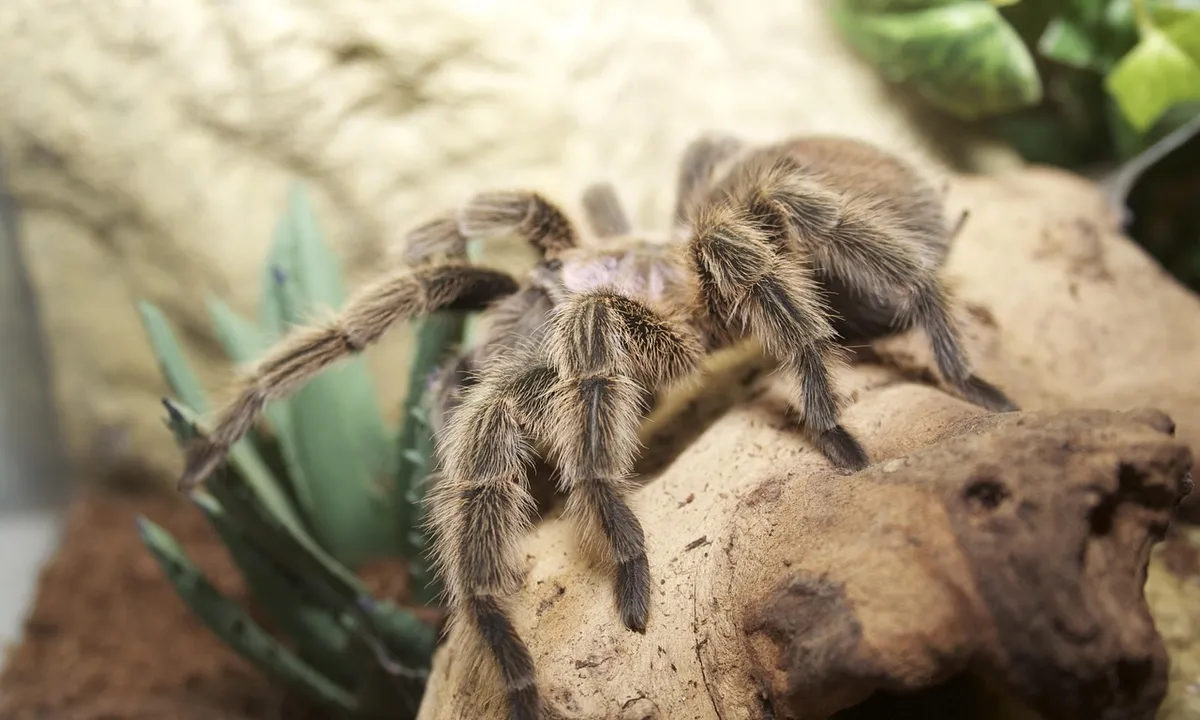
Selecting an enclosure is a direct reflection of your tarantula’s natural history and individual personality. The goal is to create a space where your spider feels secure, reducing stress and promoting natural behaviors without unnecessary risk. For terrestrial tarantulas, prioritize broad, secure floor space with a deep substrate. For arboreal tarantulas, emphasize vertical space with sturdy perches and appropriate humidity.
Ideal Candidates for Bioactive
Bioactive systems excel for species that require consistent environmental parameters and those that actively engineer their space. Watching my Theraphosa stirmi, Goliath, patrol her humid, planted tank is a lesson in how a complex environment satisfies a deep-rooted instinct.
- Humidity-Dependent Species: Tarantulas from rainforest biomes, like Theraphosa stirmi, Avicularia avicularia, and Caribena versicolor, benefit immensely. The living plants and microbial activity in a bioactive tank help maintain that crucial 75-85% humidity without constant keeper intervention.
- Active Burrowers and Explorers: Species such as Hysterocrates gigas or some Phormingochilus spp. that construct extensive tunnels utilize the structural integrity of a planted substrate. The root networks prevent burrow collapses and provide a dynamic landscape for their silent explorations.
When Sterile is the Smarter Choice
Simplicity is often the pinnacle of good husbandry, especially for keepers dealing with specific challenges. I always use a sterile tub for my OBT, Pterinochilus murinus; it allows me to see her bright orange form instantly and manage her feeding without negotiating a web fortress.
- Arid and Desert Species: Tarantulas like Grammostola rosea or Aphonopelma chalcodes need dry, ventilated setups. Adding moisture-retaining elements from a bioactive design can lead to fatal complications for these dry-climate specialists.
- Spiderlings (Slings): Their tiny size makes them vulnerable. A sterile deli cup with minimal decor lets you monitor their crucial first molts and feeding responses with perfect clarity.
- Defensive, Fast, or Venomous Species: This includes Old World genera like Pterinochilus and Haplopelma. A sterile enclosure with clear sightlines minimizes surprise during necessary maintenance, keeping both you and the tarantula safer.
- Tarantulas in Quarantine or Recovery: Any spider under observation for illness, injury, or a difficult molt belongs in a sterile space. This eliminates variables, ensuring you can track food intake, waste, and healing progress without interference.
- New Keepers: Mastering fundamental care like hydration and feeding in a controlled, sterile environment builds confidence. You establish a baseline for your tarantula’s health before introducing the variables of a living ecosystem.
Comparing Long-Term Care and Cost
The initial setup is just the first chapter; the real story unfolds in the daily upkeep and yearly budget. Choosing between bioactive and sterile is a commitment to a specific type of care rhythm that will define your hobby experience.
Ongoing Maintenance Routines
Your interaction with each enclosure type diverges significantly after the first month. Bioactive care leans toward being a gentle gardener, while sterile care is that of a meticulous custodian.
-
Bioactive Maintenance:
- Daily/Weekly: Visual health checks, misting plants for humidity, and spot-cleaning any obvious boluses or waste.
- Monthly/Seasonally: Pruning plants, checking clean-up crew population, and possibly adding supplemental leaf litter.
- Full substrate changes are exceptionally rare, often only after several years if the ecosystem becomes unbalanced.
-
Sterile Maintenance:
- Daily/Weekly: Visual checks and water dish refreshes.
- Every 4-6 Months: A complete enclosure breakdown. This involves a safe rehousing, disposing of all substrate, scrubbing the tank and decor, and replacing everything with fresh, dry materials.
- This process is more invasive but offers total control over sanitation and is often quicker per session than managing a bioactive tank.
Breaking Down the Expenses
Costs manifest differently over time, balancing initial investment against recurring effort and purchase. A bioactive setup demands more money upfront but can lower your long-term financial and time investment, whereas sterile starts cheap but incurs regular costs.
-
Initial Setup Costs (for a standard 10-gallon enclosure):
- Bioactive: Layered substrate mix ($25-$50), live plants ($15-$40), clean-up crew culture (springtails/isopods, $20), drainage materials ($10). Total initial investment: approximately $70-$120.
- Sterile: Simple substrate like coconut fiber or topsoil ($5-$10), a water dish, and a hide. Total initial investment: approximately $10-$20.
-
Recurring Annual Costs:
- Bioactive: Potential plant replacements ($10-$20), occasional supplemental clean-up crew ($10). The substrate itself may not need replacing for years. Estimated annual cost: $20-$30.
- Sterile: Multiple bulk substrate changes (3-4 times yearly at $5-$15 per change). Estimated annual cost: $15-$60, plus the value of your time spent on frequent deep cleanings.
FAQs
Can I create a “hybrid” enclosure that mixes bioactive and sterile elements?
This is generally not recommended, as it often leads to the downsides of both methods. A partial clean-up crew in an otherwise inert setup will starve, and adding plants to a sterile enclosure without the proper layered substrate and microbiology usually results in dead plants and mold. The systems work on fundamentally different principles—one is a closed-loop ecosystem, and the other is a manually controlled environment. It is best to commit fully to one methodology for the health and stability of your tarantula’s home. When planning, consider whether you’re setting up arboreal or terrestrial tanks, as each requires a different enclosure setup approach. Arboreal setups favor vertical space, climbing structures, and height, while terrestrial tanks benefit from ample floor space, secure substrate, and stable footing.
What are the most common mistakes when first going bioactive?
The most frequent errors are using untreated materials that introduce pests, choosing plants that require too much light or water for the tarantula’s needs, and adding the tarantula before the ecosystem is established. Another critical mistake is over-feeding the clean-up crew, which can cause population explosions and then crashes. Success requires patience, thorough research on plant compatibility, and strict biosecurity practices like baking leaf litter and quarantining new plants. For more tips on setting up a safe and healthy terrarium, make sure to avoid common tarantula enclosure setup mistakes.
Is a bioactive enclosure safe for very small spiderlings (slings)?
For most tarantula slings, a sterile setup is strongly advised. Their tiny size makes them vulnerable to becoming trapped in water droplets, getting lost in dense foliage, or even being outcompeted for food by a thriving clean-up crew. Tarantula slings are the youngest stage of tarantulas, and they require extra care. A simple, clear deli cup allows for critical monitoring of their first molts and feeding responses. You can successfully transition a juvenile to a bioactive enclosure once it has reached a more robust size, typically after several molts.
What happens if my clean-up crew (springtails/isopods) dies off?
If your clean-up crew perishes, the bioactive cycle is broken, and the enclosure will begin to function as a sterile one with decaying organic matter. You must manually remove waste to prevent mold outbreaks and reintroduce a new culture of microfauna. To prevent this, ensure your crew has a constant, modest food source like leaf litter and avoid conditions that are too dry or wet for their survival. A well-balanced tank will have a self-regulating population.
Can I switch my tarantula from a sterile to a bioactive enclosure (or vice-versa) later in its life?
Yes, tarantulas can be successfully rehoused into a different type of enclosure at any life stage, provided the transition is done carefully. The key is to ensure the new setup already meets all the husbandry parameters (humidity, temperature, security) before the move. When moving to bioactive, allow the ecosystem to establish for a week or two first. Always acclimate the tarantula gently in a catch cup and be prepared for an adjustment period where it may hide extensively as it explores the new environmental cues. If you’re moving to a new home, follow a step-by-step relocation plan to minimize stress. A clear plan ensures the enclosure is ready and the tarantula can acclimate smoothly.
Stewarding a Thriving Micro-World
The single most critical husbandry factor remains unchanged, regardless of your enclosure choice: You must first meet your tarantula’s non-negotiable needs for dryness, moisture, ventilation, and security before any other aesthetic or ecological consideration. A beautiful, planted terrarium is a failure if it forces a desert species into damp soil.
Watch. The silent drama of a tunnel being excavated behind the glass, the meticulous repair of a web funnel, the patient ambush from a burrow entrance-these are the true rewards. Your role is not to curate a static display, but to provide the stable foundation where these innate behaviors can unfold. Success in this hobby is measured not in handling sessions, but in the quiet confidence of a spider acting exactly as it should.
Further Reading & Sources
- r/ballpython on Reddit: BioActive Enclosures vs Sterile Enclosers?
- Benefits of Bioactive Enclosures? | Reptile Forums
- Benefits of Bioactive Enclosures for Reptiles – Zen Habitats
Arlo is a lifelong arachnid enthusiast who believes tarantulas are the world’s most misunderstood roommates. With years of hands-on experience in tarantula care, habitat setup, and species behavior, Arlo combines expert knowledge with a dash of humor to make spider ownership less scary and a lot more fascinating. From choosing the right enclosure to understanding why your eight-legged buddy is doing that weird little pose again, Arlo is here to help you become the best tarantula parent you can be, without getting tangled in the web of misinformation.
Enclosures and Sizes