
Tarantula Photography for Beginners: How to Take Great Photos Without Stressing Your Pet
Published on: February 16, 2026 | Last Updated: February 16, 2026
Written By: Arlo
Tarantula photography is the art of patience, where a successful shot balances technical precision with an unwavering respect for the subject’s comfort and natural behavior. This guide draws from my years as a breeder, photographing everything from the glacial poses of my Chilean Rose Hair, Rosie, to the sudden, orange blur of my OBT, Flash. You will learn how to capture stunning detail-the velvet texture, the silent stance-without triggering defensive kicks or frantic escapes.
- Quick Stats:
- Primary Challenge: Minimizing animal stress while achieving sharp focus.
- Core Ethos: “Look, Don’t Touch” is non-negotiable for safety and welfare.
- Key Gear: A camera with manual controls, a macro lens, and soft, diffuse lighting.
- Skill Level: Achievable for any keeper with careful preparation.
This guide will equip you with the specific techniques to document your tarantula’s life, from a fragile post-molt sling to a magnificent adult, ensuring the process is as calm for the spider as it is thrilling for you.
Understanding Your Tarantula: The Foundation of Ethical Photography
Great tarantula photography is not about a perfect lens. It is about patience and respect. You must observe your spider like a quiet naturalist, learning its rhythms and moods. This observation is the core of “Look, Don’t Touch” and is the only way to get stunning photos without causing fear or stress. A stressed tarantula will hide, flee, or defend itself, ruining the shot and the animal’s peace. My fifteen-year-old G. rosea, Rosie, is a master of stillness, a perfect subject for long, thoughtful shots. In contrast, my OBT Flash treats any enclosure opening as a threat, instantly vanishing into his web tunnel. Trying to photograph him at the wrong moment is futile and stressful for us both.
Decoding Tarantula Body Language
Reading your tarantula’s signals is your most important skill. Learn these signs to know when to shoot and when to step back. By reading your tarantula’s body language—watch for stress cues and defensive postures—you can anticipate its needs and keep both of you safe. This awareness also helps you decide when to observe, approach, or give it space.
- Calm & Approachable: The spider rests with legs tucked gently beneath it. Movement is slow, deliberate, and quiet. Pedipalps (the small leg-like appendages near the mouth) tap the ground softly in exploration.
- Stressed & Defensive: A sudden freeze or a rapid retreat into a hide signals discomfort. A threat posture-front legs and pedipalps raised high, fangs exposed-is a clear “stop.” My T. stirmi, Goliath, prefers to kick a cloud of urticating hairs from his abdomen with his back legs; this itchy, irritating defense is his final warning before a bite.
- Dangerous Frantic Escape: Some species, like Old World tarantulas, will bolt with shocking speed. This is not curiosity; it is pure panic. Understanding these cues protects you from a bite and protects your pet from the trauma of a fall or a misguided defensive strike.
Timing Your Session with Spider Activity
Work with your tarantula’s schedule, not against it. Most species are nocturnal, becoming active after dusk. The golden hour for photography is often late evening, when they emerge to explore their territory. A tarantula that has recently eaten and has access to fresh water is typically more settled. I often plan brief photo sessions for Goliath a day or two after he accepts a large roach, when he is content and less likely to flick hairs. For diurnal species, or individuals with predictable habits, use their natural activity cycles. Never wake a sleeping tarantula for a photo. Tarantulas have regular rest periods, and their activity follows species-specific circadian patterns rather than human-like sleep. In cooler months some tarantulas may slow down or enter brumation, so understanding their patterns helps with planning photos and care.
Essential Gear for Beginner Tarantula Photography
You do not need a studio. Start with what you have and add tools slowly. The goal is control: control over focus, light, and stability. Investing in understanding your existing gear will yield better results than buying expensive equipment you cannot use.
Cameras: From Smartphones to DSLRs
- Smartphone: Ubiquitous and capable. Modern phones have excellent macro capabilities. The major limitation is fixed aperture and sensor size, which can struggle in lower, tarantula-friendly light.
- Point-and-Shoot Digital Camera: Often features a dedicated macro mode. Offers more manual control than a phone and typically has a larger sensor for better image quality.
- Entry-Level DSLR or Mirrorless Camera: The gold standard for control. Interchangeable lenses let you specialize. The ability to manually adjust shutter speed, aperture, and ISO is critical for sharp, well-exposed shots of a moving subject in dim light.
The Magic of a Macro Lens
Macro photography is close-up photography that reproduces a subject at life-size or larger on your camera’s sensor. It reveals the iridescent sheen of a carapace, the delicate structure of spinnerets, and the individual setae (hairs). A dedicated macro lens is ideal. For beginners, affordable alternatives exist: extension tubes that move your standard lens farther from the camera body for closer focus, or screw-on close-up filters that act like magnifying glasses for your lens. These let you experiment with macro before a major purchase.
Support and Lighting Tools
Camera shake is the enemy of detail. A simple tripod is your best friend, allowing for slower shutter speeds without blur. If a tripod is cumbersome, a mini tripod or even a stable stack of books works. For lighting, diffused natural light from a window is soft, beautiful, and free. Harsh, direct flash will startle your subject and create ugly, sharp shadows. For more control, a small LED panel with a diffuser provides constant, adjustable light. A piece of white paper or cardboard can act as a reflector to bounce light into shadowy areas, like the underside of your tarantula’s abdomen.
Simple Camera Settings for Clear Spider Photos
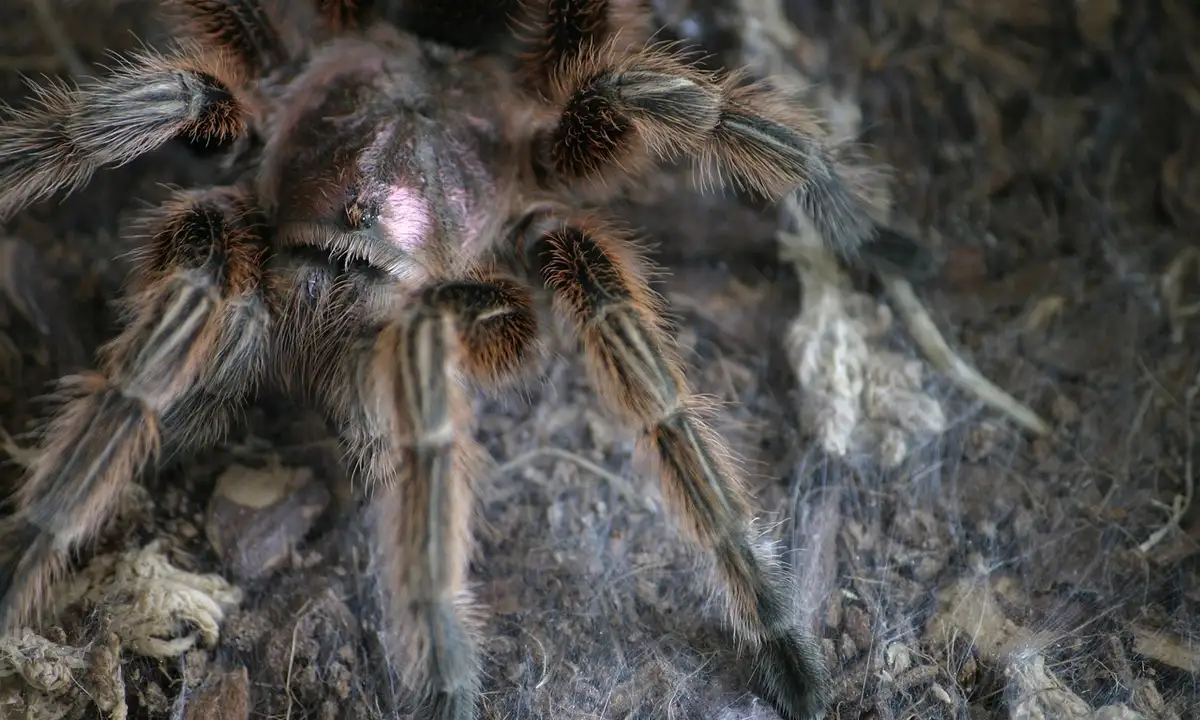
Think of your camera as a mechanical eye you can train. When I first tried to capture my OBT, Flash, his vibrant orange was a blur because I used auto-everything. To freeze a moment of tarantula life, you need to control three key settings: shutter speed, aperture, and ISO. Shutter speed is how long the camera’s “eyelid” stays open; fast speeds (like 1/250th of a second) freeze movement, crucial for fast species. Aperture is the “pupil” size; a wider opening (a lower f-number like f/2.8) lets in more light and blurs the background, making your spider stand out. ISO is the eye’s sensitivity; higher numbers brighten a dark room but add digital grain. Start in Shutter Priority mode (Tv or S on your dial) to control motion blur. Set your shutter to 1/200s, let the camera pick the aperture, and keep ISO at 800 or below for cleaner images.
Mastering Focus for Sharp Details
A photo of a tarantula is only as good as its focus. Autofocus can hunt erratically on fuzzy legs or webbing. For my burgundy Goliath bird eater, whose dark color challenges sensors, I use single-point autofocus. Manually select a single focus point and place it directly on your tarantula’s carapace or, ideally, its eyes for a connection that feels alive. Tarantula vision tends to be low in detail but keen on motion, so lining up focus with the eyes taps into how they perceive movement. Their eyesight relies on quick motion cues more than color, which is why patience and timing matter in portraits. For deliberate portraits of my slow-moving Chilean rose hair, Rosie, manual focus offers perfect precision. With defensive or fast tarantulas, patience is your lens. Take ten shots to get one keeper. Remember, “look, don’t touch” extends to your photography; avoid leaning in so close that you trigger a stress response.
Balancing Light: Shutter Speed, Aperture, and ISO
Enclosures are often dim, but a harsh flash will stress your pet and wash out colors. Use ambient light from a room lamp or a soft, external LED placed outside the enclosure. Here are starting settings for a well-lit setup, adjusted from my own logs:
| Setting | Starting Point | Adjust If Too Dark |
| Shutter Speed | 1/200s | Slow to 1/100s, but use a tripod |
| Aperture (f-stop) | f/5.6 | Open wider to f/4 or f/2.8 |
| ISO | 400 | Increase to 800 or 1600 gradually |
Prioritize keeping your ISO as low as possible to maintain image quality, even if that means a slightly darker photo you can brighten later. The silent strike of a feeding tarantula needs light, not disturbance.
Composition and Angles for Captivating Shots
Great tarantula photography is about storytelling, not just documentation. Apply the rule of thirds: imagine your frame divided into nine squares, and position your spider where the lines intersect. This creates balance, letting viewers explore the intricate hairs on a leg or the iridescent sheen of the carapace. Use leading lines like a branch or a web anchor to guide the eye toward your subject. In arboreal tarantulas, the arboreal tarantula web anchor points reveal how they use vertical space and branches to anchor their world. Highlighting these anchors helps viewers read the web as a living tool, not just scenery. An eye-level angle fosters a sense of connection, like watching my Goliath drink from her water bowl. A top-down view is perfect for documenting web structures or molt placement. Every angle whispers a different part of their secretive life.
Working with Backgrounds and Enclosures
Cluttered backgrounds steal attention. Before shooting, I often temporarily remove food boluses or water dishes from the frame. For naturalistic bioactive enclosures, use a shallow depth of field (wide aperture) to blur the background into a soft, green haze. When shooting through glass, angle your lens slightly to the side to eliminate glare and those frustrating reflections of your own hands. A plain, dark background-like a piece of matte board placed behind the enclosure-can make a tarantula’s colors explode. Your goal is a clean frame where nothing competes with your eight-legged subject.
Finding the Perfect Angle
Your angle shapes the narrative. Consider these approaches from my own portfolio:
- Front-On: Captures personality and pedipalp details. Great for docile species like my rose hair, but avoid with defensive ones as it can feel confrontational.
- Side Profile: Emphasizes size and body structure, perfect for showing the massive bulk of a bird eater.
- Overhead: Reveals intricate web tunnels and burrow entrances, telling a story of architecture.
Never position the camera from directly above pointing straight down, as this mimics a predator and can cause your tarantula to retreat or bolt. Work from the sides, always observing for signs of stress like reared legs or hurried movement. The perfect angle respects the animal’s space.
Conducting a Stress-Free Photo Session
The perfect shot is meaningless if your tarantula is left vibrating with stress. Your primary lens is your patience; the camera is a secondary tool for capturing a moment of natural behavior, not creating a stressful spectacle. This requires a deliberate, quiet approach that respects the animal’s pace.
- A step-by-step protocol for a calm shoot begins with setup completely outside the enclosure. Only if the enclosure glass is too reflective or dirty should you consider a temporary setup, using a secure, familiar container. The tarantula’s comfort always overrides the photographer’s desire for a specific angle.
Step-by-Step: The Low-Stress Shoot
- Mise en place is everything. Set your camera on a tripod, adjust your ISO, aperture, and shutter speed for the available light, and have your lens cleaning cloth ready. Do all this before you even look at your tarantula’s enclosure. Fumbling with settings while your subject is out creates unnecessary pressure.
- Tarantulas are often most calm in the evening. Move with slow, predictable motions and avoid loud noises or vibrations. I never attempt photography if Rosie is in one of her fasting moods or if Goliath has just kicked hairs-their tolerance is lower.
- Your first attempts should always be through the enclosure glass. If you must create a temporary setup, use a simple, smooth-walled plastic container they cannot climb. For my OBT, Flash, I use a large, clear deli cup placed inside a bigger tub, allowing me to shoot safely without risk of a lightning-fast escape.
- Aim for five minutes. Watch closely: a raised front leg, a sudden retreat, or abdominal flicking (in New World species) are clear “stop now” signals. I’ve ended sessions after thirty seconds because the tarantula’s posture told me everything.
- Have the enclosure fully prepared for return. Gently guide the tarantula back using a soft brush, then leave them completely alone to settle. No follow-up shots.
Natural Light vs. Controlled Studio Setup
Lighting determines the mood and clarity of your image. For beginners, a large window providing soft, indirect morning or afternoon light is your most powerful and stress-free tool. It beautifully illuminates colors without harsh shadows or added heat.
- Natural window light is free, flattering, and carries no risk of overheating your pet. Position the enclosure so the light falls across your tarantula, not from behind it.
- A controlled setup uses dim, cool LED panels with a diffuser. I use small video LEDs placed at angles to avoid the “headlight” effect. Never use a camera’s direct flash-it’s terrifying for the animal and creates awful, reflective hotspots. Incandescent or halogen lamps produce dangerous heat.
Basic Post-Processing for Tarantula Images
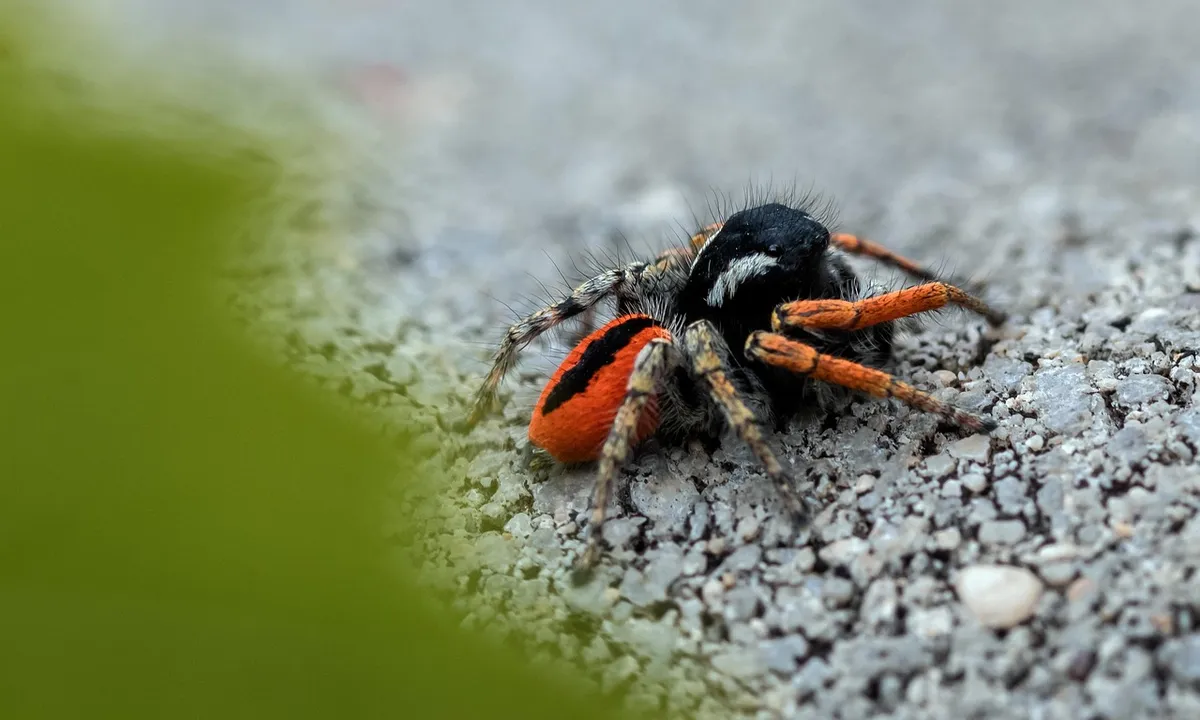
A raw photo is your starting point. Subtle editing in free software like GIMP or even your phone’s photo app can correct the color cast from enclosure glass and make your subject pop, but your goal is enhancement, not fabrication. Over-saturating a tarantula’s colors misrepresents the animal and does a disservice to fellow hobbyists.
- Focus on three simple adjustments: cropping for better composition, adjusting exposure and white balance to correct for artificial lights, and applying slight sharpening to bring out fine details like setae. The true iridescence of a carapace needs no filter.
Cropping and Color Correction
- Crop tightly to eliminate distracting elements like water dishes or enclosure seams, placing your tarantula according to the rule of thirds for a dynamic image.
- Adjust brightness and contrast to recover detail lost in shadows or highlights, especially common in darker enclosures like my Goliath’s.
- The most crucial step is white balance. Enclosure glass and LED lights often add a blue or yellow tint. Use the eyedropper tool on a neutral area, like the substrate, to remove this cast and reveal the tarantula’s true colors-Flash’s brilliant orange should look natural, not neon.
Safety and Ethics: Putting Your Tarantula First
Your tarantula’s well-being is the absolute priority in any photography session. Pushing for a perfect picture can lead to a stressed, defensive animal, and that’s a failure for both keeper and pet. I adhere to a strict ‘look, don’t touch’ policy, especially with species like my OBT, Flash, whose speed is a genuine safety concern.
Personal experience drives this point home. Once, while rehousing Flash, I moved too quickly near his enclosure. He bolted up the side of the bin in a blur of orange, a heart-stopping reminder that preparedness is non-negotiable. We recovered him safely with a calm approach and a large catch cup, but it underscored that the spider sets the pace.
Great photography stems from respect, not confrontation. Practice your camera settings on inanimate objects first, so when your tarantula is active, you’re ready to document naturally.
Managing Risks: Hairs, Venom, and Escape
Mitigating risk protects you and prevents panic for your tarantula. My Burgundy Goliath, T. stirmi, is a prolific hair-kicker, and even the docile G. rosea can flick hairs if provoked. Always assume your tarantula may use its defenses, and act accordingly before you even lift the lid. Understanding the real risks of urticating hairs helps you prepare and respond appropriately. While exposures are usually mild, knowing what to watch for can prevent unnecessary worry and injury.
Employ these protective measures for every photo session:
- Wear close-fitting safety glasses to shield your eyes from urticating hairs.
- Work on a cleared table, with the enclosure inside a larger, deep plastic bin to contain any falls or sudden escapes.
- Have a clear acrylic catch cup and a soft, long-handled paintbrush dedicated to gentle guidance and recapture.
Your recapture plan must be rehearsed and calm. Never use your hands to block or chase a tarantula; guide it slowly with the brush into the cup. Forcing a pose or handling for a photo injects fear and drastically increases the chance of a bite or a fatal fall. Holding your tarantula isn’t a sign of affection.
The Photographer’s Mindset: Patience and Respect
Exceptional tarantula photos are captured, not created. The goal is to be an unobtrusive observer, documenting natural behaviors like the silent sculpting of web tunnels or the meticulous cleaning of pedipalps. I’ve spent hours waiting for my Chilean Rose Hair, Rosie, to even move from her favorite spot, but that patience is part of the craft. If you’re a complete beginner, consider this a gentle introduction to tarantulas. We’ll cover the basics you need to start observing and appreciating them.
Join online arachnid photography communities to share your work and gain insight. Seeing how others use light and composition without disturbing their subjects will improve your technique and ethics. The best tarantula photograph is one taken with the spider’s comfort in mind.
FAQs
How can I minimize stress for my tarantula during photography?
Always watch for stress signals like raised front legs or rapid retreats, and end the session immediately if seen. Keep sessions brief, under five minutes, and schedule them during your tarantula’s active times, such as late evening. Use soft, diffused lighting and move slowly to avoid startling your pet, ensuring a calm and ethical shoot. For a safe, hands-on approach, follow a step-by-step tarantula handling guide. It will help you learn how to safely hold and support your pet throughout handling sessions.
What basic camera settings should I use as a beginner?
Begin with Shutter Priority mode set to 1/200s to freeze any subtle movements. Choose an aperture around f/5.6 to isolate your tarantula from the background, and keep ISO at 400 or lower to maintain image clarity. Adjust settings gradually if the scene is too dark, using a tripod to allow for slower shutter speeds without blur.
Is it safe to handle my tarantula for better photos?
Handling is not advised as it can cause significant stress and risk escapes or defensive reactions. Instead, shoot through the enclosure glass or use a secure, temporary container for controlled angles. Prioritize safety by following a strict ‘look, don’t touch’ approach to prevent accidents and keep your tarantula comfortable. Handling tarantulas is not recommended for beginners.
How do I clean up my photos after taking them?
Crop images to remove distractions and improve composition using the rule of thirds. Adjust exposure and white balance to correct for dim lighting or color casts from enclosure glass. Apply gentle sharpening to highlight fine details like setae, but avoid over-editing to preserve the tarantula’s natural appearance.
The Final Frame: A Keeper’s Perspective
After years of photographing everything from my docile G. rosea to my lightning-fast OBT, one principle stands above all. The single most important parameter for successful tarantula photography is not your camera’s aperture, but the absolute minimization of stress for your eight-legged subject. This means no handling, no tapping on the glass, and sessions shorter than ten minutes to prevent anxiety. I learned this the hard way when a prolonged shoot caused my T. stirmi, Goliath, to kick a cloud of irritating hairs-a clear sign I had overstayed my welcome. Common signs your tarantula is stressed or feeling defensive include a threat posture with raised front legs, rapid leg movements, and flicking at hairs. If you see these cues, back off and end the session to avoid escalation.
True photographic magic happens when you shift from chasing a shot to witnessing a life. The greatest images often come from silent observation, not intrusion. Find joy in the methodical webbing of an OBT decorating its home, or the patient ambush of a rose hair. Your camera is a tool for appreciating these quiet dramas. With patience, you’ll be ready for that fleeting moment when the enclosure’s ambient light catches the iridescent sheen of a fresh carapace, proving the best photos are earned through respect.
Further Reading & Sources
- How To Take The Best Tarantula Pictures Even If You’re Not A Photographer (IMAGES) – Tarantula Heaven
- Tarantula Pictures | Download Free Images on Unsplash
- 3,742 Tarantula Stock Photos, High-Res Pictures, and Images – Getty Images | Tarantula hawk, Holding tarantula, Blue tarantula
Arlo is a lifelong arachnid enthusiast who believes tarantulas are the world’s most misunderstood roommates. With years of hands-on experience in tarantula care, habitat setup, and species behavior, Arlo combines expert knowledge with a dash of humor to make spider ownership less scary and a lot more fascinating. From choosing the right enclosure to understanding why your eight-legged buddy is doing that weird little pose again, Arlo is here to help you become the best tarantula parent you can be, without getting tangled in the web of misinformation.
Handling and Interaction