
Separating Tarantula Spiderlings Safely: A Guide for Species from G. rosea to P. murinus
Tarantula spiderlings exist in a silent, fragile world where the simple act of separation from their siblings is the first major test of a keeper’s skill and patience. Based on years of breeding everything from pet-rock Grammostola to lightning-fast Old Worlds, this article cuts through the uncertainty with precise, step-by-step protocols. The safest window for separation opens after the second molt, when the spiderlings’ exoskeletons have hardened enough to resist desiccation and minor handling stress.
Quick Stats for Common Spiderlings
- Origin: Species-specific (e.g., arid Chile for G. rosea, African scrublands for P. murinus)
- Type: New World (e.g., G. rosea, with urticating hairs) or Old World (e.g., P. murinus, reliant on speed and potent venom)
- Growth Rate: Varies dramatically; slow for G. rosea (years to maturity), fast for P. murinus (reaching noticeable size in months)
Drawing from my own escapes and rehousings, this guide delivers the exact stress-minimizing techniques I use to move spiderlings from communal cups to individual enclosures, ensuring their health from delicate sling to robust adult.
Understanding the Critical Separation Timeline
Recognizing the Signs It’s Time
You cannot rely on a calendar alone. Spiderlings from a fast-growing species like my P. murinus “Flash” may need separation sooner than those from a slow grower like a G. rosea. Watch for behavioral and physical cues. The first sign is often a break in the group huddle. When spiderlings stop congregating and begin staking out individual corners, they are communicating their need for space. Increased activity and legginess are clear indicators. I’ve seen clutches where the more adventurous siblings start exploring the lid, a silent plea for new territory.
Size disparity is a major red flag. In any sac, some spiderlings will molt and grow faster. A larger spiderling will see a smaller one as food, not family. A size difference of just 1.5 times the legspan can trigger cannibalism, ending your breeding project abruptly. Look for defensive postures-a raised front leg or a sudden skitter away from tankmates. If you see any of these signs, begin your preparations immediately.
- Dispersal: Spiderlings are no longer clustered together.
- Aggression: Threat displays or quick, jerky movements toward others.
- Size Variance: Noticeable differences in body and leg size after a molt.
- Food Competition: Multiple spiderlings lunging for the same prey item.
The Real Risks of Waiting Too Long
Procrastination here has direct consequences. The primary risk is cannibalism. It is not a rare event; it is a natural population control mechanism. Losing even one spiderling to a sibling is a preventable loss that impacts your breeding numbers and the animal’s welfare. Beyond that, overcrowding creates a stressful environment. Stress suppresses feeding responses and can weaken immune systems, making the entire clutch more susceptible to mold or mites.
I learned this lesson early. With a batch of A. avicularia slings, I delayed separation by one week post-dispersal. The result was two missing spiderlings and several others with damaged legs from brief clashes. High-stress conditions from crowding can also lead to premature escapes during maintenance, as jostled spiderlings seek any exit. You also risk resource monopolization, where dominant slings claim all food and water, stunting the growth of the others and creating an uneven, unhealthy cohort.
Gathering Your Safe Separation Toolkit
Essential Enclosures and Setup Items
Before you touch a single spiderling, have all new homes ready. For most terrestrial spiderlings, I use clear plastic deli cups or small acrylic enclosures. Proper ventilation is non-negotiable; use a soldering iron to melt small air holes in plastic lids, never drilling, as plastic shards are dangerous. Ensure the lid remains secure to prevent escapes while allowing air exchange. In a properly ventilated tarantula enclosure, steady airflow helps prevent humidity buildup and mold, keeping spiderlings healthy. Each enclosure must be set up identically to minimize shock: a shallow layer of slightly damp substrate (coconut fiber is my standard), a bottle cap water dish, and a faux leaf or curled bark for a hide.
Bioactive principles can start here. A layer of springtails in each cup will manage any mold from humidity and leftover prey parts. Pre-setting 20 or 30 identical enclosures in a quiet, warm area streamlines the entire process and keeps your focus on the delicate transfer. Label each cup with a number if you are tracking lineage. The goal is to replicate the security of the communal enclosure, just on an individual scale.
- Enclosures: Small deli cups or acrylic boxes (16-32 oz size).
- Substrate: Pre-moistened coconut fiber or peat mix, about 1-2 inches deep.
- Hides: Half a toilet paper tube, small cork bark flat, or plastic foliage.
- Water: Mini bottle caps or plastic jewelry baggies filled with water.
Safe Handling and Transfer Tools
Your hands are not tools for this job. We adhere to “Look, Don’t Touch” for the safety of both keeper and spiderling. The sudden strike of a scared sling is fast, and while their venom is typically negligible, the fall risk from a fumbled transfer is high. I rely on a suite of passive tools that guide the spiderling without confinement or pressure. My most-used item is a soft, clean makeup brush. Its gentle bristles can coax a sling into a catch cup without any risk of injury.
For more defensive or fast species, like an OBT offspring, I use a “tube and cup” method. Place a clear plastic tube against the spiderling and use the brush to guide it in, then cap both ends with your hands before moving it to the new enclosure. Have a large, shallow tub or a fitted tabletop enclosure as a “transfer station” to work within; this contains any unexpected sprints. Remember, the silence of the enclosure is broken only by your calm movements-hurrying increases mistakes.
- Soft-Bristled Brushes: For gentle herding and direction.
- Clear Plastic Tubes or Straws: For secure transport of defensive slings.
- Small Catch Cups: Film canisters or plastic condiment cups with lids.
- Long Tweezers (Smooth-Tipped): For moving decor, not the tarantula.
- Containment Field: A large plastic bin to work inside for security.
The Step-by-Step Safe Separation Process
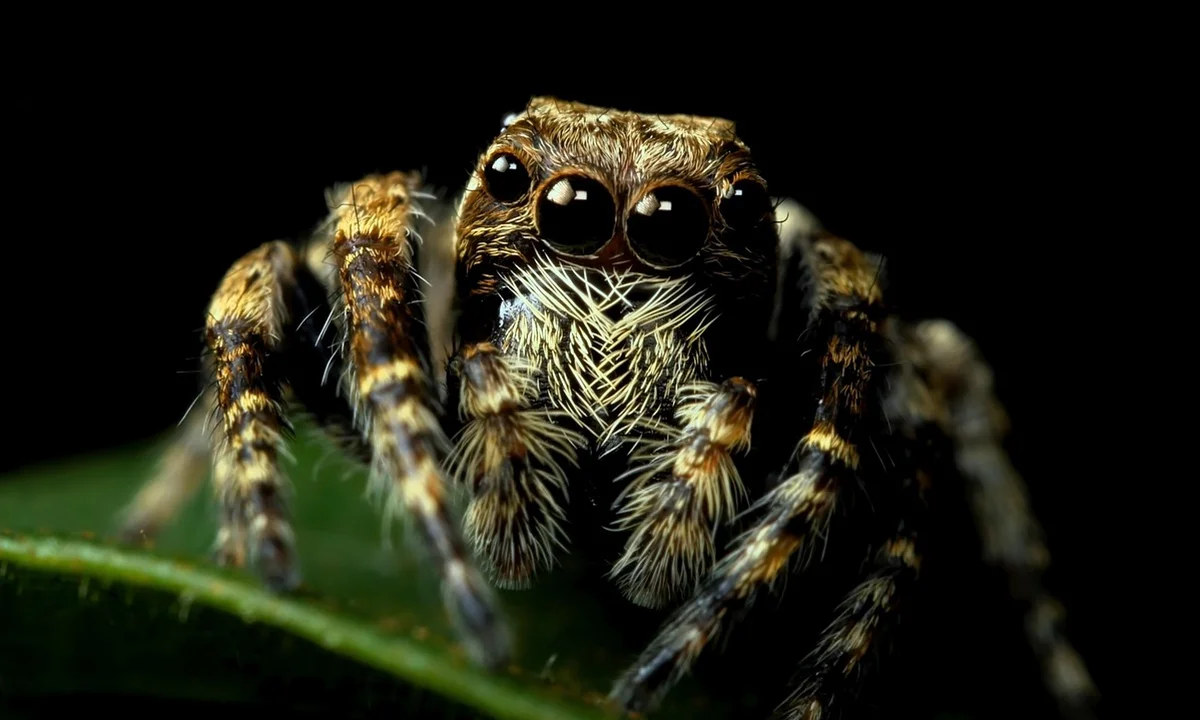
Step 1: Preparing the Mother’s Enclosure and Workspace
Success begins long before you touch a single vial. Your workspace must be a fortress against escapes. Clear a large, flat surface like a kitchen table, lay down a soft towel to cushion any falls, and surround it with a tall containment barrier. I use a shallow plastic storage bin as my main work arena.
Gather every single tool you will need before you begin: soft-tipped paintbrushes, long plastic tweezers, catch cups, and all the pre-prepared spiderling enclosures. For the mother’s tank, have a large catch cup ready. This is not a task for improvisation.
Gently mist one corner of the mother’s enclosure. This encourages the spiderlings to cluster in a more predictable area, often away from the humidity. Work during the day when tarantulas are typically more docile. The goal is a calm, methodical environment for you, which translates to less stress for them. Just be careful not to overdo it, as too much moisture can lead to problems.
Step 2: The Gentle Transfer Technique
Open the mother’s enclosure slowly. Your first job is to safely secure the mother. Using a large catch cup, gently guide her into containment and secure her in a temporary, safe holding tub. This protects her and prevents a chaotic scramble.
Now, address the spiderlings. Use a soft, dry paintbrush as your primary tool. Gently coax one spiderling at a time into a small catch cup or vial. Do not try to grab or pinch them. Their abdomens are incredibly fragile. If they bolt-and they will-use the brush to herd them gently. The silence of the enclosure is broken only by the soft scratches of your tools.
I learned patience from my OBT, Flash; a fast tarantula teaches you that every movement must be deliberate and every escape route preemptively blocked. Work on one small group at a time, transferring each individual directly to its new home before retrieving the next.
Step 3: Securing the New Enclosures
Each spiderling should go immediately into its own pre-set habitat. Have the lid of the new enclosure ready to slide closed the instant the spiderling is inside. I use deli cups with small air holes punched in the sides, never the lid, to prevent escapes during feeding.
Check and double-check each closure. A spiderling can fit through a gap you can barely see. Once all are secure, carefully return the mother to her original, now much quieter, enclosure. Offer her a well-earned meal. She has done her job.
Caring for Your Newly Separated Spiderlings
Creating the Ideal Spiderling Environment
Spiderlings dehydrate with alarming speed. Their setup prioritizes moisture and security. I use a simple, effective formula: a shallow layer of moisture-retentive substrate (appropriate substrate), a bottle cap water dish, and a piece of cork bark or curled leaf for hiding.
Humidity is managed through substrate, not misting. Pour water directly into one corner of the substrate until it is damp but not flooded. This creates a humidity gradient. For species like my Goliath that crave moisture, I keep two-thirds of the sub damp. For arid species like my Rosie’s offspring, a single moist corner suffices.
Cross-ventilation is non-negotiable; stagnant, wet air fosters mold and kills spiderlings faster than hunger. Holes on opposing sides allow for airflow. Keep them in a warm, quiet area away from direct sunlight and vibrations.
First Meals and Feeding Schedule
Do not feed immediately after separation. Wait 3-5 days for them to settle and harden fully. Their first meal should be prey smaller than their abdomen. Flightless fruit flies, pinhead crickets, or pre-killed small cricket legs are perfect.
- Offer food twice a week.
- Remove any uneaten prey within 24 hours.
- A plump abdomen is your guide; if it’s round, you can skip a feeding.
Spiderlings often refuse food before a molt. If one goes off food for a week or two, but its abdomen remains plump, simply provide water and wait. Forcing food causes immense stress, especially when it’s a bit delicate to know when not to feed your tarantula.
Health Monitoring and Early Problem Detection
Inspect your spiderlings daily. Look for clear signs of thriving and warning signals of distress.
- Good Health: Plump abdomen, active movement at night, webbing, and prompt feeding responses.
- Warning Signs: A shrunken, wrinkled abdomen (dehydration), a spiderling constantly clinging to the lid (often a sign of overly wet substrate), or the presence of mites.
For dehydration, gently place the spiderling’s front legs over the edge of its water dish. Do not submerge it. Often, they will drink. To tell if your tarantula is dehydrated, look for a sunken or shriveled abdomen and reduced activity. Quick action can prevent progression. The most common early problems stem from incorrect humidity. A death curl in a spiderling is often a final, desperate sign of dehydration, so vigilant observation is your most powerful tool. If you notice a problem, isolate and adjust the conditions immediately—simplicity and stability are the pillars of their survival.
Avoiding Common Separation Mistakes
Handling Errors and Stress Prevention
The most frequent error I see is using hands instead of tools. Your skin oils can harm a spiderling’s delicate cuticle, and a fall from even a few inches can be fatal. Always use soft-tipped brushes, deli cups, or gentle coaxing to guide spiderlings during a move.
I learned this the hard way with Flash, my OBT. During a rehousing, one sling bolted with shocking speed. Using a cup to gently corral it was the only safe method. For safe transport and rehousing, prep a secure transport container in advance and handle only as needed. Move slowly, keep the lid secured, and rehouse in a calm, stable setup to minimize stress. Tarantulas are not handling pets; a “look, don’t touch” policy prevents stress and injury for both of you.
Keep separation sessions brief, under five minutes if possible. Work over a large, padded bin to contain falls. Minimizing time exposed reduces dehydration and panic, which you’ll see as frantic running or a defensive threat posture.
- Never blow on a spiderling to make it move; your breath is too forceful and desiccating.
- Use a damp brush to gently guide legs, never grab the body.
- Pre-chill the new enclosure slightly if dealing with a fast species; cooler temps can slow them down temporarily.
Enclosure and Setup Pitfalls
An oversized enclosure is a top mistake. A spiderling in a vast space will struggle to find food and feel secure. For most slings, a 16-ounce deli cup or a small acrylic box is perfect for their first solo home.
Substrate choice is critical. Avoid pure coco fiber for moisture-dependent species like my T. stirmi; it holds water but compacts easily. I mix coco fiber with vermiculite and sphagnum moss for Goliath’s slings, maintaining a humidity pocket above 80%. For arid species like G. rosea, use a dryer, sandier mix.
Ventilation is a balancing act. Too little leads to stagnant air and mold; too much dries the enclosure out overnight. Drill small air holes on multiple sides, not just the lid, to promote cross-ventilation without creating a wind tunnel.
- Size: The enclosure should be no more than 3-4 times the spiderling’s leg span in length.
- Humidity: Measure with a digital hygrometer. For moist species, keep it 75-85%; for dry, 60-70%.
- Temperature: Maintain a gradient of 70-80°F (21-27°C). Never use heat mats under the tank.
- Furnishings: Include a starter burrow (a curled cork bark) and a shallow water dish, even for tiny slings.
Special Considerations: Communal Species and Unique Cases
When Spiderlings Can Stay Together
True communal tarantula keeping is a rare exception, not the rule. Most species, including all three of my tarantulas, are solitary and will cannibalize siblings. Only a handful of genera, like some Poecilotheria (ornamental tarantulas), have been observed tolerating group living under strict, spacious conditions. These rare social setups raise questions about tarantulas’ social communal housing risks. In practice, such housing often incurs aggression, stress, and possible cannibalism if space and resources are not generous.
If you attempt it, you must provide an enclosure vastly larger than normal, with multiple deep hides and feeding stations to reduce competition. Constant monitoring is non-negotiable; you must be ready to separate at the first sign of aggression or a missing leg.
Even in these cases, “communal” often means extended cohabitation of spiderlings from the same sac, not indefinite adult grouping. As they mature, territorial instincts usually intensify, requiring eventual separation. I’ve never kept a communal setup myself, as the risk to the animals outweighs the novelty for me.
- Species Examples: Poecilotheria metallica or P. regalis spiderlings may cohabit for longer periods.
- Critical Requirements: Bioactive setup with live plants, abundant prey, and visual barriers.
- The Reality: Cannibalism is always a possibility. Never leave a communal setup unattended for long periods.
FAQs
What are the most reliable signs that separation is urgent?
The most urgent signs are observable behavioral changes and physical disparities. When spiderlings stop huddling together and begin actively dispersing to individual corners, it’s a clear signal. A noticeable size difference, where one spiderling is 1.5 times larger than its siblings, significantly increases the risk of cannibalism and requires immediate action. You can learn more about identifying signs of health in tarantula spiderlings versus unhealthy ones to better assess when intervention is needed.
What is the absolute minimum setup for a new spiderling enclosure?
The essentials are a secure, ventilated container like a deli cup, a shallow layer of slightly damp substrate, and a miniature water source. A simple hide, such as half a toilet paper tube or a small piece of cork bark, is crucial for providing security. This basic setup minimizes stress by meeting all of the spiderling’s core needs in a confined, manageable space.
What is the safest method to move a spiderling without touching it?
The safest method is to use passive guiding tools, never your hands. Gently coax the spiderling into a small catch cup or a clear plastic tube using a soft-bristled brush. For particularly fast or defensive species, using the tube as a temporary tunnel to guide them directly into their new enclosure is highly effective and prevents injury.
What are the top three mistakes to avoid during the entire process?
Avoid using your hands to handle the delicate spiderlings, as this risks injury from falls and transfers skin oils. Do not place spiderlings into oversized enclosures, which can cause stress and make it hard for them to find food. Finally, never skip the preparation step of having all new enclosures set up and ready before you begin the separation process.
How soon after separation should I offer food, and what if they refuse?
You should wait 3 to 5 days after separation before offering the first meal, allowing the spiderling time to settle and harden. Offer prey smaller than its abdomen, like pinhead crickets or fruit flies. If the spiderling refuses food but has a plump abdomen, simply remove the prey and try again in a few days, as they may be preparing for a molt. For tips on the appropriate prey and feeding schedules, check out our feeding guide for beginner tarantulas.
Long-Term Success
The single most important factor for a newly independent spiderling is consistent access to humidity. Provide a small, shallow water dish from day one and gently overflow a corner of the substrate weekly to create a moisture gradient they can seek out. To create a proper substrate moisture gradient for your tarantula, keep the rest of the enclosure drier. This gradient lets the spiderling move to the microhabitat that fits its humidity needs.
Now comes the reward. Watch as your tiny charge explores its own domain. You might see the first delicate sheets of silk appear, or witness the precise ambush of a pinhead cricket. Growth in this hobby is measured in molts and millimeters, a slow, beautiful process that teaches profound patience. Your careful work during separation sets the stage for years of quiet fascination.
Further Reading & Sources
- Tarantula Sling Husbandry – A Comprehensive Guide | Tom’s Big Spiders
- Raising Young Tarantulas | TARANTULAS.com
- Tarantula Tetris: Efficient Spiderling Rehousing from Incubator – YouTube
Arlo is a lifelong arachnid enthusiast who believes tarantulas are the world’s most misunderstood roommates. With years of hands-on experience in tarantula care, habitat setup, and species behavior, Arlo combines expert knowledge with a dash of humor to make spider ownership less scary and a lot more fascinating. From choosing the right enclosure to understanding why your eight-legged buddy is doing that weird little pose again, Arlo is here to help you become the best tarantula parent you can be, without getting tangled in the web of misinformation.
Breeding Tarantulas